

So, you want to install Windows 10 on your PC, but the only other computer you have is a Chromebook. I’ve figured out how you can easily create a USB installer, and today I’ll show you how to make one. You’ll need the following:
- Access to the PC you want to install Windows on
- A USB drive with at least 8 GB of free space
- Any Chromebook with access to the Chrome Web Store
This guide involves some jumping back and forth between the destination PC and the Chromebook, but the process is relatively straightforward.
Installing the Chromebook Recovery Utility
-
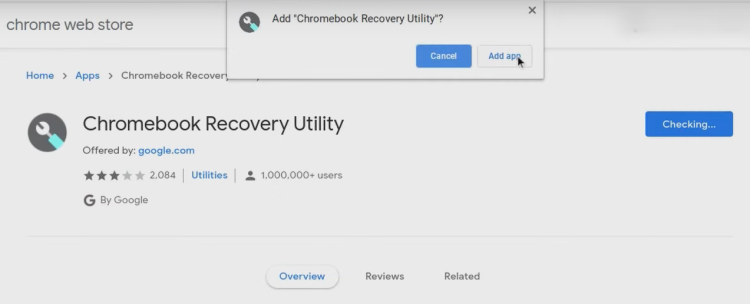
- Open the Chrome browser and search for “Chromebook Recovery Utility”.

- Click on the first result, then click “Add to Chrome,” and then “Add app” once it’s installed.
- Close the tab and open a new one. Type ventoy.net and navigate to the official Ventoy website.
- Click on “Downloads” and from the list of files, choose the “ventoy-xx.xx-livecd.iso” file. You’ll be redirected to a GitHub repository with the latest release.
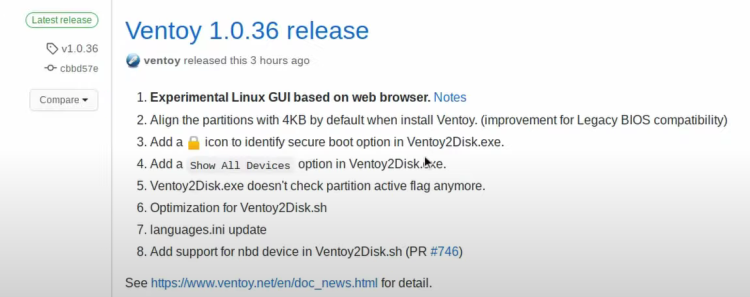
- Scroll down to the “Assets” section and click on the “ventoy-xx.xx-livecd.iso”.

- Open the Chrome browser and search for “Chromebook Recovery Utility”.
Downloading the Windows 10 ISO File
-
-
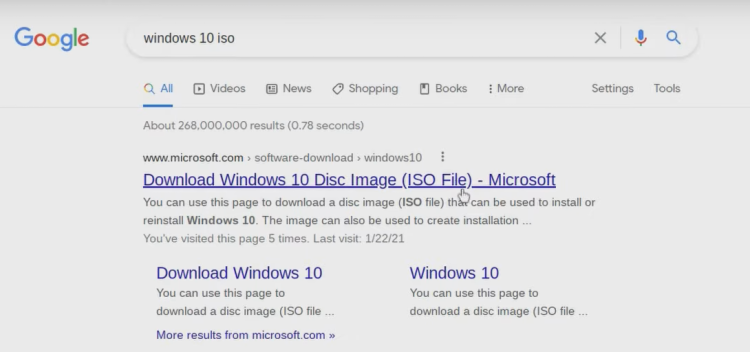
- Open a new tab and search for “Windows 10 ISO.”
- Click on the link that reads: “Download Windows 10 Disk Image (ISO File).”
- Under the “Select edition” dropdown, choose “Windows 10.” In my case, it’s the October 2020 update, though this will change as future updates are released.
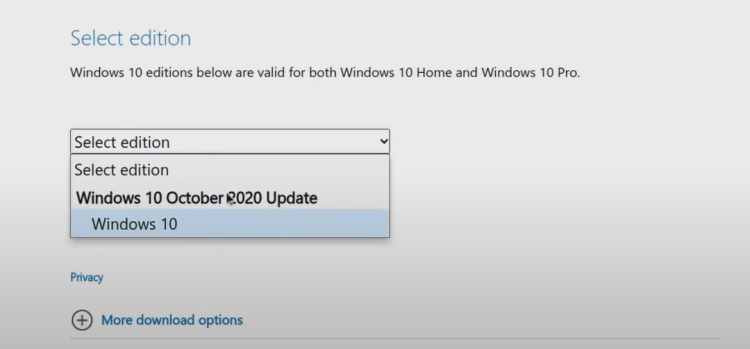
- Click “Confirm.”
- Choose your product language and click “Confirm” once more.
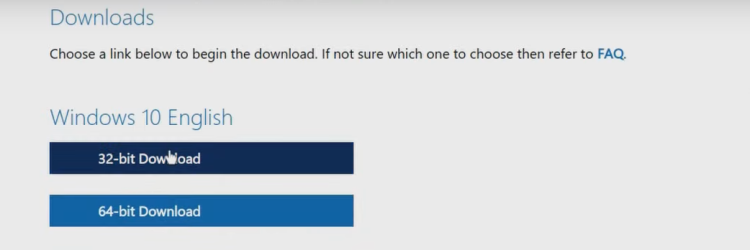
- Unless you have a CPU that’s 32-bit only, you’ll want to download the 64-bit ISO. Click on “64-bit Download” and the ISO will begin downloading. You can leave that downloading.
-
Сhanging the File Type of the Ventoy ISO
While we move on to the next step, we need to change the file type of the Ventoy ISO before we can use it with the Recovery Utility.
Follow these steps:
- Convert the Ventoy ISO to a ZIP File:
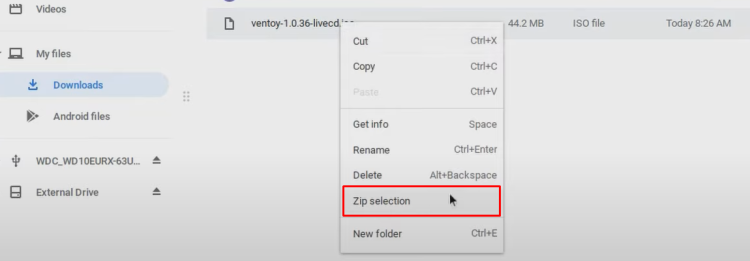
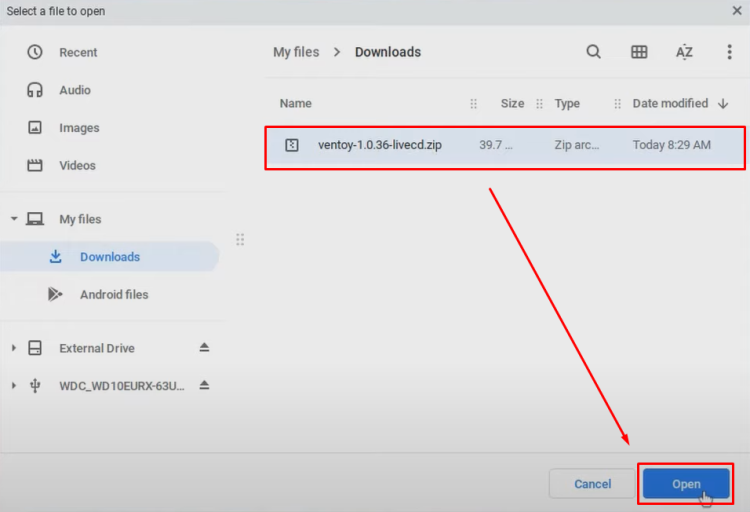
- Open the Files app and locate the Ventoy ISO you downloaded earlier.
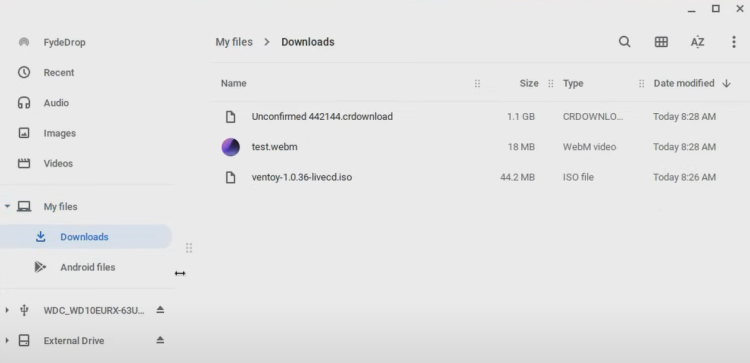
- Right-click on it and choose “Zip Selection.” This will zip the ISO so it can be used by the utility.
- Open the Files app and locate the Ventoy ISO you downloaded earlier.
- Open the Chromebook Recovery Utility:
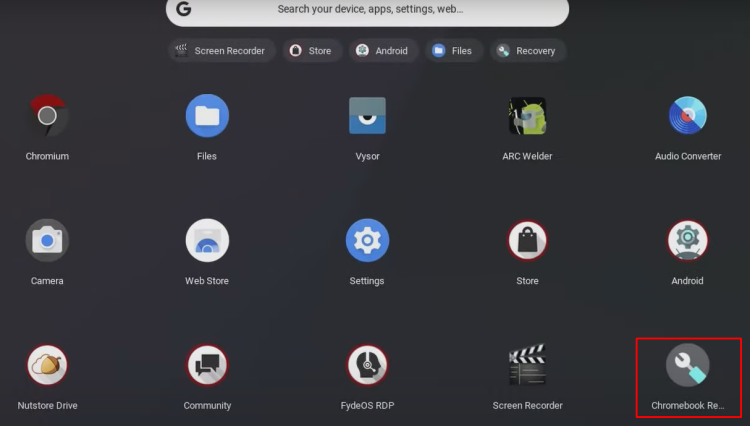
- From either the Chromebook launcher or the apps page in Chrome, open the Chromebook Recovery Utility.
- Keep in mind that everything on your USB drive will be erased, so make sure there’s nothing important stored on it!
- Click on the Gear icon next to the “X” and choose “Use local image.”
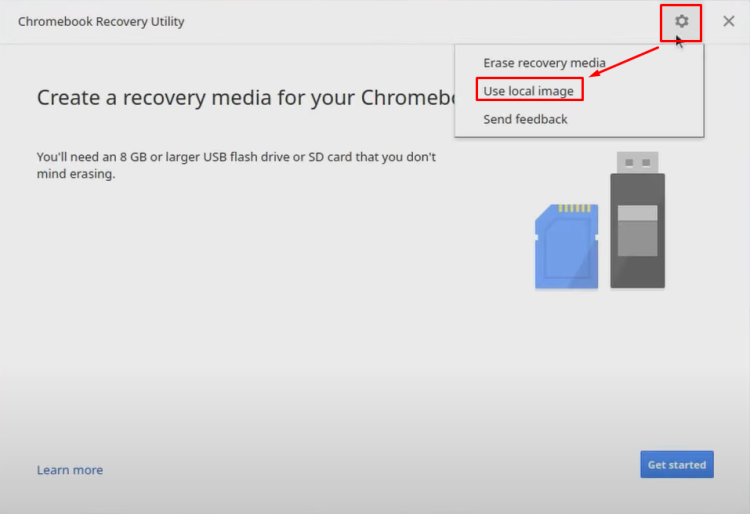
- Another window will appear. Locate the Ventoy file you just zipped and open it.
- From either the Chromebook launcher or the apps page in Chrome, open the Chromebook Recovery Utility.
Creating a USB Drive for Ventoy Installation
You’ll then be asked to insert a USB drive. Insert your drive now if you haven’t already. Remember that everything on your drive will be erased, so make sure there’s nothing important on it! It’s always a good idea to make backups.
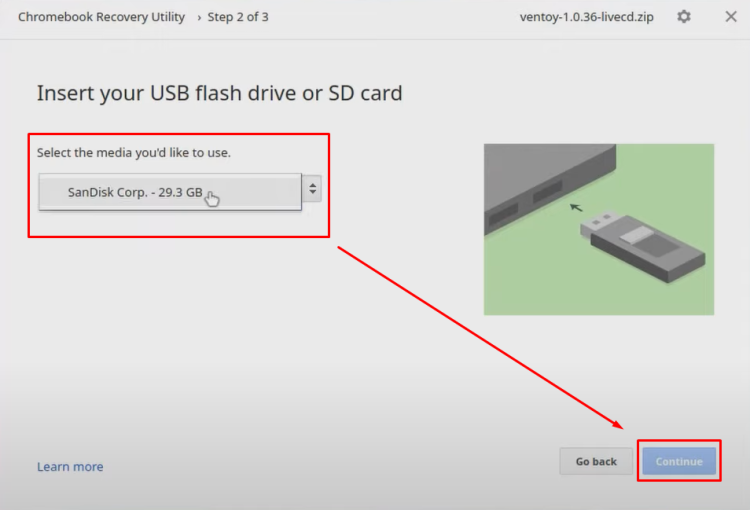
Click “Continue” and then click “Create Now.” Let it do its thing.
For now, you can leave the Windows 10 ISO alone.
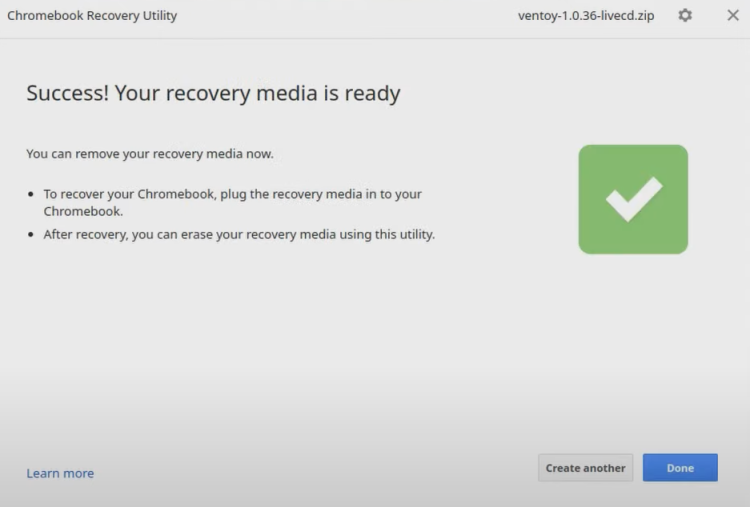
Installing Ventoy on a USB Drive
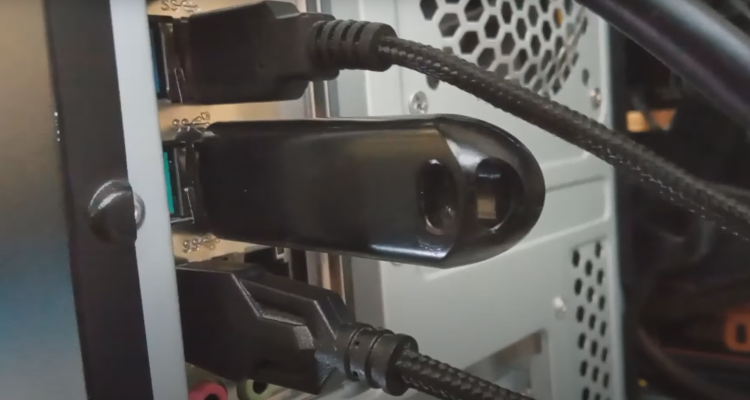
You’ll need your PC for the next step. Eject your flash drive from your Chromebook and take it over to your PC. Insert it into a USB port. If possible, use one of the ports on the back of your system. If you have a laptop, this won’t matter.
Before you turn on your computer, make sure you know how to access the boot menu. For most modern motherboards, you’ll need to hit a specific function key (F8, F11, F12, etc.) to access the boot menu. Here are some common keys:
- ASUS: F8
- Gigabyte: F12
- Intel: F10
If you’re unsure, a quick Google search for your motherboard model can help.
With your USB drive inserted, turn on your PC and repeatedly press the appropriate function key until you’re in the boot menu. In the boot menu, look for the option to boot from a USB drive.
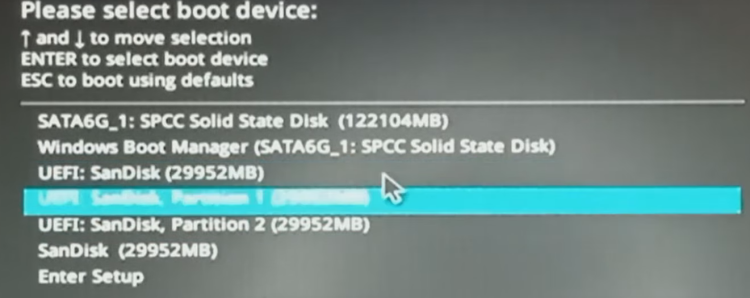
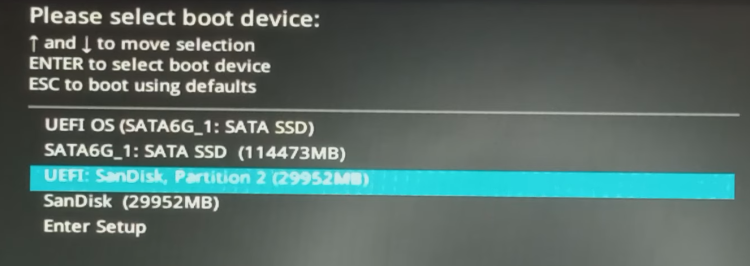
You should see your flash drive listed in the boot menu, though some flash drives or other USB devices may have a generic name. Before you choose your drive, note that a menu will appear as soon as you hit Enter, but you don’t need to worry about it if you miss it.
Choose the UEFI Option
-
- Select the option that has “UEFI” next to it and hit Enter. If that doesn’t work, choose the other option.
- You’ll then be greeted by the Ventoy Live CD installer.
Creating a bootable Windows USB on a Chromebook can be tedious. It used to be possible to use the Chromebook Recovery Utility to write a Windows ISO to a USB drive, but due to changes Microsoft made, the USB would no longer boot. It’s technically still possible, but even then it won’t work reliably. This is where Ventoy comes into play.
Ventoy is a multi-boot utility that allows you to drag and drop bootable ISO files, like Ubuntu or Windows, onto the drive, giving you a list of different boot options. Once you’ve copied the ISOs to the USB, no extracting or messing with the files is needed. This will make the Windows 10 ISO (which should have finished downloading by now) bootable.
Back at your PC, let’s get Ventoy installed:
- Installing Ventoy:
-
- By default, you should see a list of installed drives in your system. Do not select any internal drive; instead, choose your USB drive.
- For example, I will choose my SanDisk flash drive by typing in the corresponding number, but this will vary depending on the number of drives in your system.
- Hit Enter.
- Now, type the number corresponding to your USB drive (e.g., “1”) to install Ventoy onto your USB drive.
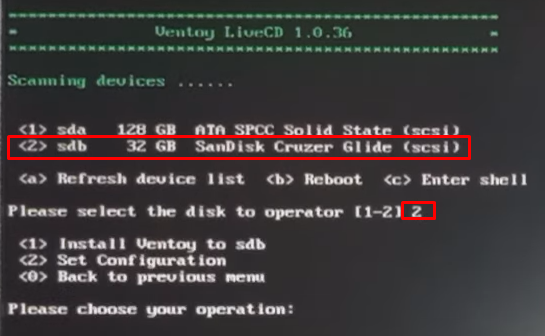
- Hit Enter.
- You will be informed that all data on your drive will be erased. The drive should already be erased, so hopefully, you made backups previously. If you choose to use another flash drive, it will be erased as well.

-
- Finalize Ventoy Installation:
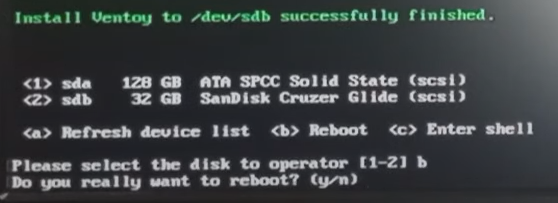
- Hit “Y” for Yes when prompted to confirm you want to erase the drive and install Ventoy.
- You will be asked again if you’re sure. Hit “Y” and Enter again. The installation process will commence.
- After a while, you’ll get a message saying that the installation of Ventoy to your drive has successfully finished. Type the letter “B” and hit Enter, then type the letter “Y” and hit Enter again.
- While your PC is rebooting, press the power button to turn it off.
- Copy Windows ISO to USB on your Chromebook:
- Take the USB drive and plug it back into your Chromebook.
- Open the Files application and navigate to the Downloads folder where the Windows ISO file is located.
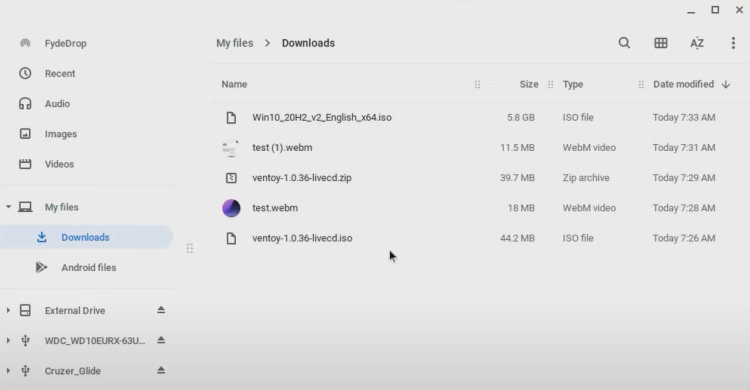
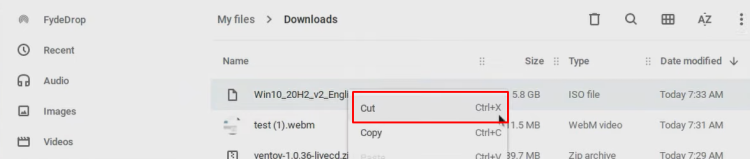
- You don’t need to do anything to this file, as Ventoy recognizes ISO files. Cut the file by selecting it and hitting Ctrl + X, or by right-clicking and selecting “Cut.”
- Find your flash drive in the Files application. Your drive will probably have two partitions; make sure you paste the file to the larger partition that has Ventoy installed (this will likely be mostly empty space).
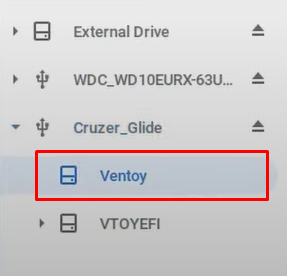
- Once you find the correct partition, paste the Windows ISO file and let it transfer. Once the transfer is complete, eject your USB drive from the Chromebook.
- Plug the USB drive back into your PC.
Running the Ventoy USB Drive with Windows 10
As I mentioned earlier, make sure you know which key you need to use to enter the boot menu. The USB will technically boot by itself if there’s no other bootable device, but it’s useful to manually access the boot menu if you’re experiencing issues. You’ll also want to make sure that UEFI boot is enabled if your system supports it.
- Enter the Boot Menu:
- Insert the USB drive into one of your PC’s USB ports. I recommend using the rear ports if you have a desktop system. For a laptop, it doesn’t matter.
- Power on your system and repeatedly press the boot menu function key until you reach the list of boot devices. This key is often F8, F11, or F12, depending on your motherboard or PC manufacturer.
- Select the boot option that has “UEFI” next to it. If you don’t see a UEFI option, it might be disabled or your system might be older. Ensure UEFI is enabled if your PC or motherboard supports it. Information on how to enable UEFI can be found online specific to your model.
- Boot from USB:
- Select your USB drive and hit Enter. The Ventoy boot menu will appear, and you should see the Windows ISO listed.
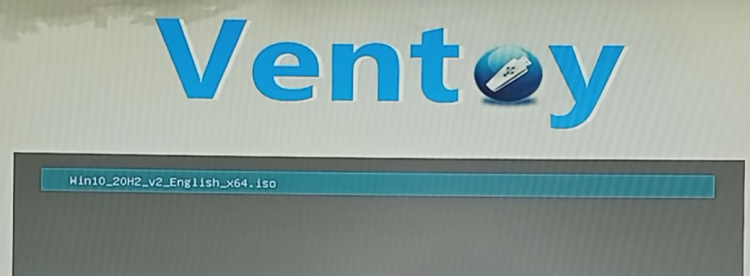
- Hit Enter on the Windows 10 ISO, and the installer will begin to boot.
- Select your USB drive and hit Enter. The Ventoy boot menu will appear, and you should see the Windows ISO listed.
Install Windows 10 on Your Computer
Once the installer is done booting, you’ll be greeted with a purple screen.
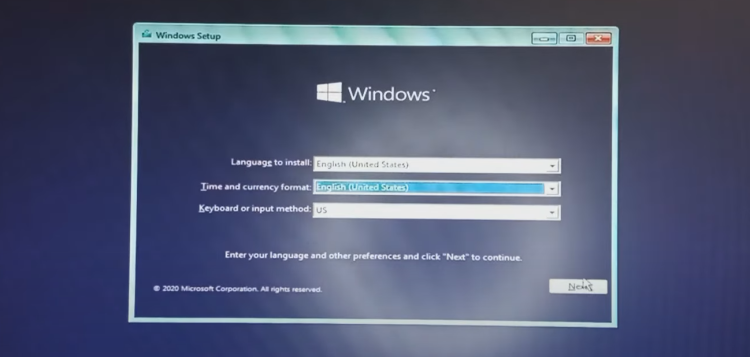
- Begin Installation. Choose your language if needed, click “Next,” then click “Install Now.”
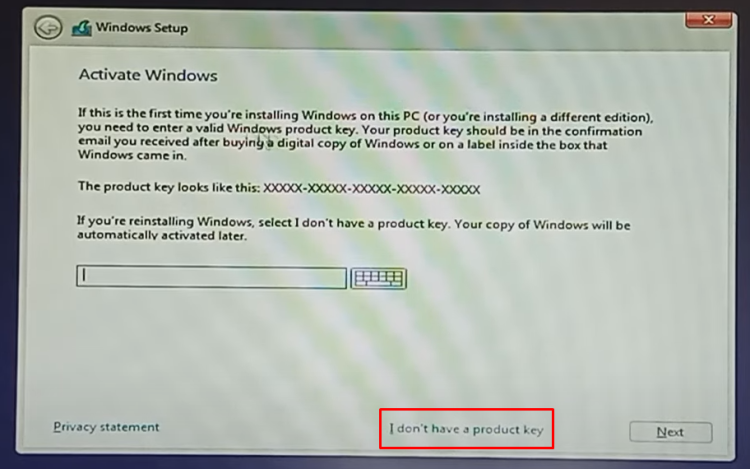
- Product Key. You may or may not see a screen asking for a product key. If you have previously had Windows running on your system, it might already be activated, especially if the system or motherboard was used previously. If asked for a product key and you don’t have one, click “I don’t have a product key.”
- Select Edition:
- If you previously had Windows running and know which edition it was, make sure to choose the same edition to avoid activation issues.
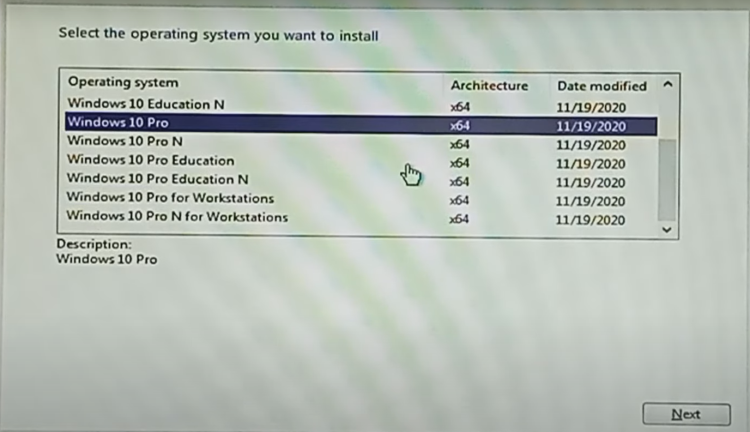
- If you’re using a brand new motherboard, select either Windows 10 Home or Professional:
- Windows 10 Home: Sufficient for most users.
- Windows 10 Pro: Choose this if you need features like BitLocker or business management tools like group policies. It’s technically more secure, though Windows Home is also safe.
- I usually choose Pro for the additional security features, but Home is perfectly fine for regular users.
- If you previously had Windows running and know which edition it was, make sure to choose the same edition to avoid activation issues.
- Installation Type. Once you’ve selected the edition, click “Next” and choose “Custom.”
- Partition Selection. The list of drives and partitions will vary. If you have one drive, you should see one partition. Select the appropriate partition where you want to install Windows.

Choose the appropriate partition and click “Next.” Windows will begin installing. Once installation is complete and your PC is rebooting, remove the USB installer to avoid booting back into the Ventoy menu. You should now be booting into Windows 10.
If you have an Ethernet cable plugged in, I recommend unplugging it so you can complete the initial setup without a Microsoft account. Your PC will reboot a second time, and then you’ll be greeted with the setup screen. This process is straightforward—just uncheck and skip any Microsoft-specific options that you don’t need.
The reason for not connecting to the internet is to avoid being forced to use a Microsoft account. If you don’t connect, you can create a regular user account. Click “Limited Experience” and uncheck everything on the following page. After this, Windows will finalize the setup. After a short while, you’ll see the desktop.
Congratulations! Windows 10 is installed. You can now start installing drivers and applications to make your PC fully functional. If you have a dedicated graphics card and another storage device, make sure they are configured properly.
Keep in mind that while windows 10 is completely free to use, as I just showed, you won’t be able to customize these settings under personalization and you will have a watermark in the bottom right corner letting you activate. However, activating doesn’t need to be expensive, as legit activation keys are easily obtainable.
i’ve followed every step, but my win pc wont respond with the usb drive inserted.
it just freeze and nothing happens with the drive in, with the drive out the pc boots.
have an idea whats wrong?
very thankful for help!
Hi, Profacii
Most Likely Fixes:
– Try a USB 2.0 port instead of USB 3.0 (some systems freeze with newer ports during boot).
– In BIOS, toggle between UEFI/Legacy boot modes (one may work).
– If still stuck, test the USB on another PC to isolate the issue. 🛠️