
What’s up, guys? Today, we’re going to take a look at how to flash an SD card, USB drive, or any kind of portable drive with Raspberry Pi OS.
Step 1: Download Raspberry Pi Imager
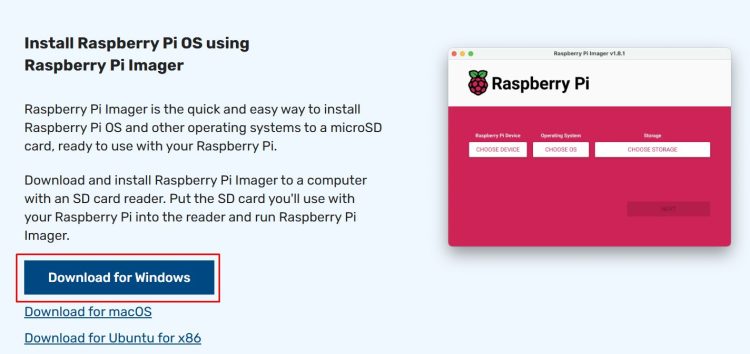
The first thing I’m going to do is open up my browser, search for “Raspberry Pi Imager.”

Then click on the top result. Once there, I’ll select the option to download for Windows.
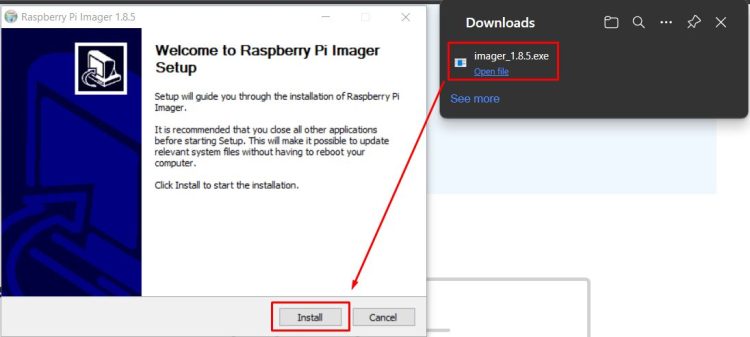
After downloading, we can open it and go through the installation process.
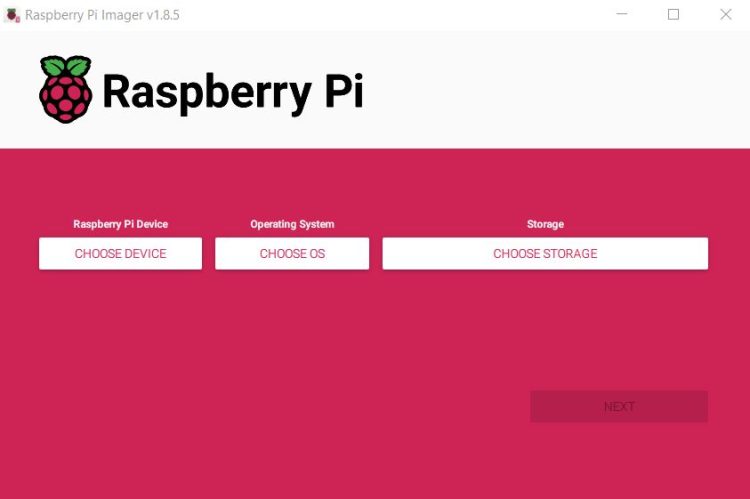
Once that’s done, we’ll be greeted with a screen that looks like this.
Step 2: Select the Device
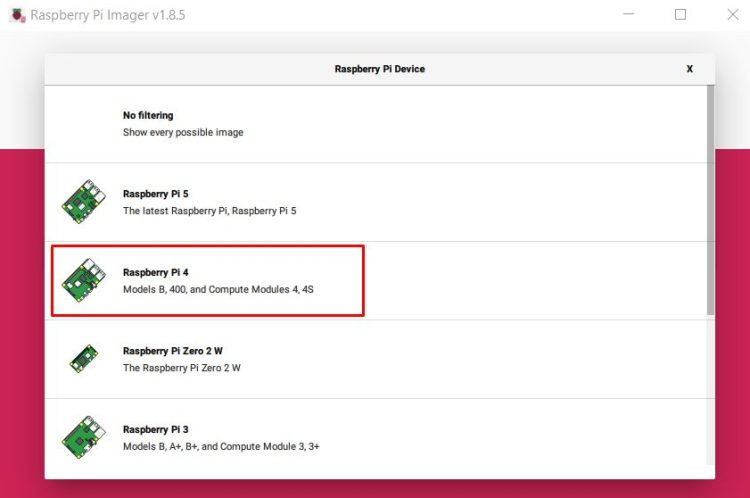
The first step is to click “Choose Device” and select the device we’re going to flash the OS onto. In my case, I’ll be using a Raspberry Pi Model 400, which is essentially a Raspberry Pi 4 built into a keyboard, making it usable as a standalone computer.
Step 3: Choose the Operating System
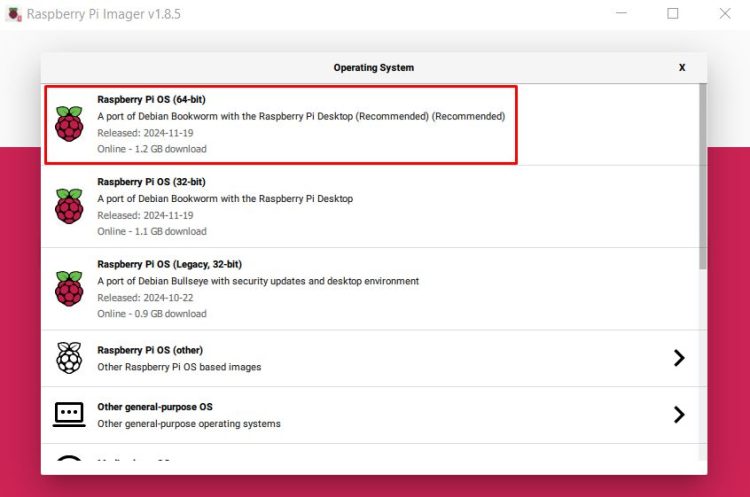
Next, we’ll click “Choose OS.” The top option will be the recommended choice for your device. For a Raspberry Pi 4 or Raspberry Pi 5, this will be the 64-bit version.
For a Raspberry Pi 3 or older, it’ll be the 32-bit version. Since I’m using a Raspberry Pi 4, I’ll select the 64-bit option.
Step 4: Select the Storage Device
The final step is to choose the storage we’re flashing the OS onto. In my case, it’s a USB Drive.
Keep in mind that the device name might not display exactly as it appears in your file browser.
For instance, in my file explorer, the drive is assigned the letter D. I’ll select the device mounted as the D drive here.

Step 5: Configure Optional Settings
Once selected, click “Next.”

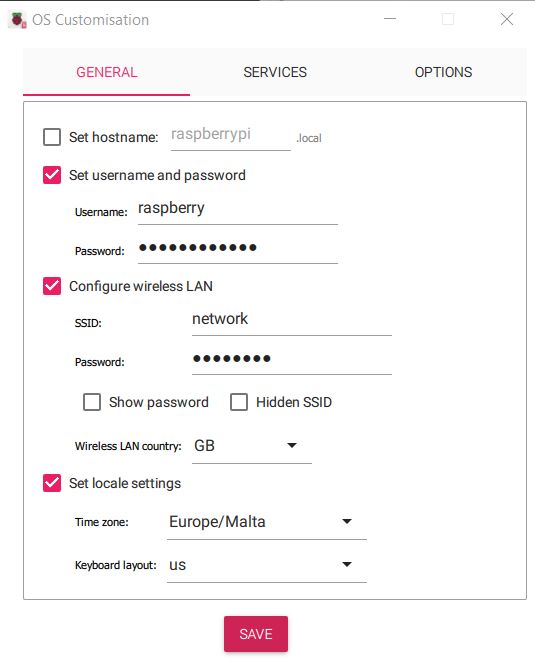
If you want to edit any settings, you can do that now.
Here are some options you can configure:
- Hostname: This defaults to “Raspberry Pi,” which works fine for me.
- Username and Password: By default, the username is “raspberry,” and the password is “Raspberry Pi,” but you can change these to your preference.
- Wi-Fi Setup: If you’d like to connect to a Wi-Fi network during setup, you can configure the network name and password here.
- Location Settings: You can set your time zone and keyboard layout for your region.
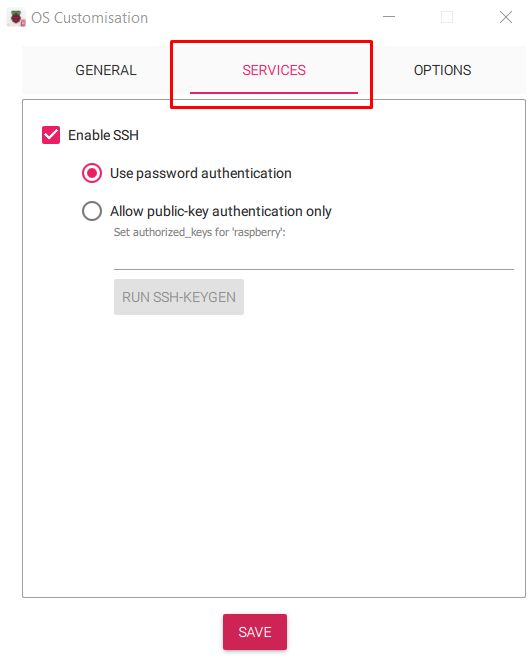
Additionally, I recommend enabling SSH under the services section. This is useful if you don’t have a monitor ready and need to connect to the Raspberry Pi from another computer. This feature allows remote configuration.
Once all the settings are configured, click “Yes.”

Note that this will erase everything on the drive. Click “Yes.”

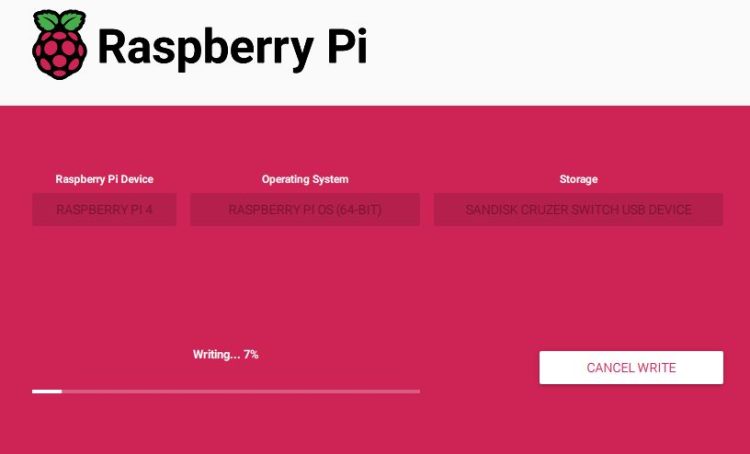
After the process completes, you’ll have Raspberry Pi OS ready on your device.
Conclusion
And that’s it! You’ve successfully flashed Raspberry Pi OS onto your SD card or USB drive. Whether you’re setting up a Raspberry Pi for the first time or preparing for a new project, this guide ensures you’re ready to go.
If you have a monitor ready, you can connect it to your Raspberry Pi and begin exploring all it has to offer. If you don’t have a monitor, enabling SSH lets you configure your Raspberry Pi from another device, making setup even more flexible. Happy tinkering!
