
![]()
Introduction
In this guide, we’ll show you how to install Android x86 on VirtualBox, letting you run Android right on your desktop or laptop.
So, why would you want to do this? Here are some great reasons:
- Test & Develop Apps: If you’re an Android developer, it’s a quick and easy way to test your apps without needing a physical device.
- Mobile Gaming: Run Android games on your PC with better performance, especially if your phone struggles with demanding games.
- Use Android-Only Apps: Get access to Android-exclusive apps without needing an actual Android device.
Ready to dive in? Let’s get started!
Downloading Required Files

Before diving into the installation, you’ll need two critical files: the Android x86 ISO image and the VirtualBox software. The Android x86 image acts as the operating system, while VirtualBox serves as the platform to emulate Android on your computer. Let’s start by grabbing these files!
Step 1: Download Android x86 Image
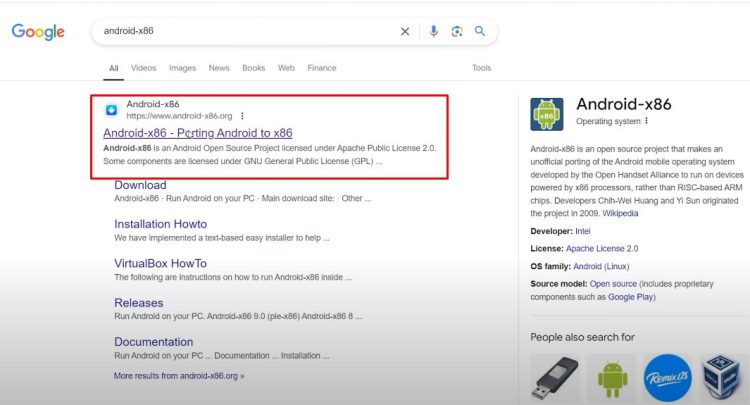
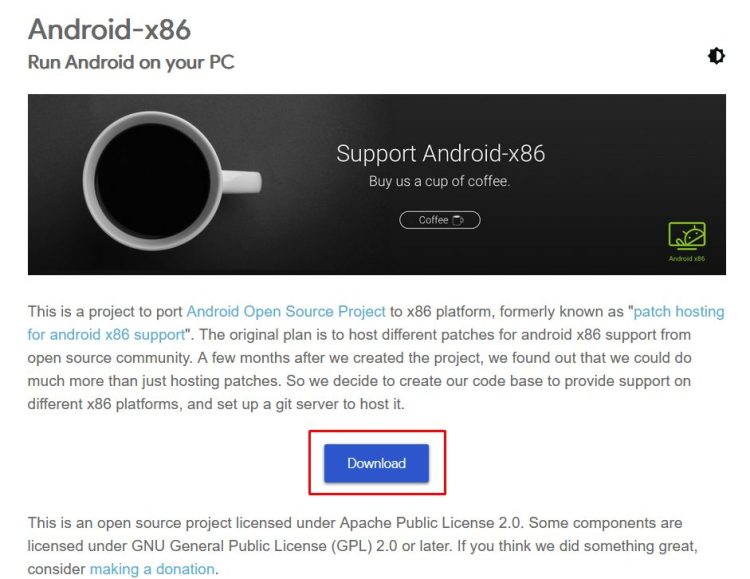
Open your favorite browser and navigate to the official Android x86 website. Search for “Android x86” and hit enter. Open the first link and click on the download button.
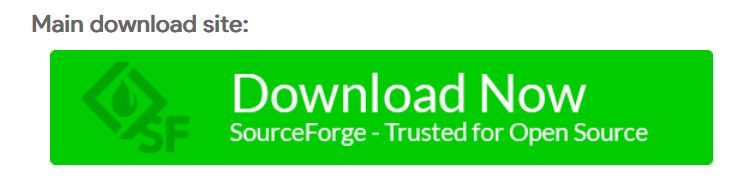
Choose Download now from Main download site.
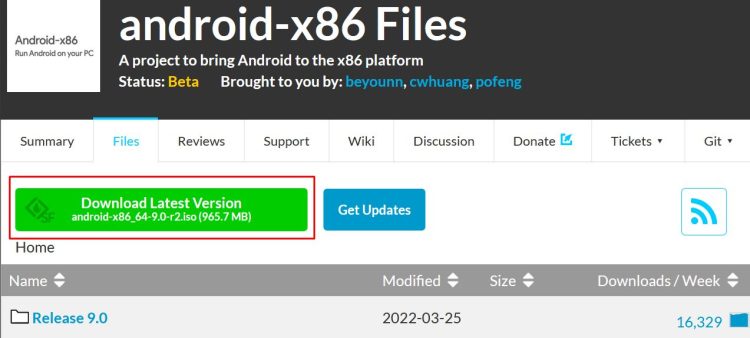
Here, you have different Android versions available for both 64-bit and 32-bit systems. It is recommended to download the latest version, android-x86_64-9.0-r2.iso.
The download should start automatically after a few seconds.
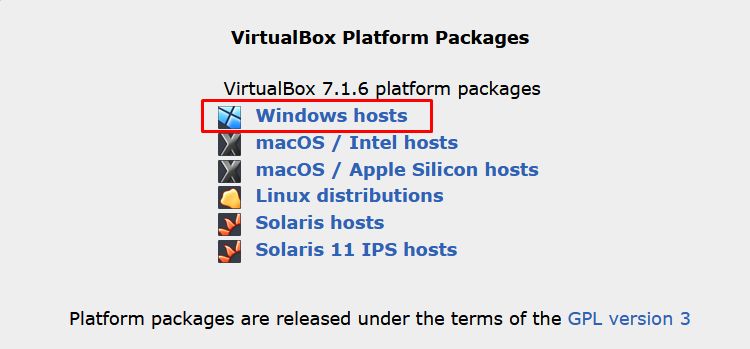
Step 2: Download VirtualBox

Open a new tab and type “VirtualBox download” in your browser. Navigate to the official VirtualBox website where you can find VirtualBox for various operating systems such as Linux, Mac, or Windows. Since we are installing it on Windows, select the Windows option.
Once the download is complete, close your browser.
Installing VirtualBox
Double-click on the downloaded VirtualBox installer and follow the installation steps by clicking “Next”.
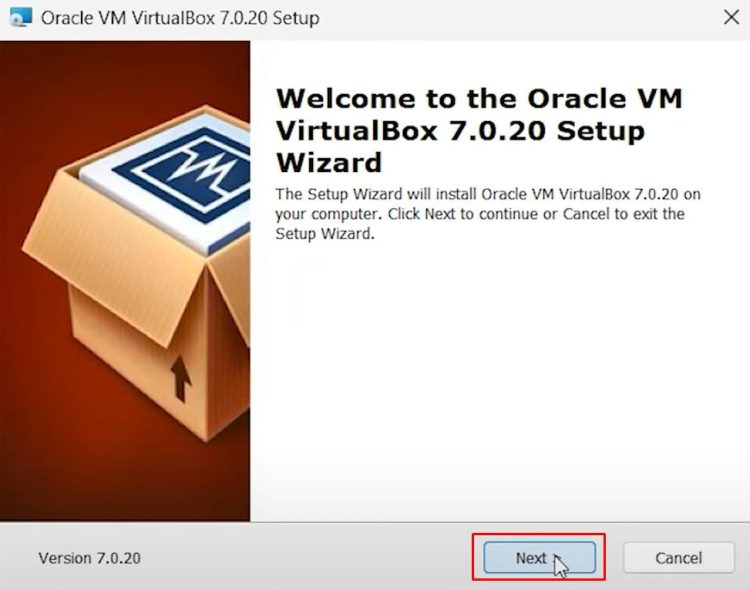
Then click on “Next” -> “Yes” -> “Next” -> “Install”. After the installation is finished, open VirtualBox.
Setting Up Android x86 in VirtualBox
With VirtualBox installed and the Android x86 ISO ready, it’s time to configure your virtual machine. This step ensures your PC allocates adequate resources (like RAM and storage) to Android for smooth performance. Proper setup here minimizes lag and ensures compatibility, so follow the steps carefully. Let’s create and customize your virtual machine!
Step 1: Create a New Virtual Machine
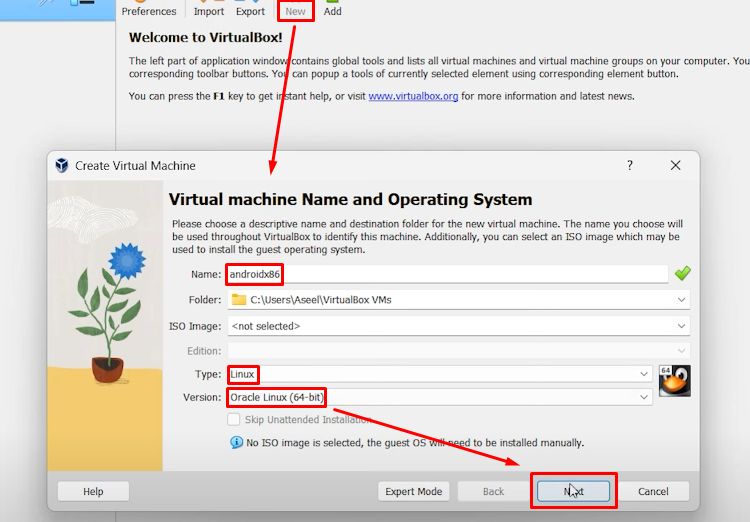
Click on “New” in VirtualBox. Write a name for your virtual machine (e.g., “Android x86”). Under the “Type” section, select “Linux,” and for the “Version,” choose “Other Linux (64-bit).”
Step 2: Allocate Memory and Processors
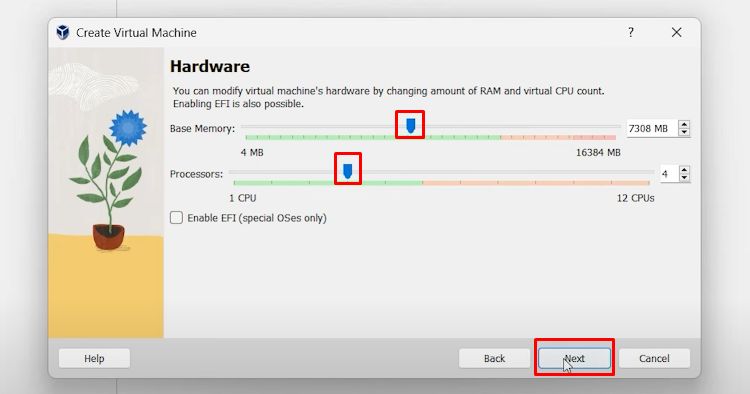
In the next step, allocate memory (RAM) to your virtual machine. If you have 16GB of RAM, you can allocate around 7-8GB; however, 2GB is also sufficient if you have less RAM. For processors, select more than two if your system allows it, but two processors are enough if you don’t have more.
Step 3: Set Up Hard Disk
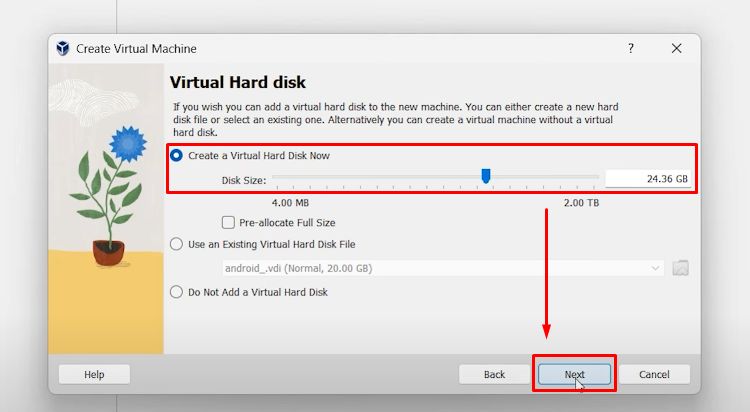
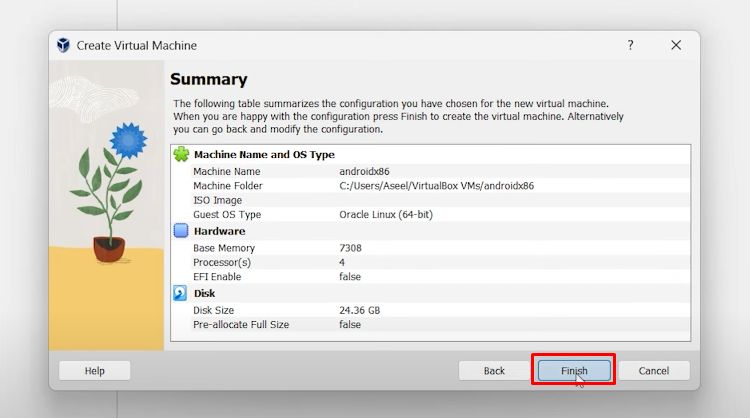
Allocate at least 20GB of hard disk space for Android x86. After setting up these configurations, click “Finish.”
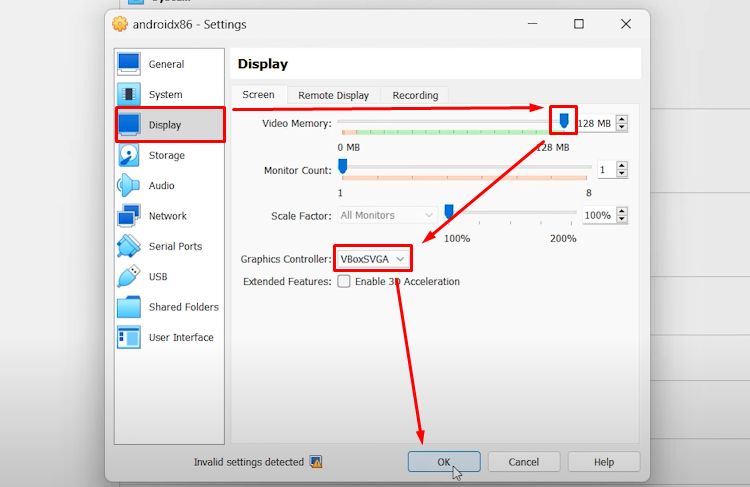
Step 4: Configure Settings
Click on “Settings” and go to the “System” tab. Leave the default settings. In the “Display” section, ensure that the graphic controller is set to “VBoxSVGA” and allocate 128MB of video memory.
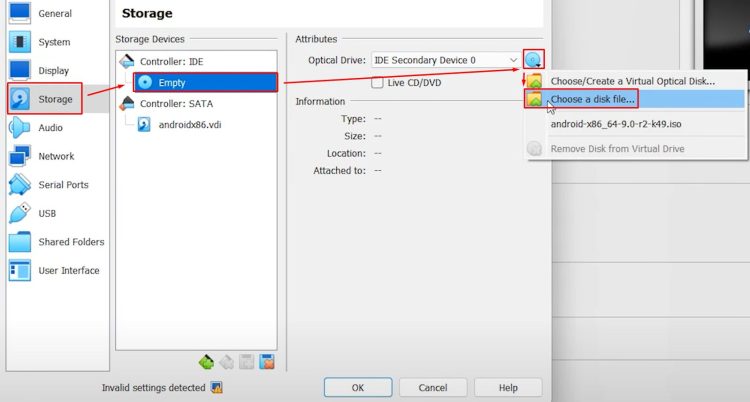
Go to the “Storage” tab, add an empty CD, and choose the ISO file of the Android x86 image you downloaded earlier.
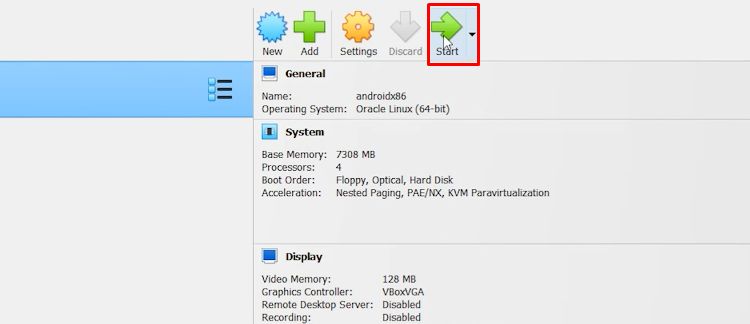
Starting the Installation
Click on “Start” to begin the installation process.
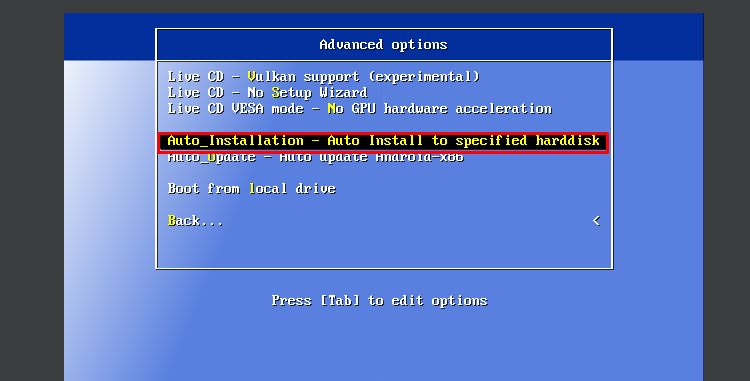
Select “Advanced options” and choose “Install Android x86 to hard disk.”
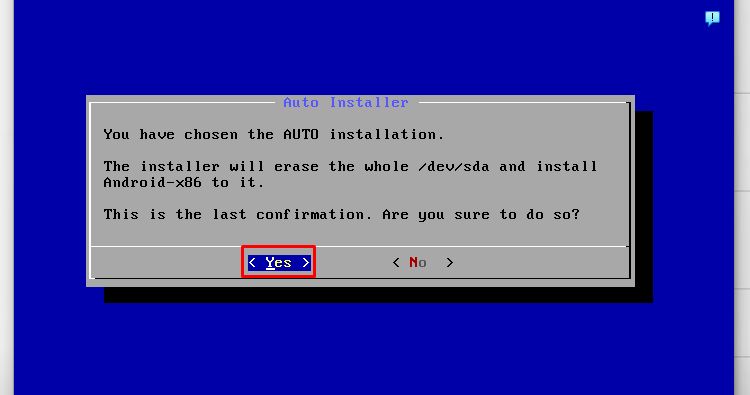
Confirm with “Yes” when prompted.
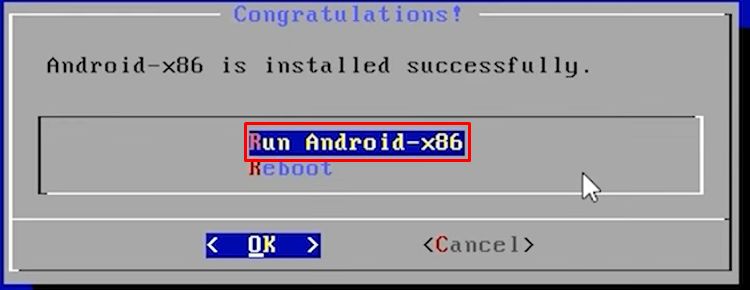
Click on “Run Android-x86”.
Completing the Installation

Once the installation begins successfully, select your preferred language (e.g., United States).
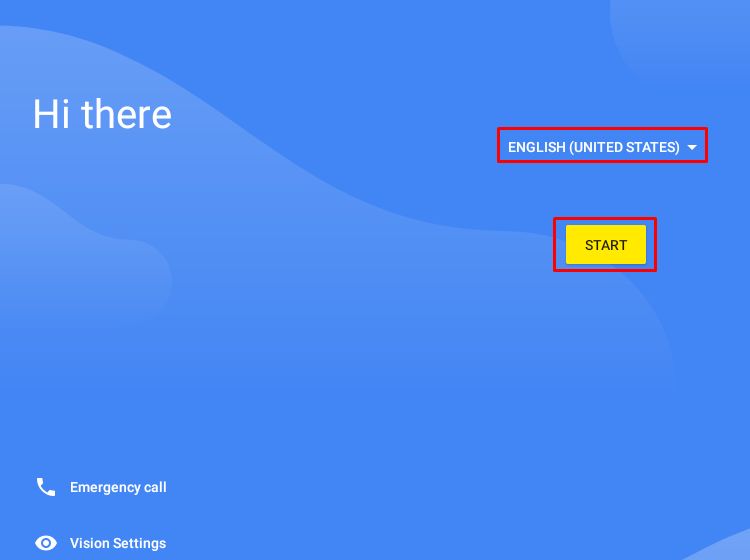
You can skip connecting to Wi-Fi by choosing “Skip” and continue with the setup.

Configure your time settings or leave them as default. You can also opt to turn off location services if desired.
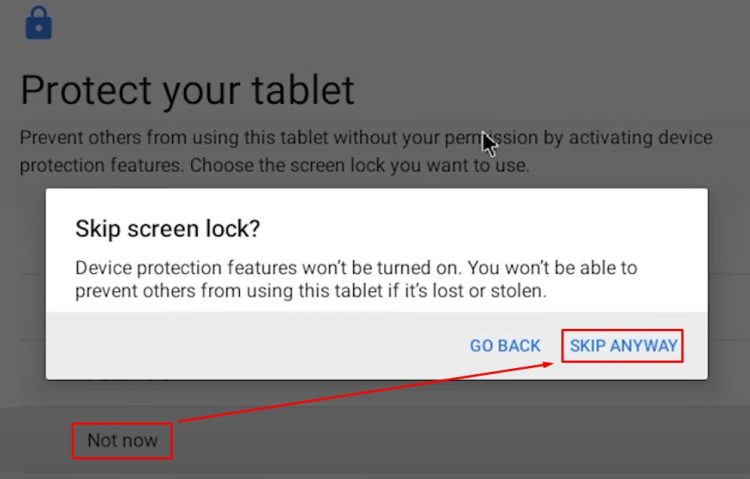
If prompted to set up a PIN for security, you can skip this step by selecting “Not now.”
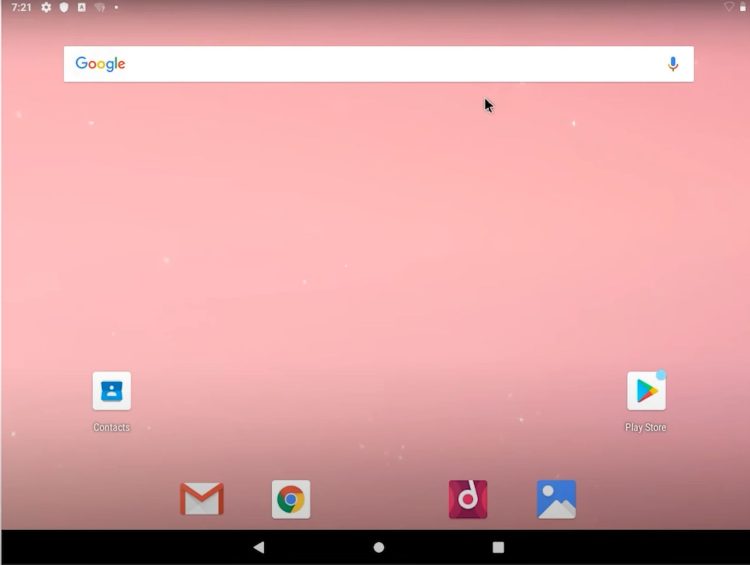
After completing all the steps, Android should boot up on your VirtualBox environment.
⚠️ Critical Reminder:
After installation, you MUST eject the Android x86 ISO from the virtual optical drive. Otherwise, the VM will reboot into the installer repeatedly.
Eject the ISO to Avoid Boot Loops
- Shut down the Android VM completely (do not save state).
- In VirtualBox, right-click your Android VM and select “Settings”.
- Go to Storage > Controller: IDE.
- Click the ISO file (e.g.,
android-x86_64-9.0-r2.iso) and select the 🗑️ Remove Disk icon.- This ensures the VM boots from the virtual hard disk instead of the ISO.
- Click OK to save changes.
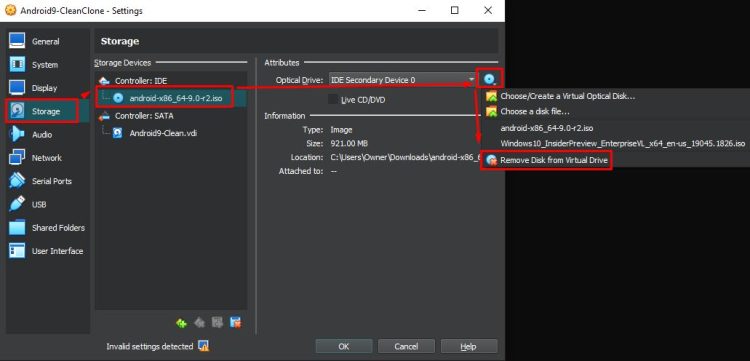
Why This Matters: Forgetting to eject the ISO causes the VM to reboot into the installer instead of Android.
Your Android Experience on PC
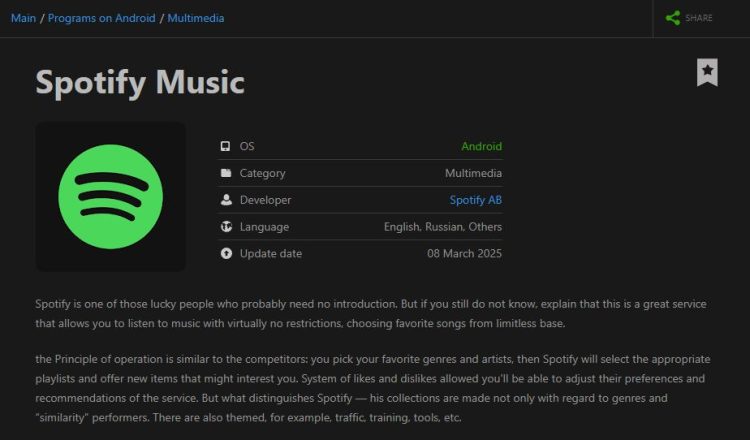
Now that you’re running Android on your desktop, why not take full advantage of its capabilities? For music lovers, we recommend trying the spotify mod apk. This modified version unlocks premium features like ad-free listening, unlimited skips, and offline playback — perfect for enjoying music while developing apps, gaming, or multitasking on your virtual Android setup.
Why choose the mod?
- No subscription required
- High-quality audio streaming
- Download playlists for offline use
- Ideal for testing app integrations
Simply install the APK within your virtual Android environment and enjoy a seamless music experience!
Final Steps
Congratulations! You have successfully installed Android x86 on VirtualBox. Happy exploring Android on your desktop!