Ok, when you are ready, you need to download and run WinUSB.
First you need to select the USB drive that you want to make bootable for Ubuntu and Windows.
When it will be plugged, WinUSB will detect it automatically and show in combo-box. The upper horizontal line below of USB stick name represents the ratio of free and used space. The second line represents a space on drive required to make it bootable with selected Windows and Ubuntu distributions.
Table of Contents
ToggleChoose Windows and Ubuntu distributions
To select Windows distribution you need find it in standard dialog that will be opened by click one of the round buttons – ISO or DVD, depending on the type of distribution that you have, you can see buttons on screenshot above. After selection, it will be displayed in the application as shown in the screenshot below. Note, that you can set the name of boot menu point for this distribution on the small dialog shown below.
Select format option
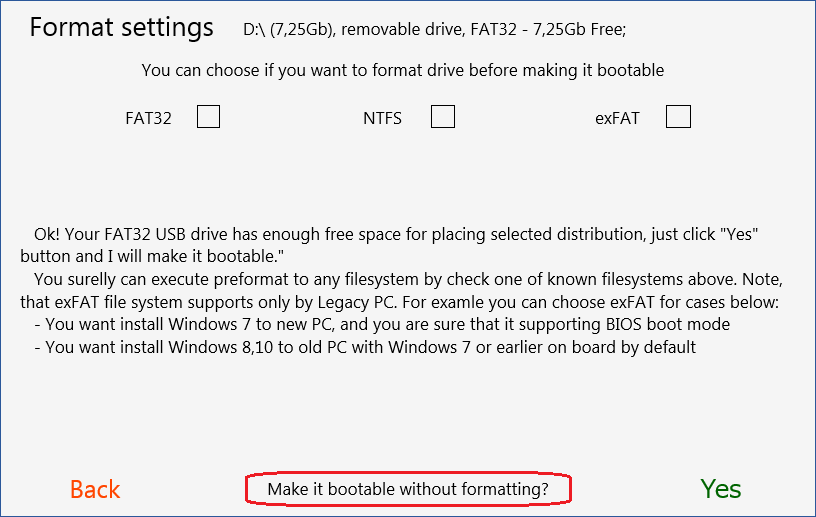
WinUSB propose some option to create a bootable USB drive. If there is enough USB stick free space, WinUSB will prompt you to make it bootable without formatting as shown bellow in the screenshot on the left.
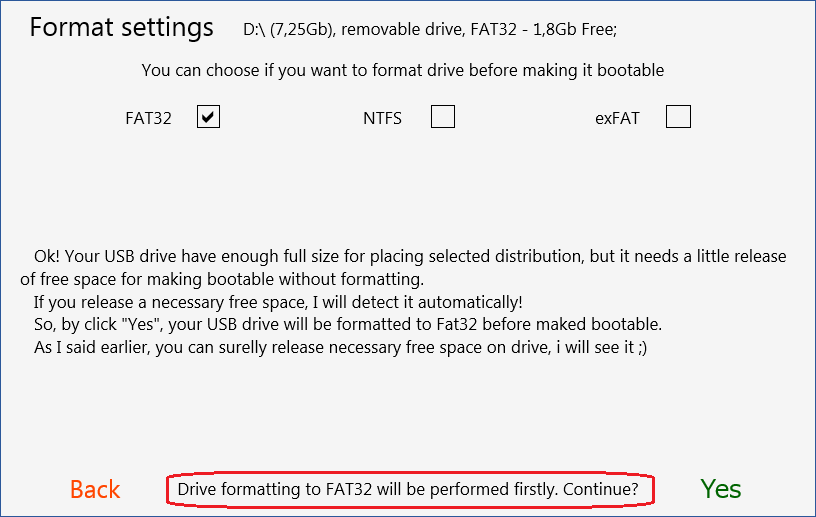
If the space is not enough, WinUSB will offers you either to perform pre-formatting, or cancel it by pressing the “Back” button, free up enough space on the flash drive, and then come back to work option screen. Application will automatically detect the release of the space and will propose to continue without formatting. Note, don’t ask WinUSB format to fat32 USB drive bigger than 32Gb!


