The need to install Windows from a bootable USB flash drive arises quite often, and, probably, many, faced the problem of the lack of network and WIFI drivers to access the Internet when you first start Windows after installation. Access to the Internet may be required at least to load drivers required by the operating system for the correct operation of most applications and games.
It should be noted that some laptop and computer vendors attach a disk with the necessary drivers to their products. In this case, after installing the operating system, you can use such disk and now you will have enough short tutorial for creation a bootable USB stick for Windows installation using WinUSB or an instruction for experienced users to create a bootable USB flash drive with Windows manually.

If you do not have a disk with drivers, then for normal computer use, it’s not enough just to install Windows from a USB flash drive. It is necessary to ensure that there is a universal set of drivers on your bootable USB flash drive, sufficient for access to the network and download the rest of the drivers for the computer on which you install the operating system.
Today I want to propose a new solution to the problem voiced above. Beginning with version 3.4.0.0, WinUSB has the ability not only to create a bootable USB flash drive to install Windows 7,8,10, but also to automatically download the DriverPack network program and then install it on your bootable USB drive. DriverPack network will install all necessary network drivers, after which, will offer to download the rest from the Internet. You can read more about this program on DriverPack official site.
So, let’s start, firstly, to create a bootable USB flash drive, in any case, we need an installation image or a DVD with Windows, if you do not have neither one, then you can read here how to download Windows 10 ISO from Microsoft website. Now that you have the Windows installation image, you need to download and run the latest version of WinUSB, the download will start by click of the button below.

Table of Contents
ToggleSelect USB stick, you want to make bootable
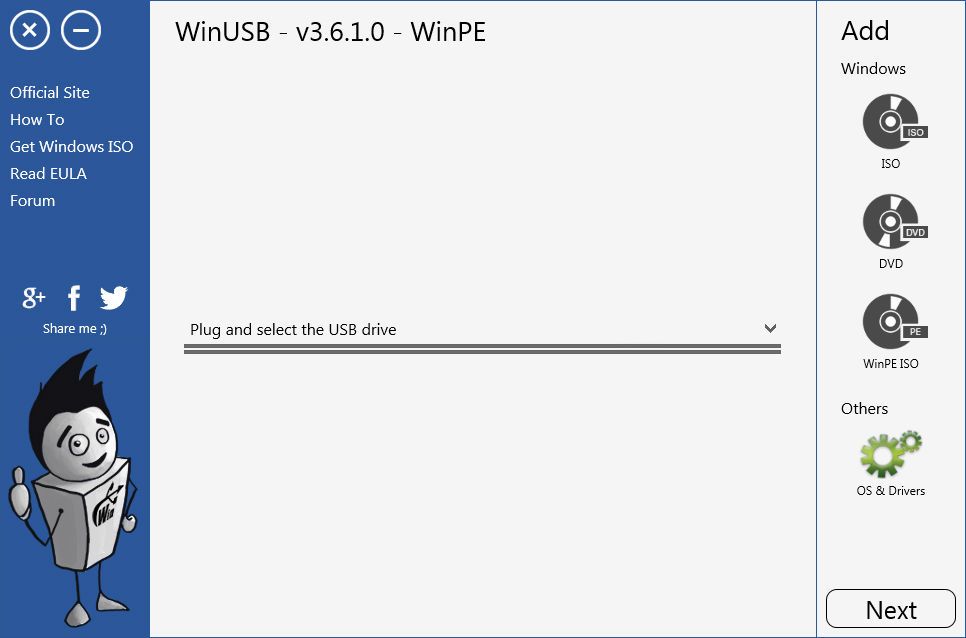
First you need to select a USB flash drive in the drop-down list under the name of the WinUSB version, as shown in the screenshot below. The upper horizontal line under the name of the selected flash drive will display the ratio of free and used space on the thumb drive, the lower line will show the place on the flash drive, which will be required to make it multiboot with the selected Windows distribution and the DriverPack program.
Choose Windows distribution and DriverPack program
The Windows distribution can be selected in the standard dialog box to select a file or directory by clicking one of the round buttons in the screenshot above – ISO or DVD, depending on the type of distribution that you have. After the distribution is selected, it will be displayed in the application, as shown in the screenshot below.
Immediately after selecting the distribution, a small window will appear “Enter the name”, where you will be asked to specify the name of the boot menu item on your flash drive corresponding to the chosen distribution, by default there will be the name of the ISO file, or the name of Windows version for DVD.
Format settings
Well, when you chose the Driver Pack and the Windows distribution to write to the USB flash drive, it remains to indicate whether you need to format it before making it bootable.
If there is enough free space for burning Windows and DriverPack on the USB flash drive, then WinUSB can make it bootable without formatting and deleting data. If space is not enough, WinUSB will prompt you to perform formatting. In any case, you can click the “Back” button, free up additional space on the USB flash drive, deleting unnecessary files, WinUSB will notice it automatically and the next time you go to the formatting settings, you will be asked to make the USB flash drive bootable without formatting.
Note, don’t ask WinUSB format to Fat32 USB drive bigger than 32Gb!
Burning Windows 10 with drivers to USB
When you have selected the formatting mode, click the “Yes” button to start burning Windows with network drivers to the bootable USB drive. If you did everything as described in the article, the process of downloading and installing the DriverPack program will be started. After it is completed, WinUSB will start unpacking Windows files.
Note. When the Windows installation is complete, you can start DriverPack by launching the DriverPack.exe file in “\WinUSB\DriverPack” directory on your bootable USB stick.
Conclusion
Excellent! Now you have a bootable USB flash drive with Windows installer and network drivers that will allow you to download all the other necessary drivers during the first operating system startup. if you need to burn more distributions on the USB stick, just repeat the process illustrated in this article without downloading DriverPack. If you will execute the process without formatting, then all new ISO files will be written next to the already existing ones on the your multiboot USB drive!
Important: Bootable flash drives created using the WinUSB program support the ability to boot in UEFI mode with the NTFS file system, but to successfully run the Windows installation, you need to disable UEFI secure boot option.
Thank you for using WinUSB! I’ll be glad to see you again

