
Hi, I’m going to show you how to perform a clean installation of the Windows 10 operating system. I’ll keep things short by using fast forwarding. Let’s get started with the step-by-step process!
Creating a Bootable Flash Drive
The first step is to open a web browser, such as Google Chrome, and search for “download windows 10”.
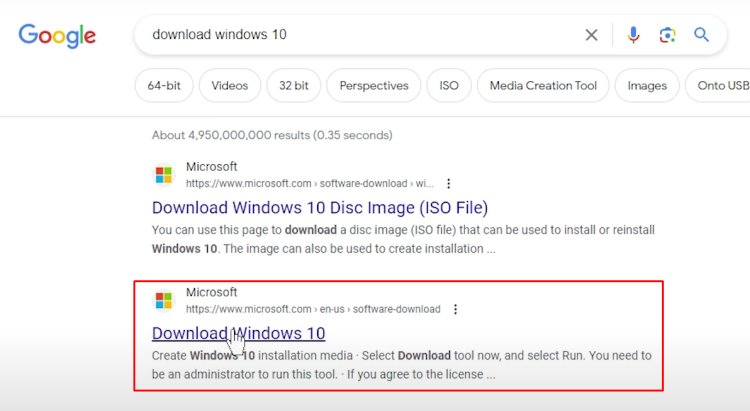
When I do that, the first two results come directly from Microsoft, which is a good thing.
So, I’m going to click on the second link that says “download windows 10.” On this screen, the option you want to choose is “Create Windows 10 installation media.”
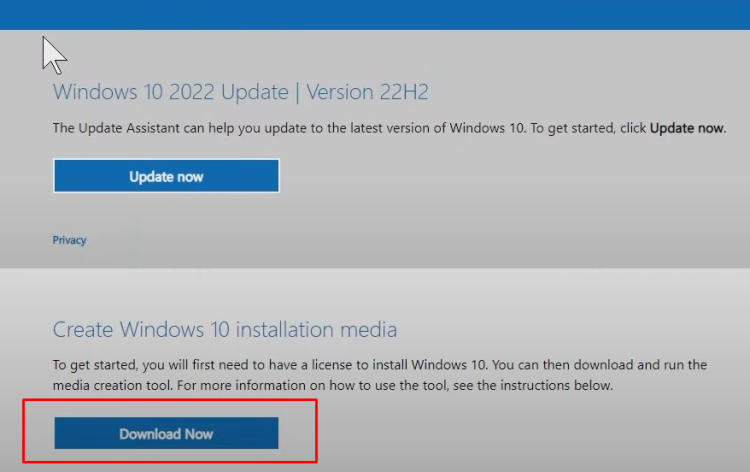
This will allow you to create a USB flash drive with all the files needed to perform the installation, enabling you to boot from it and proceed with the install.
So, let’s click Download Now. There it is — the Media Creation Tool.
Click Save; it should download really quick because that’s not a large file.
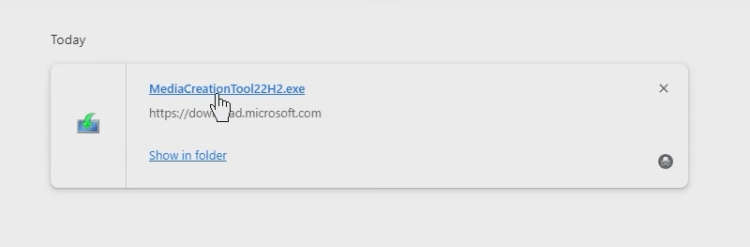
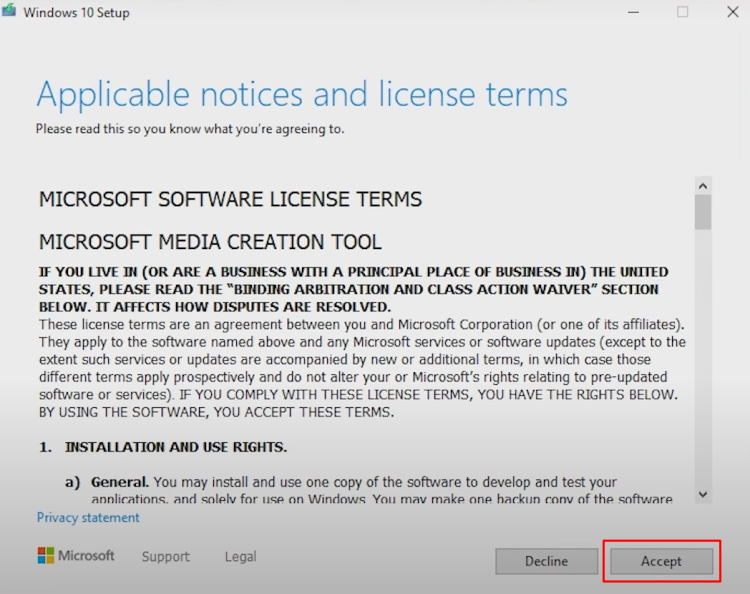
Now, navigate to the Downloads folder and run the file by clicking on it. Agree to the security prompt, and the tool will appear.
It takes a little time to get ready and download the operating system, but just follow the prompts, and we’ll have a bootable flash drive created shortly. Agree to the license agreement when prompted.
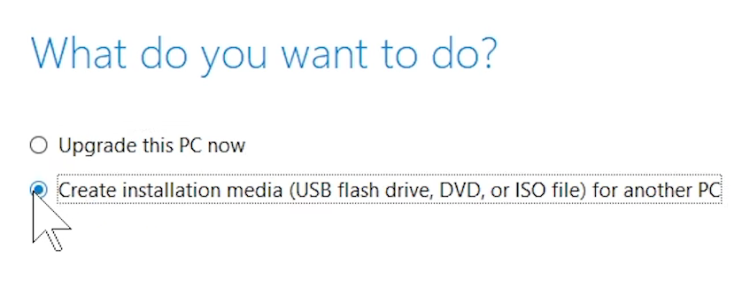
On this screen, choose the second option that says “Create installation media.”
You can create a USB flash drive, an actual DVD, or an ISO file that can be stored digitally and used at any time in the future.
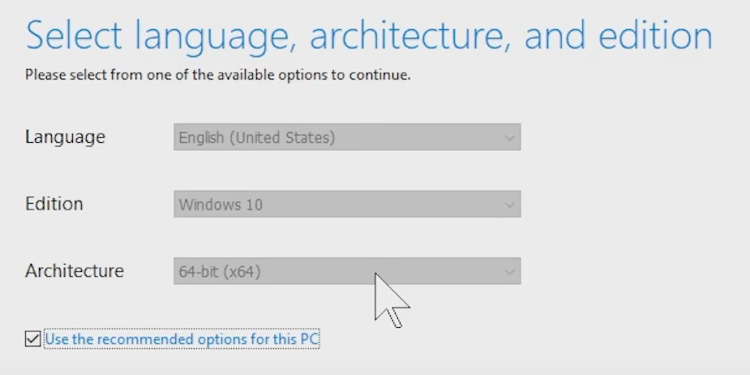
So, let’s go ahead and click Next. On this screen, it has detected the settings that match the computer I’m currently using to create the installation media.
In most cases, these settings are fine, and most people will want Windows x64. If you need something different, you can uncheck the box and choose from the different options in the drop-down menus.
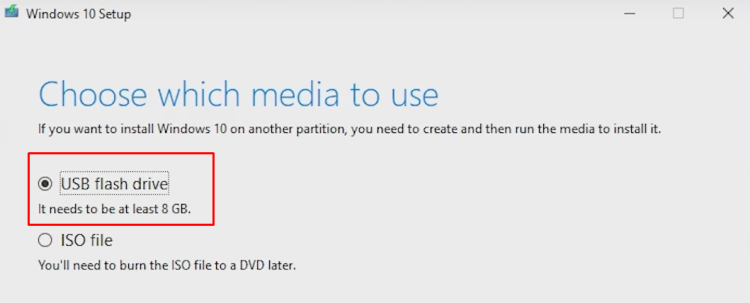
So, I’m going to leave it as it was and click Next. We are creating a USB flash drive, so I’ll go ahead and select that option.
On this screen, it’s asking you to identify which drive you want to overwrite.
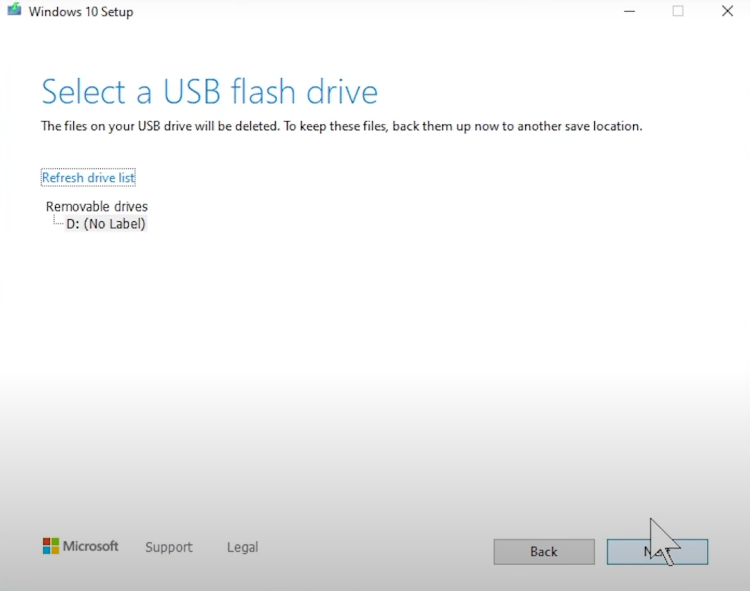
Here are my removable drives. I only have one, so I’ll click on D and click Next.
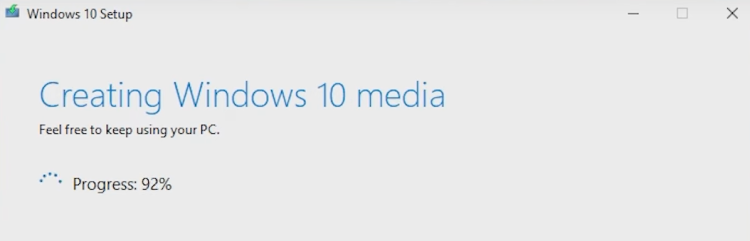
It starts downloading Windows. This can take a little while, and once it’s done, it’ll begin the process of actually writing those files onto the flash drive.
It looks like the flash drive creation is complete, so go ahead and click finish.
How To Boot From Flash Drive
Now that we have the USB flash drive for the computer you want to reload, go ahead and insert it into that computer.
Next, you’ll need to know how to get the computer to boot to that flash drive. So again, we’ll turn to our friend Google.
I’m going to do a search such as “Dell Optiplex 7400 boot to USB,” and let’s just see what comes up in the search results.

Often you can get a quick answer by scrolling down, so in these results here it is. I do remember that is correct for Dell. Usually, you tap the F12 or Delete key to get it to bring up the boot menu.
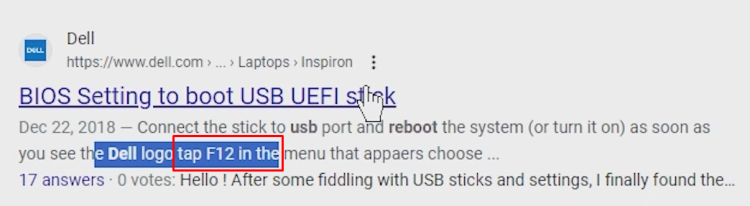
So what you’ll do is when the computer is powered off, power it on and shortly after start tapping F12, F12, F12 over and over again, and eventually, you’ll hit it at the right time, and it’ll pull up a boot menu.
Inside that boot menu, there should be an option for the flash drive; it might have the brand name of the flash drive such as PNY or Sandisk or Lexar, or it might just say USB flash or USB.
But just look at the list, determine which one would represent the flash drive that you just created.
Use the arrow keys to go up and down and hit enter to select it, and at that point, Windows will start to boot.
Starting Windows Setup Process
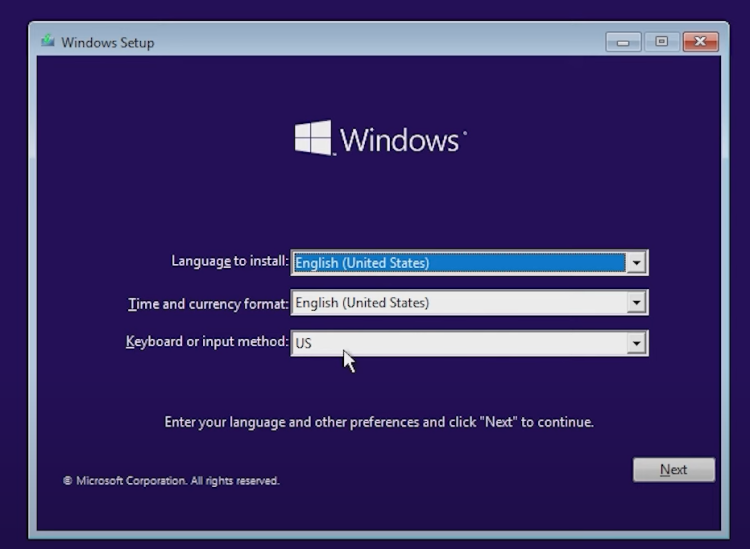
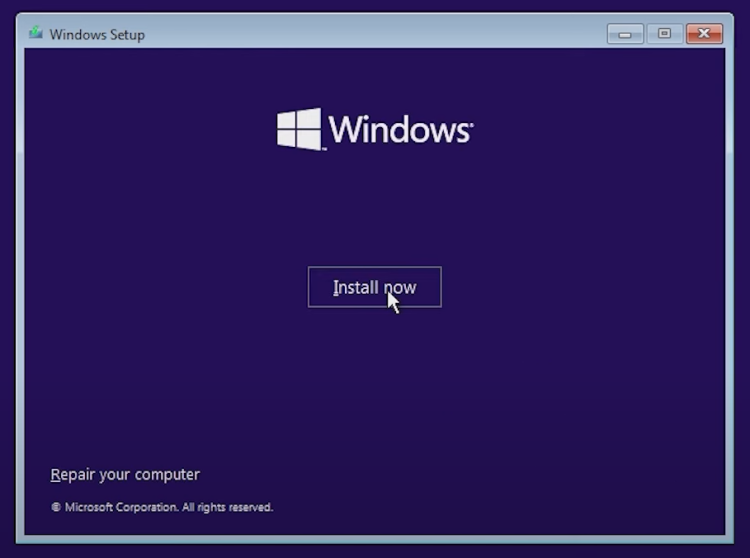
Here’s the first part of the Windows 10 installation screen.
Go ahead, and as long as the information matches what’s right for your country and language, click Next. We want to use the Install Now, so go ahead and click that.
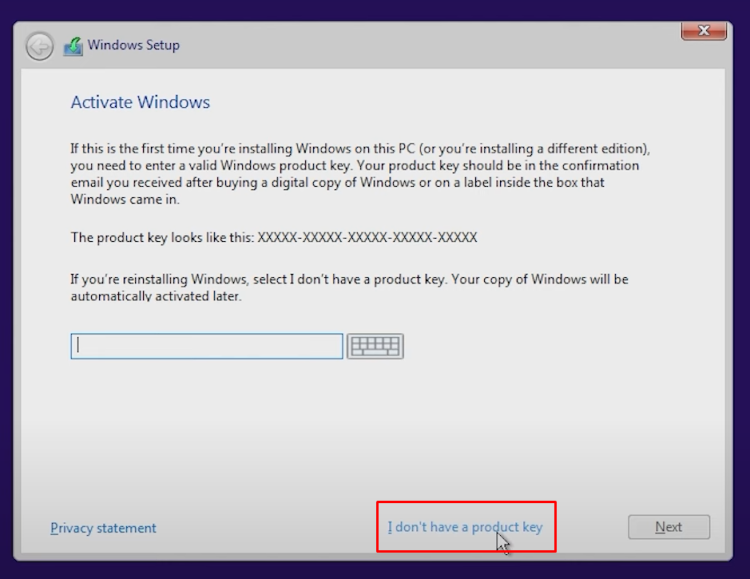
Here’s the part where it wants to know if you already have a Windows product key. Nowadays, a lot of times it’s a digital key saved on the Microsoft activation servers, and you don’t need it.
So, I’d say if you have a key that’s written across the side of your computer on the case like an old Windows 7 key or 8 or 8.1, you can go ahead and type it here; otherwise, just click on “I don’t have a product key”.
The next page asks you to select which operating system you’ll be installing.
Now it’s real important to get it right; otherwise, you’ll have to buy a new code and activate Windows, and it’ll become a real pain.
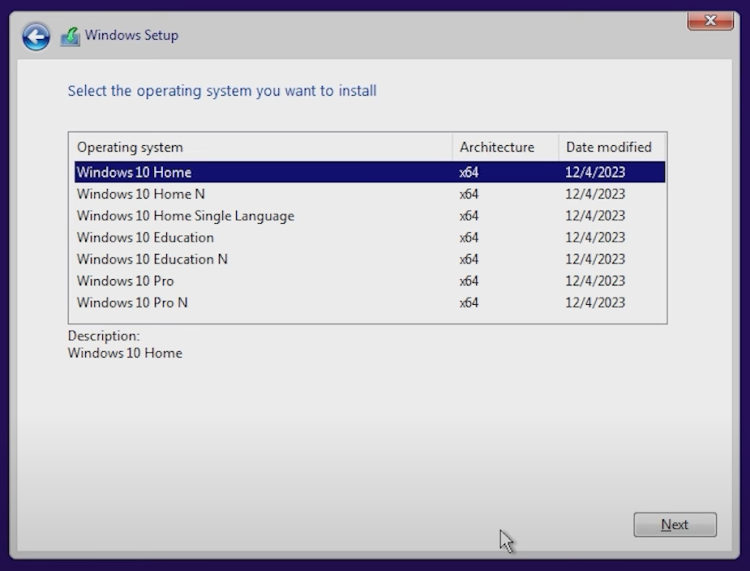
So, for this case, I’m going to choose Windows 10 Home because that’s what this computer had on it previously, so we’ll click Next and agree to the license agreement, click Next.
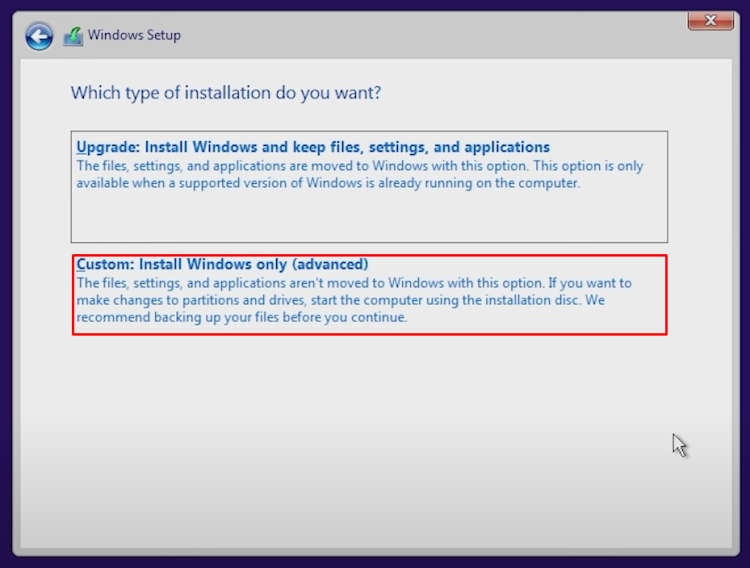
Since we want to do a clean install, we really don’t want any junk from the past; we will not be doing the upgrade, so go ahead and click “Custom Install.” This window is asking you where you would like to install the new Windows software.
Clearing Existing Partitions
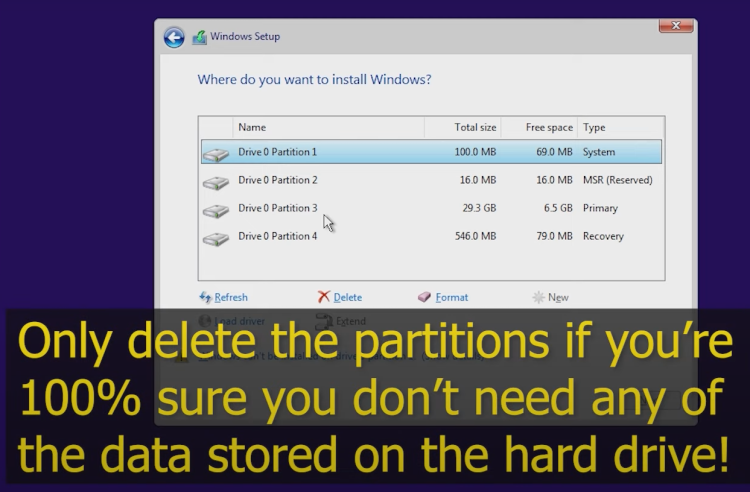
In this case, this machine has an existing copy of Windows that I really don’t want. I don’t need any files whatsoever from that hard drive, and I just want a nice clean, fresh installation.
So, in that case, what we would do is highlight each partition and then click Delete, okay?
And then go through each one until the only thing you’re left with is unallocated space.
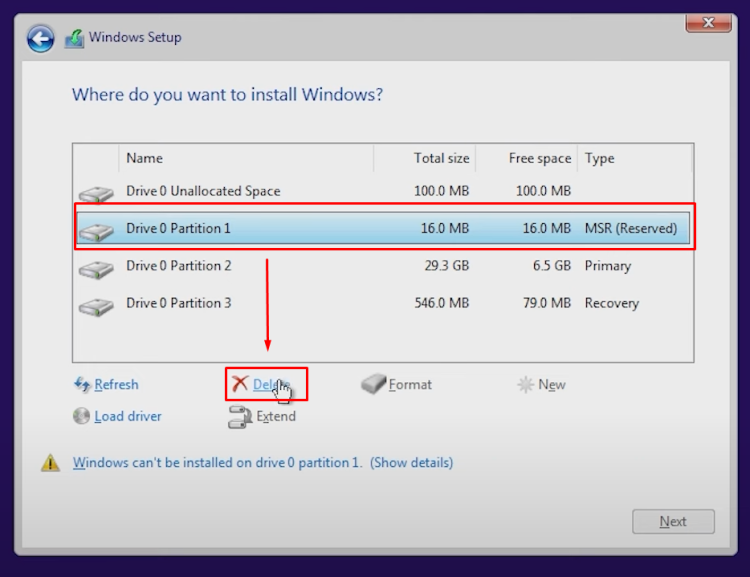
Now when you do that, that will completely erase, remove, destroy, delete all the data that’s on that drive, so make sure that’s what you want to do before you do this!
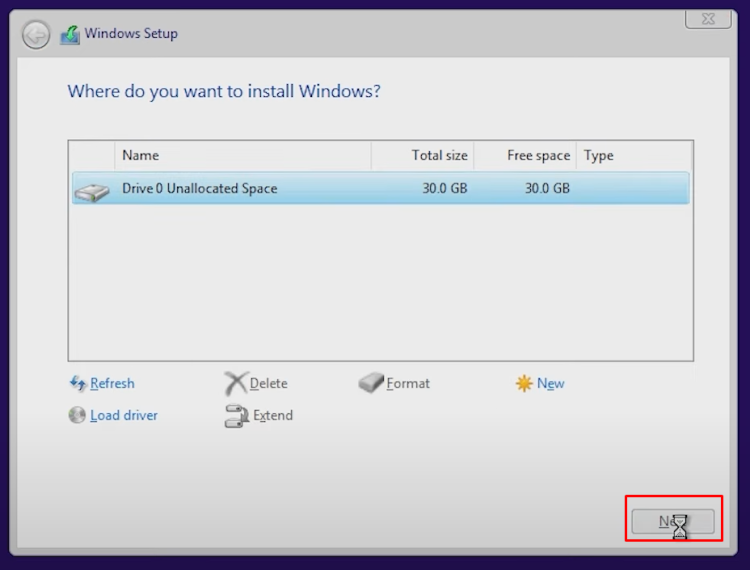
But in our case, we want clean; we don’t need any files, so I’ll get it down to just the unallocated space and just click Next.
Waiting For Setup To Complete
Windows will go ahead and create whatever partitions and recovery partitions that it needs, so don’t worry about it; just let it do its thing.
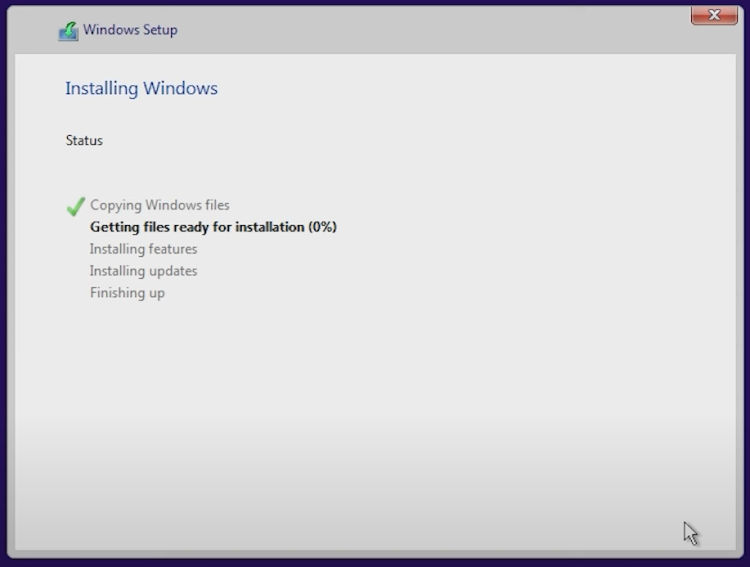
So now the Windows installation has begun, and it’ll take just a little while. It’ll get to a point eventually where it starts asking us some more questions.
So, away we go! And here’s where it wants to restart.
So you can either wait for the timer to hit 0 or you can click Restart Now. It looks like things are going well so far.
It goes through these initial screens and then it will ask us a bunch of questions. I will go over that with you in just a second. It looks like we’re there.
If your computer starts talking to you, you can go ahead and click the microphone down below, and that’ll make it stop talking. Shortly, it’ll ask us a bunch of questions, and we’ll go through them one by one.
Answering Initial Setup Questions
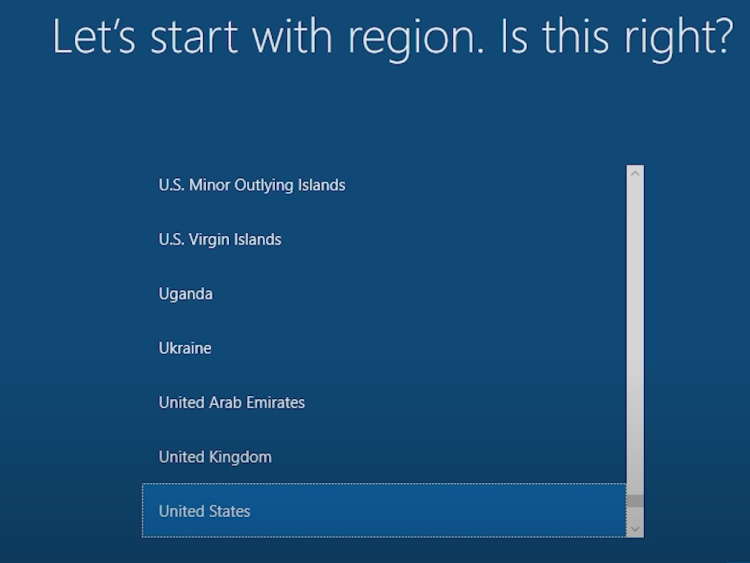
First is the region, so I’m in the US. We’ll make sure to click Yes on that. Is that the right layout? Yes, it is. Add a second layout? No, I don’t think I’ve ever done that.
Adding Or Avoiding Microsoft Account
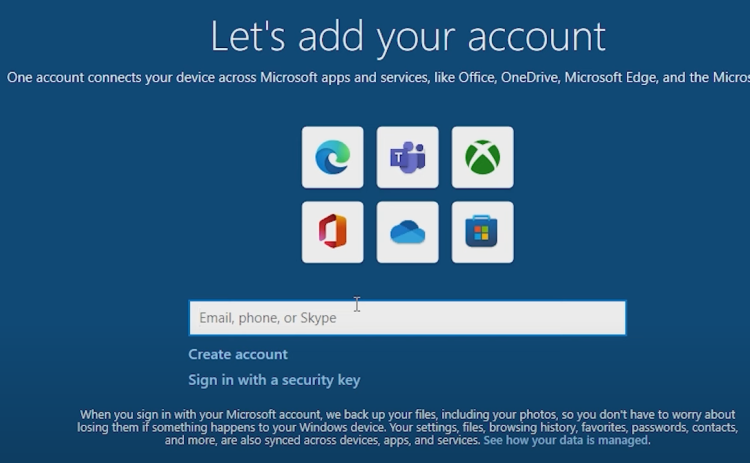
Now we’re at the “Let’s add your account” screen. Some people don’t mind Microsoft having all their information and their email and having a Microsoft account, OneDrive, and all their files floating between their different computers.
So if that’s you, go ahead and put your email address in and continue forward. For those that don’t want Microsoft to force them to put a Microsoft account on the screen, I found a little trick. You can say “[email protected]” and click next.

And then when it asks for a password, just click the password box and type a bunch of just random junk that doesn’t mean anything, like that.
And then click Next. It’ll fail; it’ll say “Oops, something went wrong”, and then that forces the installation program to just skip over the creating a Microsoft account phase. So I’ll click Next, and it does continue on.
New User Account & Password
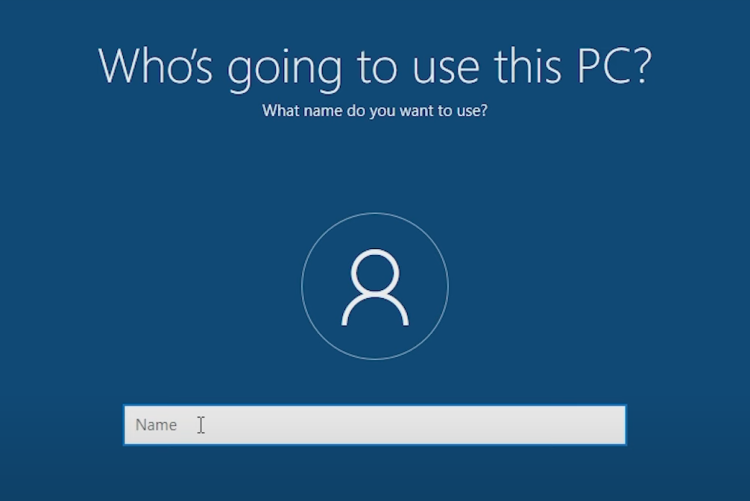
Here’s where it’s asking who is going to use this PC. Now you don’t have to identify yourself. You could just say something generic like “User.” This will show up later, so put whatever you’d like it to show on the login screen and click Next.
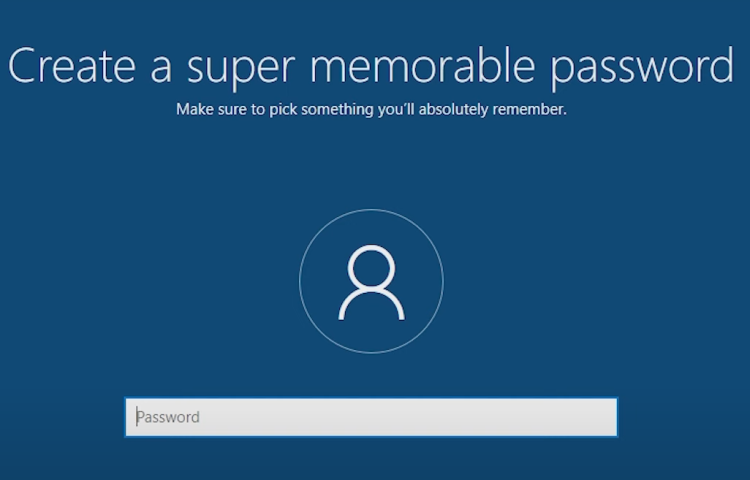
Create a super memorable password? Well, for now, let’s just keep it easy, not enter one. I believe if we enter one, then we have to create three challenge questions, and that becomes a real pain. So let’s click Next to get going fast.
Privacy & Experience Questions
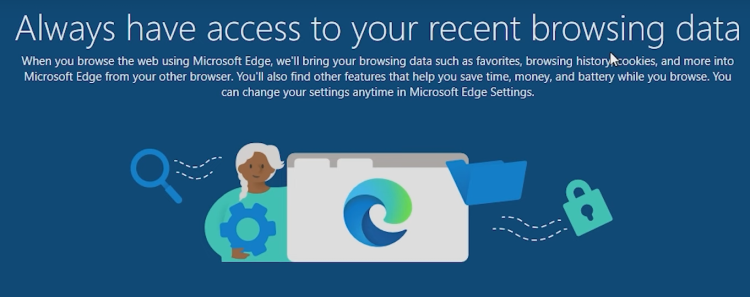
Always have access to your recent browsing data? I’m going to, for this article, just say no to everything to try to keep it private, not letting them pry into our lives too much and just to get going faster. So we’ll click Not now to that.
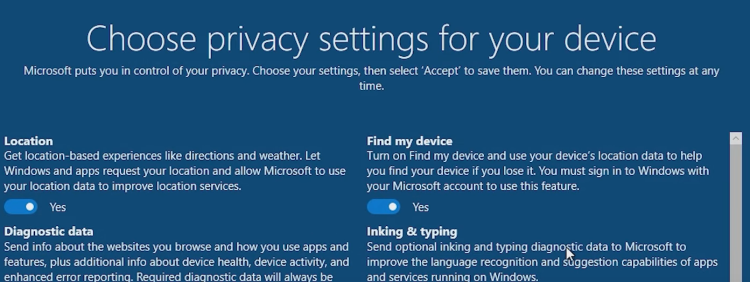
Privacy settings, you can go through and disable the ones you don’t like, but for now, I’ll just accept that.
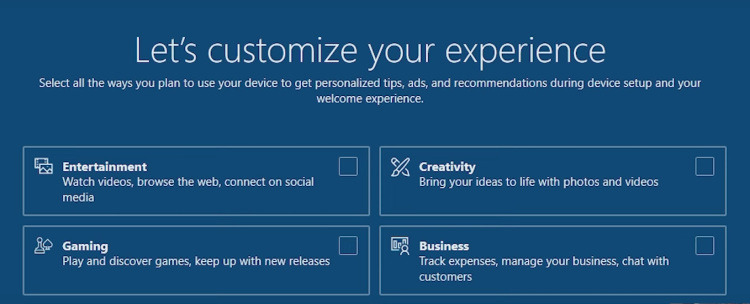
And let’s customize your experience. I’m going to click skip there; feel free to go through it if you’d like. Let Cortana help you get things done online, Not now.
Final Phase Of Windows Setup
And on this screen, it’s just kind of wrapping up the settings, preparing your user account, doing a few things in the background to get it ready.
And this is normal; it says Hi to you and tells you to wait a little while for everything to get ready. And eventually, the desktop screen will just pop right up.
Is The PC Missing Device Drivers?
And now we’re at our Windows desktop, so it looks like this machine did pretty good during the upgrade. One thing that you do need to check is to see that all of your device drivers were properly installed during the Windows installation process.
Often times there are bits and pieces, such as the video card driver, the network driver, various pieces of hardware that don’t work properly.
And you have to go out and actually download the software related to those parts and install it inside your fresh copy of Windows. So there’s a way to check out to see what is not loaded properly.
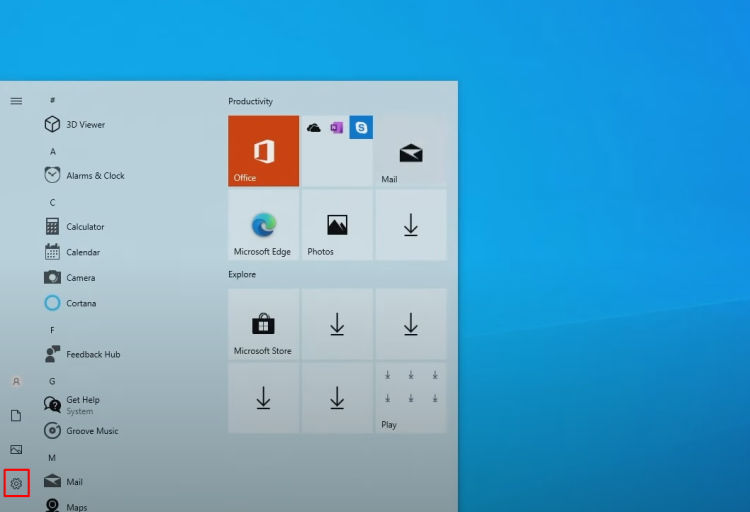
You can click on the Windows Start menu in the bottom left corner, click on the little Cog wheel for the settings, and then click on System.
Scroll all the way down on the column on the left and then click About, and you’ll see Device Manager.
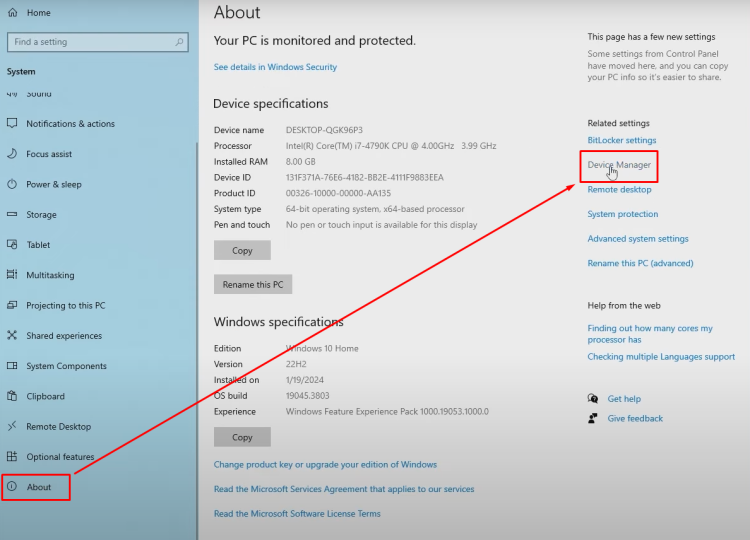
There’s probably a bunch of other ways to get there, but that’s one way to do it.
Once we click Device Manager, this will list all of the pieces and parts, and it’ll tell you if there’s any problems or trouble or missing drivers that are on the system.
This list actually looks pretty clean. See how everything is nice and neat, and there’s nothing standing out or indented.
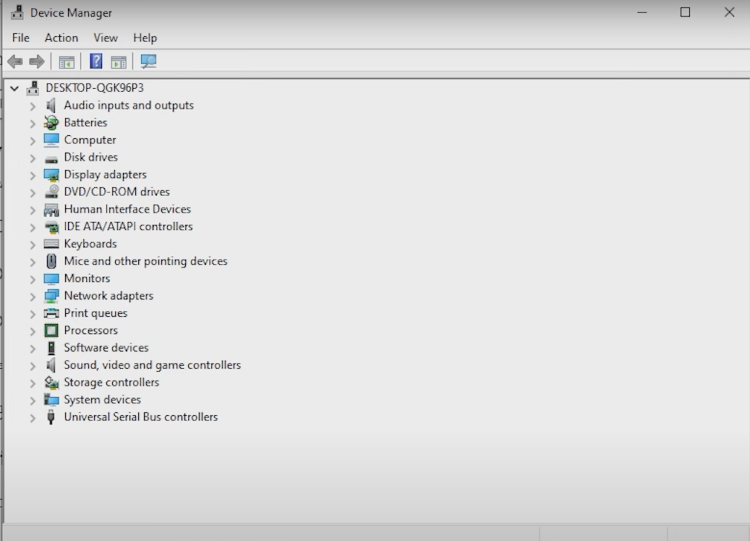
There’s no yellow triangles, so Windows actually had all of the device drivers that were required for this particular computer already loaded into that installation disc that we made.
But you might find that yours did not, like if your video monitor looks really bad, everything’s jumbo sized and low color, that would mean that your graphics driver was not included with what Windows downloaded and installed during the installation process.
Also, there might be if your network driver shows up as not being supported, then you won’t be able to go online.
Ways To Locate & Install Drivers
So in that case, what you have to do is go to another computer and look your PC up on the internet, go to drivers from the manufacturer, and locate the network driver file that you need.
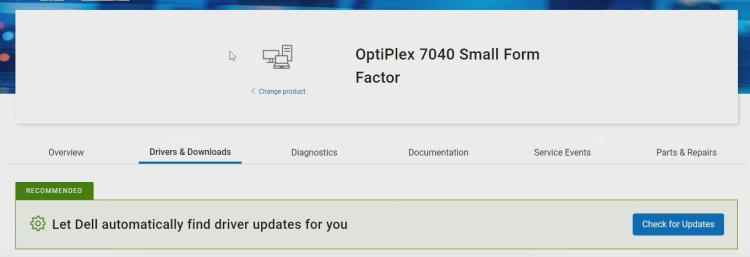
Copy it to a flash drive and then carry it over to the machine that’s having the trouble, and then install it. For example, using that Optiplex 7040 as an example, let’s open up Microsoft Edge, just assume this was another working computer, and our network card didn’t work.
We’ll go to google.com; they seem to give me the best answers and search results.
So let’s type “Dell Optiplex 7040 drivers.”
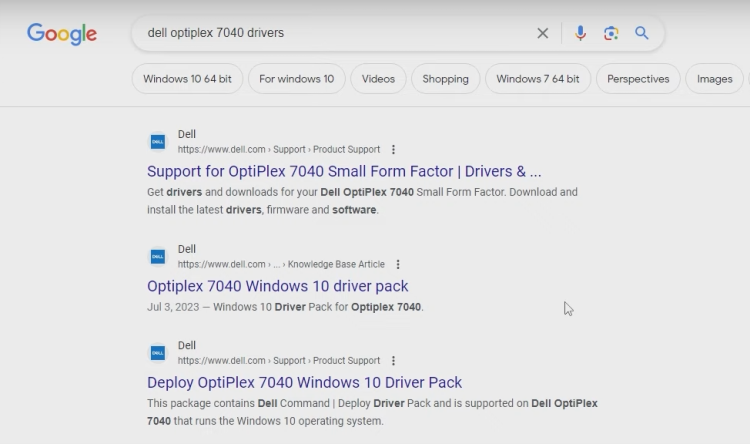
Make sure what you click on really is the manufacturer, but this one up here says dell.com support for Optiplex and it has drivers, so that sounds good to me.
Sometimes it’s a little tricky to find what you’re looking for, but eventually, you should be able to.
Other times, if you have a clone computer, they often come with a little DVD that has all the drivers on it, and you can use those to install the drivers by running the Setup program on the disc.
So in this case here, it looks like since we’re online, this supplies where it can automatically find them. But let’s assume we’re on a different computer.
So access the complete list of drivers for your Optiplex. We’ll hit expand, and let’s say that we just want to get it on the internet, and it’s not on the internet.
So we can change the category to, let’s see what they’ve got here, Network, Ethernet, Wireless, that sounds good; that narrows the list down, and it does have our Windows x64 bit.
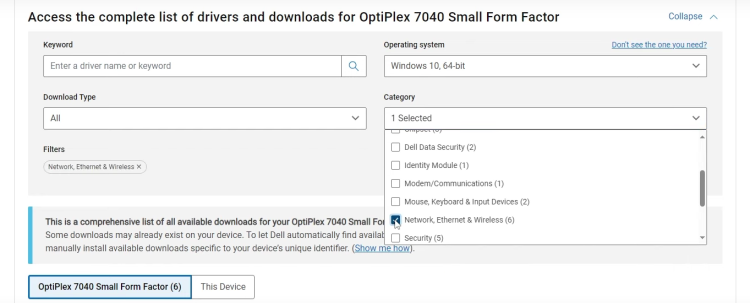
And looking at what they’ve got here, I guess that computer has a Wi Fi option, so Bluetooth and Wi Fi kind of go together.
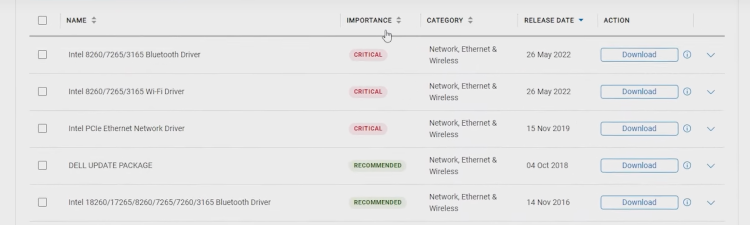
But if you were missing that driver, you’d want to download and install both of these files, or if you had the gigabit cabled connection and that wasn’t working and you’re plugged in, then it would be this PCIe Ethernet Network driver that you would need.
So let’s say if that’s the one, you would just click download and follow whatever instructions that manufacturer puts you through.
This one looks pretty simple; it found the file, downloaded it, and then we can right click and show in folder, and there’s the file.
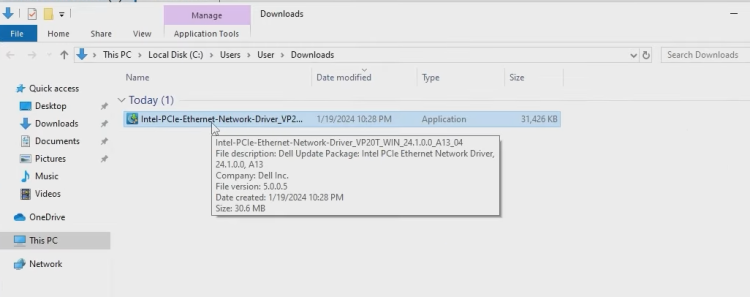
So you’d want to take that file, save it on the flash drive, take the flash drive back over to the machine that needs it, and then when you plug it in, it should pop up, and you can double click this file to install the driver for the network, and now you’re online.
So just that one (network adapter) driver seems to be the most important, and once you’re online, you’ve got really three different ways to go.
One is to go through that drivers list and download each and every one; that takes a long time. It’s probably not worth it being the first thing you try.
Windows Update To Install Drivers
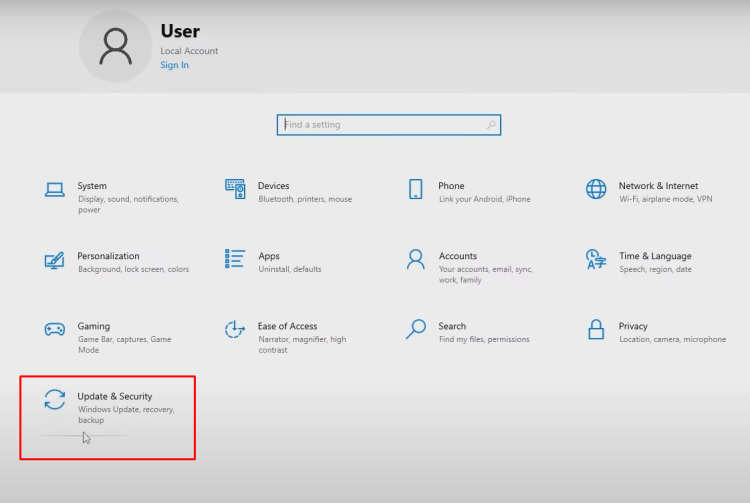
But one easy thing is to click the start button, click settings now that it’s online, and then go to Update & Security.
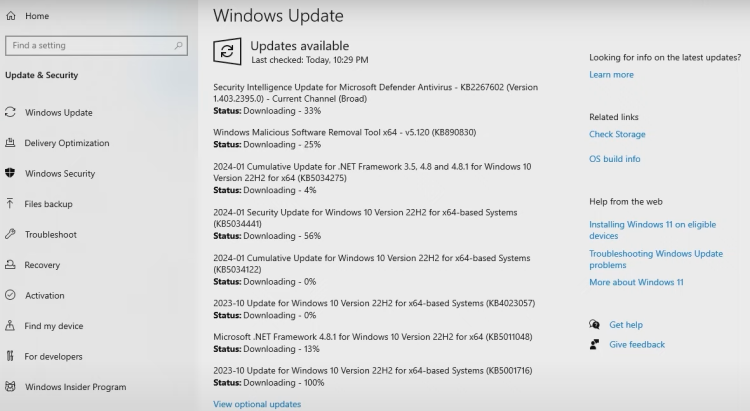
Often, if you click on Check for updates, Windows 10 will go out and reference the Windows 10 driver database, try to figure out exactly what you need, and then it’ll pull it down and install it.
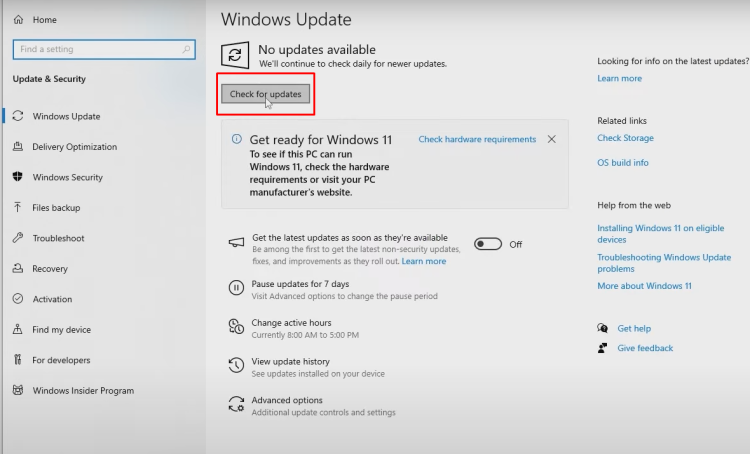
So you can see it does have a whole bunch of stuff, but often if you need drivers, they’ll come in like that. Of course, you can manually install them, but there’s one more trick.
Install Remaining Windows Updates
Anyway, now you’ve got a perfectly cleanly installed Windows 10 computer. If you go ahead and make sure all of the Windows updates are installed, you’ll be in great shape.
So at this point, you can load it up with programs, customize it, put your software on there, anything you want to do, knowing that it’s completely, freshly reloaded, and all the problems from the past are gone.
Now you’ve got a perfectly cleanly installed Windows 10 computer. If you go ahead and make sure all of the Windows updates are installed, you’ll be in great shape.
So at this point, you can load it up with programs, customize it, put your software on there, anything you want to do, knowing that it’s completely, freshly reloaded, and all the problems from the past are gone.