If you’ve ever wanted to try Android on your computer without fully committing to installing it, creating a bootable USB is a great option. It’s perfect for testing Android, running apps on a different system, or even using it on a laptop with limited resources.
You can boot Android from the USB drive on almost any compatible machine, without messing with your main operating system. In this guide, I’ll walk you through the simple steps to make your very own bootable Android 8.1 USB, so you can enjoy Android anywhere you go.
Download Android ISO
To begin, we’re going to open up our browser and head over to android-x86.org. This is the official site where you can find various Android operating system ISO image files.
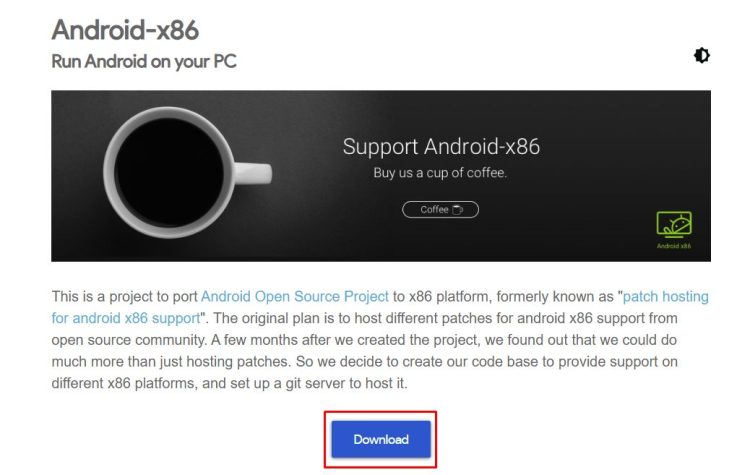
The first thing we’re going to do is click on the download option right here, and it’ll show you a few sites where you can download these images. You can get it from Fasthub or OSDN. I’m going to go to the SourceForge website, so click on that.
If you scroll down a bit, you’ll see the Release 8.1. If you go further, you can find version 7, version 9, version 6, and so on.
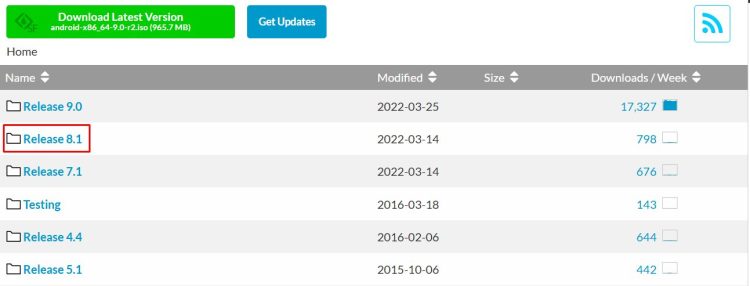
You just need to choose the version of the Android operating system that you want to download. Make sure to get the ISO image file, not the RPM. So, let’s go ahead and download the ISO file for Android 8.1. Click on it, and it will take you to the download page, where the download will start automatically.
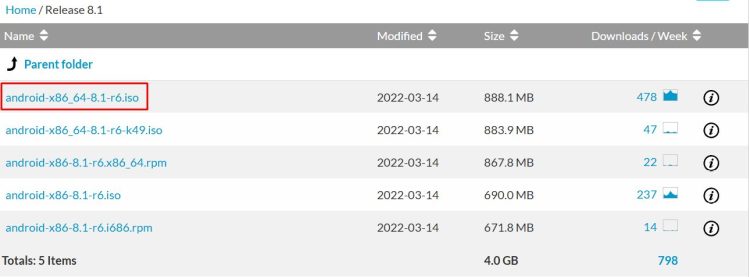
We’ll let that download, and I’ll jump over to the next step.
Download and Install Rufus
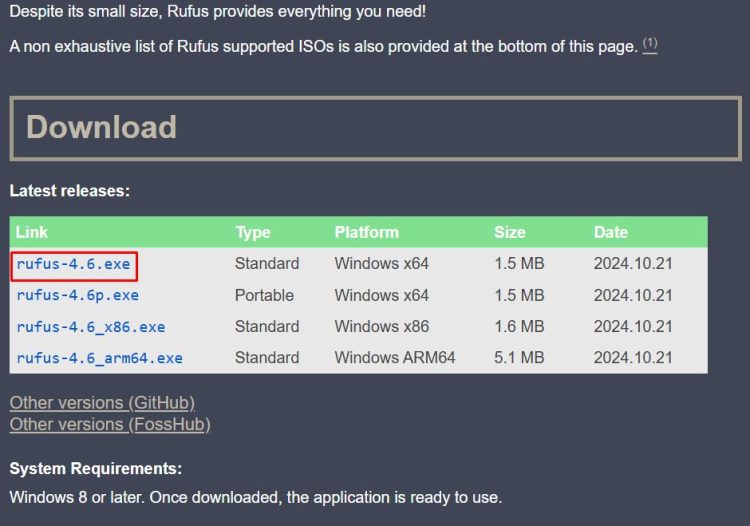
Now, we’re at rufus.ie, the official site to download the Rufus bootable USB creation tool. I’m going to download it and install it on my computer. The latest version is 4.6. Let’s click on it, and we’ll wait for it to download.
Double-click to open it, say “Yes” to the prompt, and it’ll ask if you want Rufus to check for application updates online. I’m okay with that, so I’ll select “Yes.”

Prepare the USB Flash Drive
Now we have Rufus installed, and here is the main screen. First, I’m going to plug in a USB flash drive. For this video, I’m using the DataTraveler G4 16 GB USB flash drive.
It’s a cheap, reliable flash drive, and I’ve used these many times with no issues, so I definitely recommend them. I’m just going to plug it in.
Select the Android ISO in Rufus
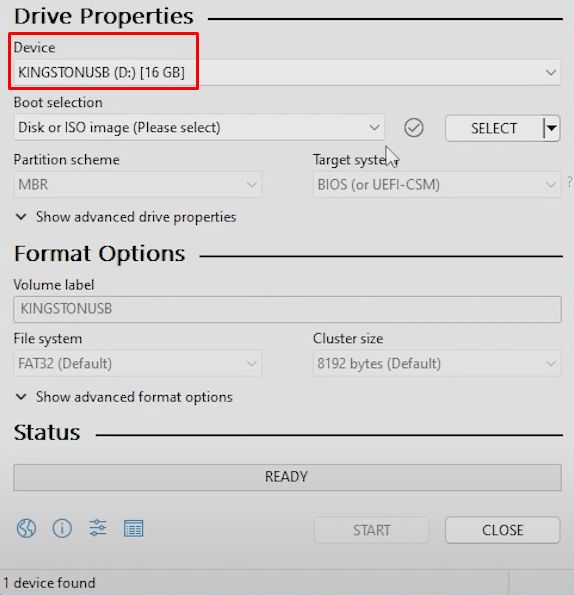
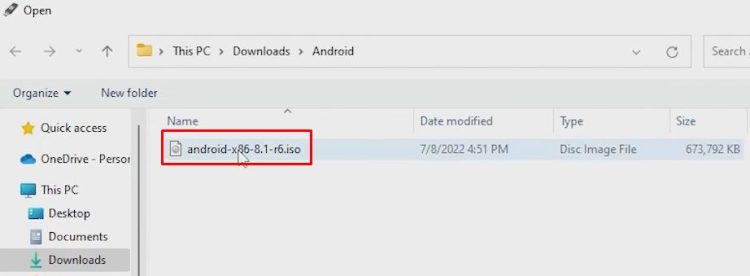
Once plugged in, you’ll see the device listed at the top of Rufus. Next, we’re going to select the operating system. I already have it downloaded in my Downloads folder. Here’s my Android 8.1-r6 ISO image file.
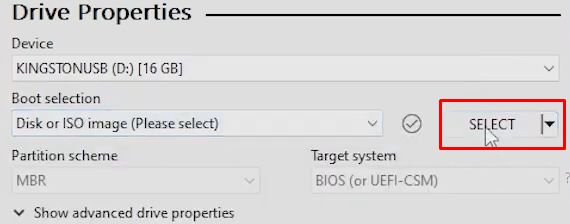
I’ll select it by navigating to the Downloads folder, clicking on it, and then clicking the “Open” button.
Configure Rufus Settings
We’ll leave the partition scheme as default, the target system as default, and I’ll just shorten the volume label to “Android 8.1.” The file system will stay as FAT32, and the cluster size will remain as default.
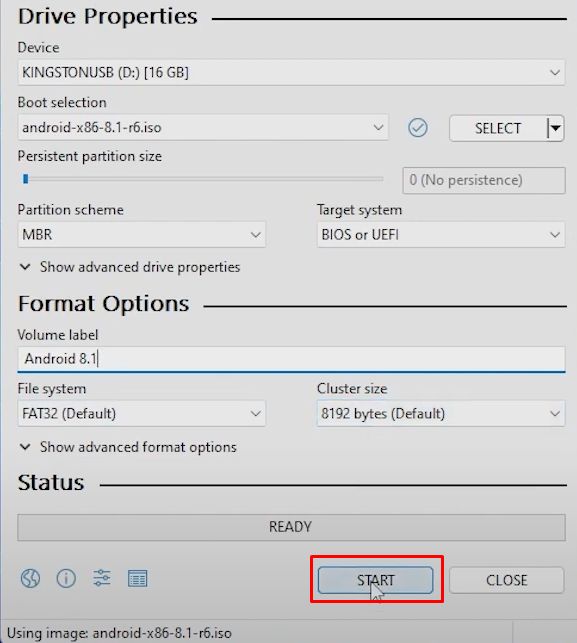
Once everything is set, go ahead and click on the “Start” button.
Confirm Warnings and Start the Process
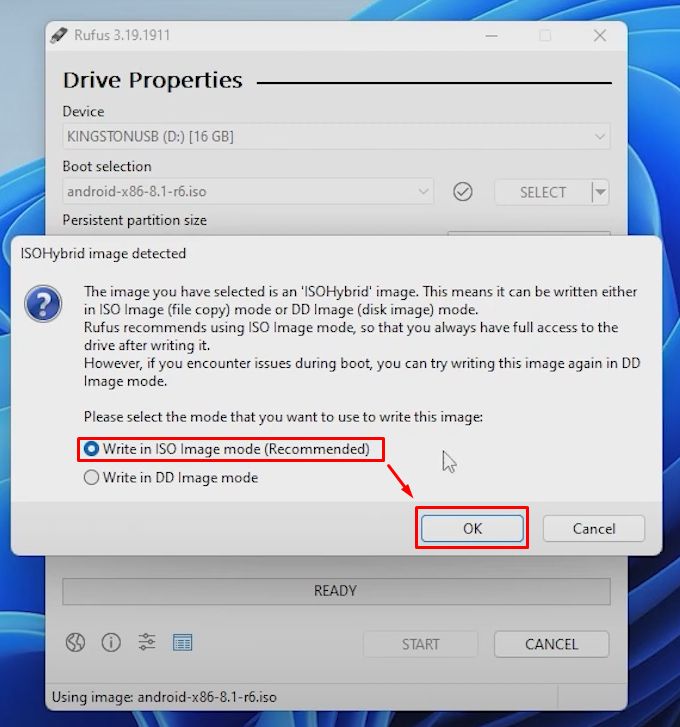
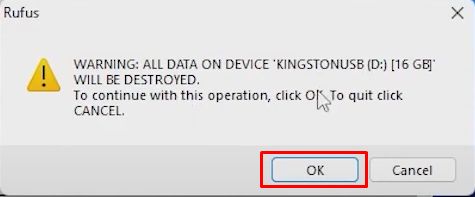
You’ll get a prompt to “Write in ISO image mode,” which is recommended, so click “OK.” Another prompt will let you know that this will completely wipe out the drive. Click “OK” to confirm.
You might also get a prompt to download a subsystem for Linux, which is required for booting up. I already have it on my PC, so it should proceed right away. Now, we just need to wait while it copies over all the files.
Once the process is complete, you’ll see that it says “Ready.” Go ahead and click “Close.”
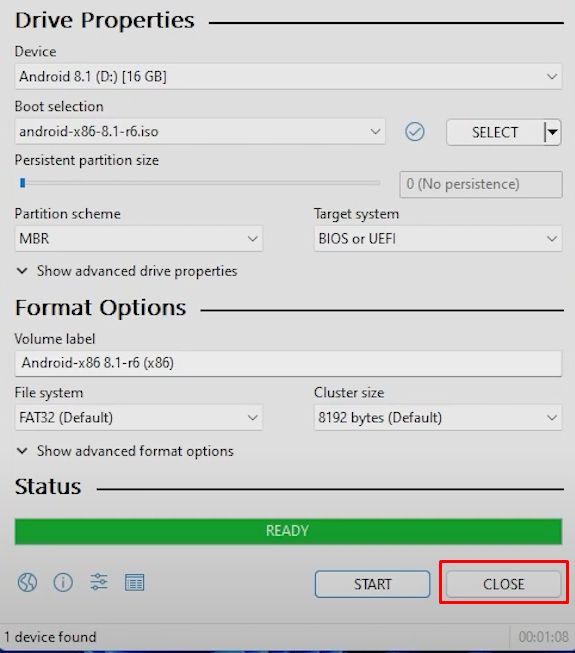
We’ve now created a bootable version of Android 8.1 on a USB drive. And that’s it!
Optimize Your Portable Android Setup
Running Android from a USB isn’t just for testing — it’s a gateway to mobile apps on any PC! For music enthusiasts, supercharge your experience with the spotify mod apk. This version unlocks premium features like ad-free streaming, unlimited skips, and offline downloads — ideal for enjoying music on the go without draining your phone’s battery.
Why install this mod?
- No ads, no subscriptions — perfect for portable setups
- Download playlists directly to your USB drive
- Works seamlessly on Android 8.1 and newer
- Great for testing apps in a sandboxed environment
Install the APK on your bootable Android system, and you’ll have a portable music powerhouse ready for any computer!
Conclusion
And there you have it—creating a bootable USB drive for Android 8.1 is simple and quick with the right tools. Whether you’re exploring Android as a secondary OS or just want to experiment, having Android on a USB drive opens up countless possibilities.
