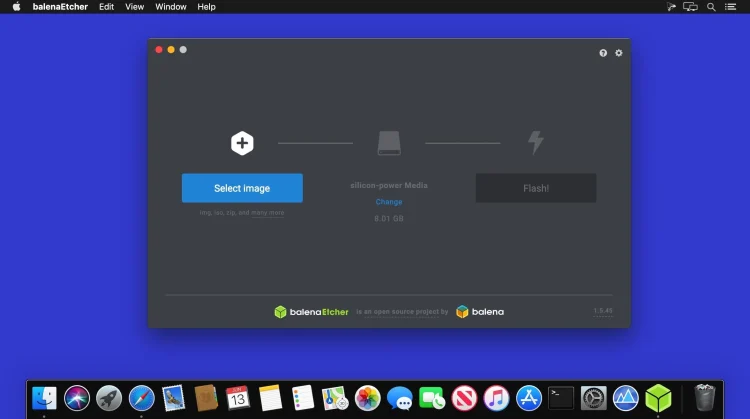
I’m going to show you how to create a bootable USB drive if you have an ISO image and you’re installing a new operating system on a computer, or you need to create a rescue image or something of that nature.
Choosing the Tool: Balena Etcher
There are lots of rescue tools out there that are bootable ISOs. This is the way to get it done. So today I’m showing you on my MacBook Pro, and we’re going to be using what’s called Balena Etcher. It’s a tried and true method for me. I’ve been using it for years. I have since found other options to do this, and they are much simpler. In future discussions, I’ll be going over those, but for now, let’s take a look at Balena Etcher.
Prerequisites:
- USB Stick: Ensure you have a compatible USB stick with sufficient capacity to hold the ISO image and to serve as the bootable drive. A USB stick with a minimum capacity of 16GB is recommended to accommodate the ISO image and provide ample space for the bootable drive. Using a smaller capacity USB stick may result in insufficient space for the ISO image or limitations in the bootable drive’s functionality.
- Operating System Image in ISO Format: Obtain the ISO image of the operating system or rescue tool you intend to use. It’s crucial to download the correct ISO image compatible with your system architecture and intended use. Using an incompatible or corrupted ISO image may lead to failed installations or system errors during the booting process.
- Balena Etcher Software: Download and install Balena Etcher on your macOS system. Balena Etcher is a reliable tool designed specifically for creating bootable USB drives from ISO images. You can find the software on the Balena Etcher website, ensuring you download the appropriate version compatible with your macOS operating system. Balena Etcher simplifies the process of flashing the ISO image onto the USB drive, making it bootable with just a few clicks.
Steps:
1. Downloading Balena Etcher
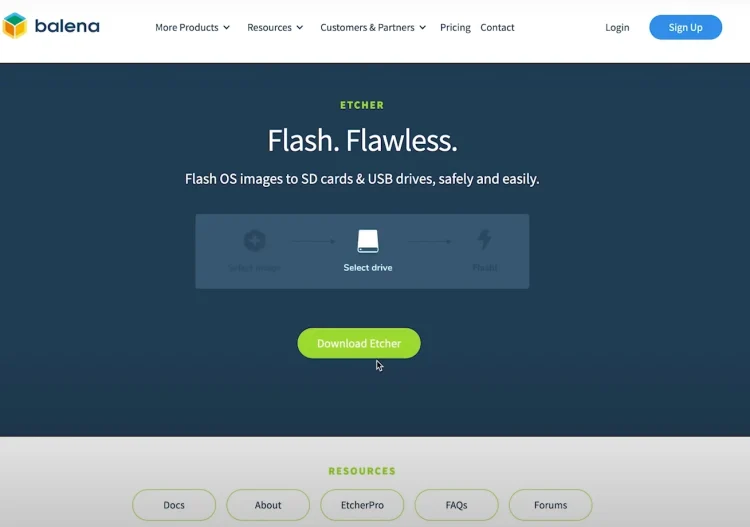
So if you search for Balena Etcher on Google, you’ll pull up their website. And like I said, this is for macOS. Right here, you can download Etcher. That way, you don’t have to search. But if you do need to search, you can certainly find it that way.
2. Selecting the ISO Image
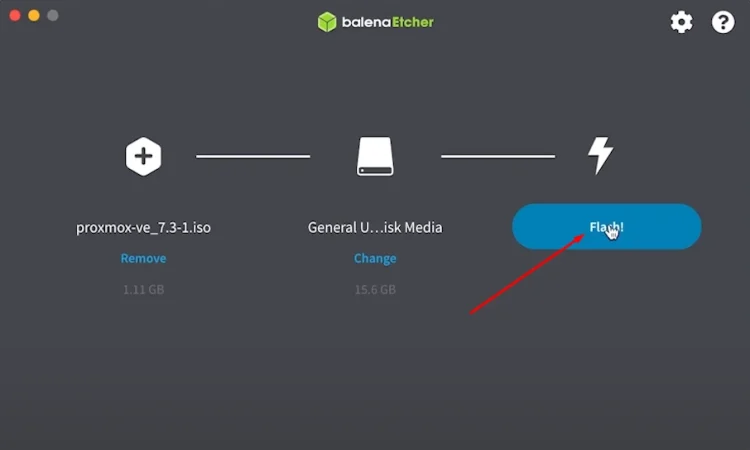
So if we pull up my Balena Etcher here, I’ve already picked out an ISO image, which is Proxmox VE.
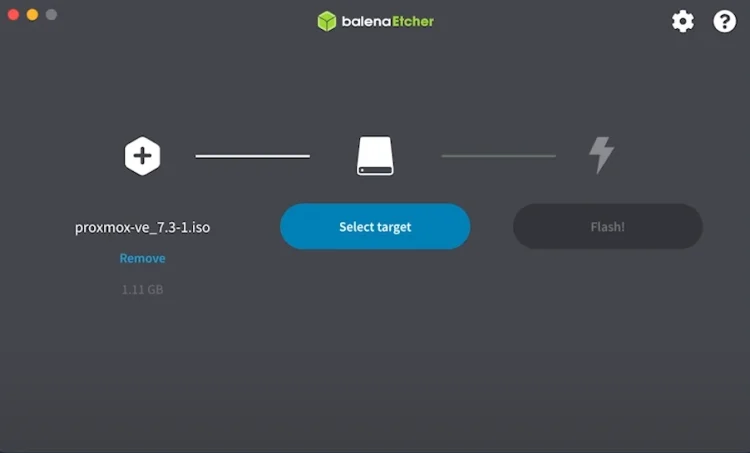
At the time that I downloaded it, it was 7.3.1. It’s since been upgraded; I’m not sure where they’re at just yet. I’d have to go back and look, but I know it’s beyond that. So I’m just using this one as a demo.
3. Setting Up the USB Drive
And then we’ll select our target. Right now, I’ve got a 16GB target drive for you there.
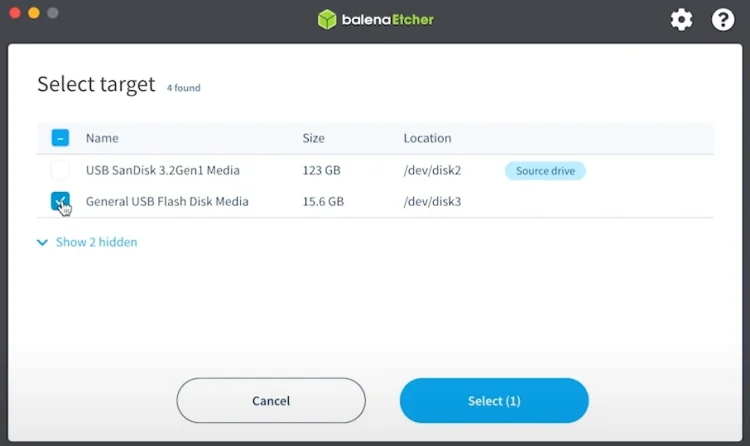
This is on my 128GB source drive. The Proxmox ISO is on my 128GB USB drive using Ventoy or MediCat. I’ll be doing articles on both of those, but for now, like I said, we’re just using Balena Etcher. So we’ve selected our flash drive, and then it’s as simple as clicking “Flash.”
3. Flashing the Drive
Then it’ll run for a bit. Oh, it wants my password. Let’s see… there we go.
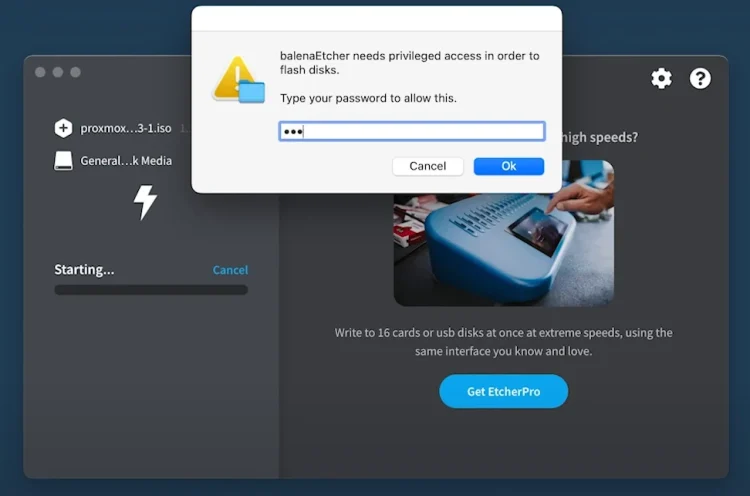
Okay, as you can see over here on the right-hand side, it’s starting, and then what will happen is it’ll actually flash, and then it will go back and check.
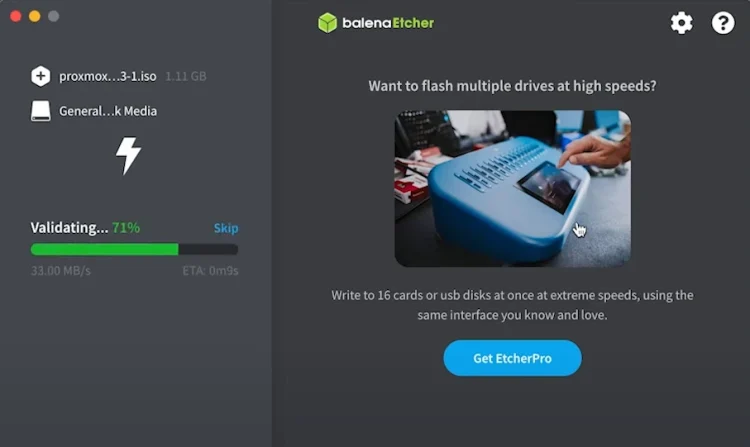
Once you’ve got that flashed, it will tell you that you can go ahead and remove that media, and you’ll be good to go.
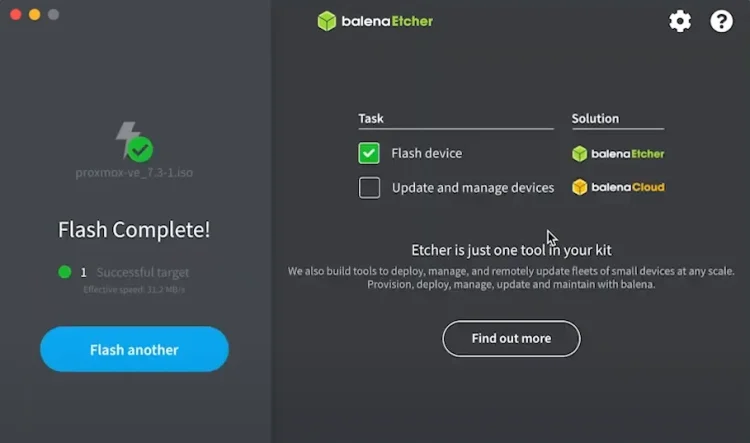
All right, guys, so there you go. You can see the flash is complete, and like I said, this is for macOS, Balena Etcher, and it’s a way to make a bootable USB drive out of an ISO. So you can install Linux or Proxmox, which is Linux-based, or use utilities like password recovery utilities or things of that nature if you’ve locked yourself out of your OS.
Conclusion
In wrapping up, I’ve walked you through the steps of creating a bootable USB drive using Balena Etcher on macOS, a method I’ve personally relied on for years. While acknowledging there are simpler alternatives out there, I’ve chosen to focus on Balena Etcher for its reliability and effectiveness. Through this guide, I’ve aimed to provide a clear pathway for installing new operating systems or creating rescue images, leveraging the power of technology to simplify these tasks.
