When booting a pen drive, it’s crucial to understand whether it uses the Master Boot Record (MBR) or GUID Partition Table (GPT) format. This distinction is essential to avoid potential data loss or boot errors. In this tutorial, we’ll guide you through the process using Rufus bootmaker, ensuring a smooth and error-free experience.
We’ll demonstrate how to determine whether your pen drive uses MBR or GPT and how to configure it accordingly using Rufus.
Do you want to install Windows 10 on your device? Use our detailed step-by-step guide.
Follow these steps to ensure your pen drive is correctly set up for booting, whether you’re installing a new operating system or creating a bootable drive for other purposes.
Preparing the Environment
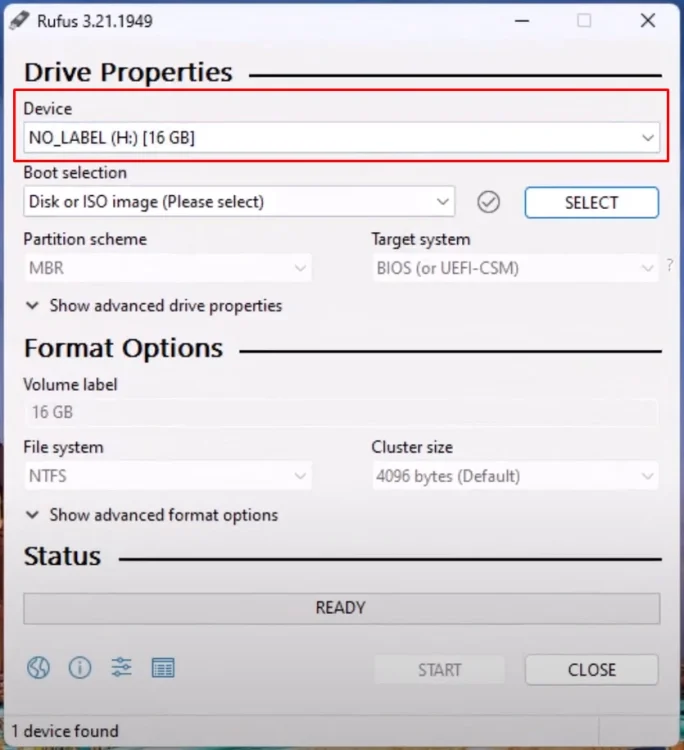
- Connect your pen drive to your computer and open Rufus.
Selecting the Windows 11 ISO File
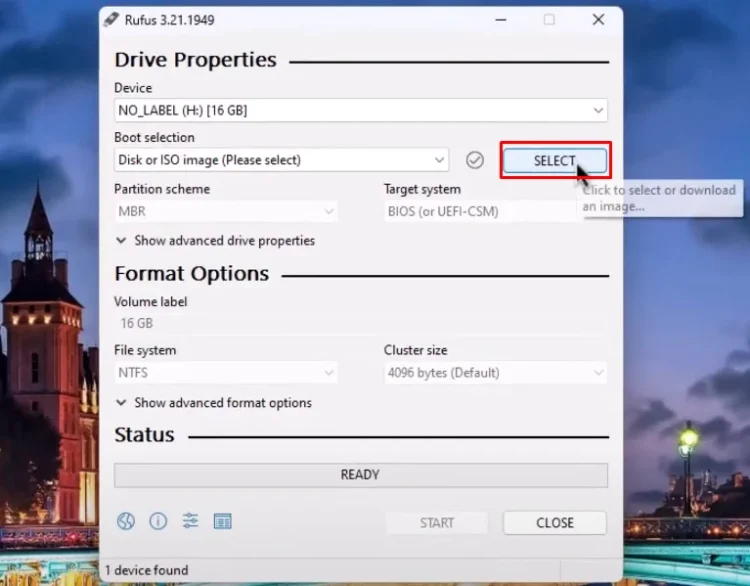
- Select the Windows 11 ISO file.
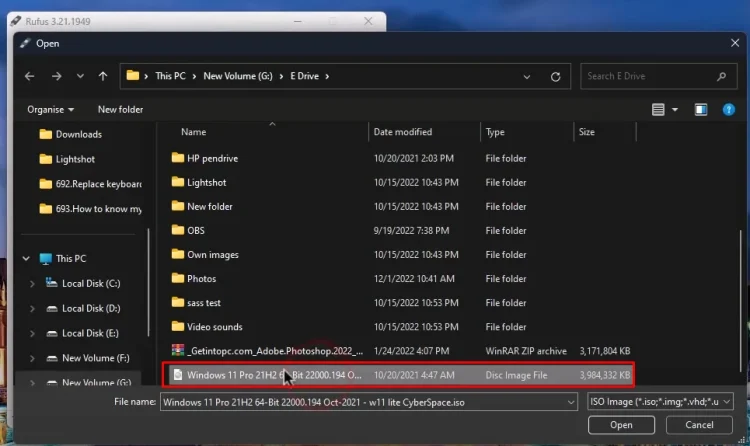
- Find the ISO image file in explorer and select it.
Determining the Partition Scheme
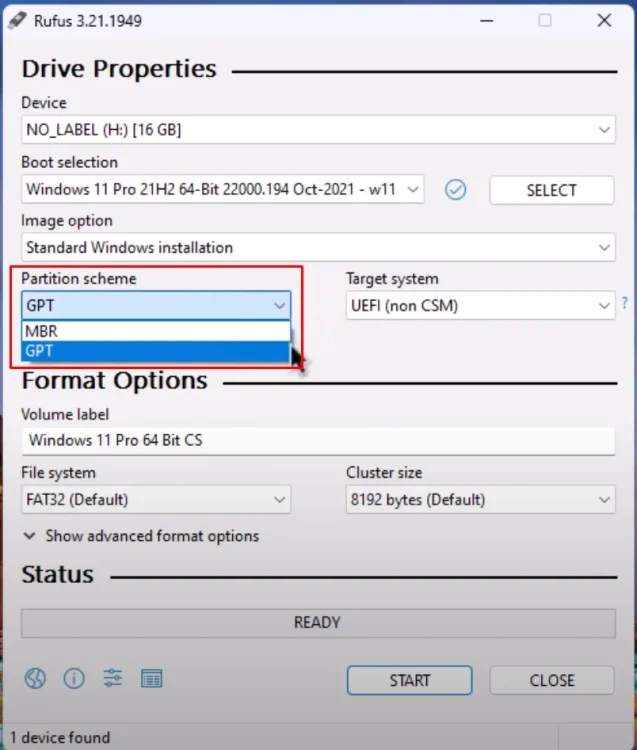
- Choose the appropriate partition scheme (MBR or GPT).
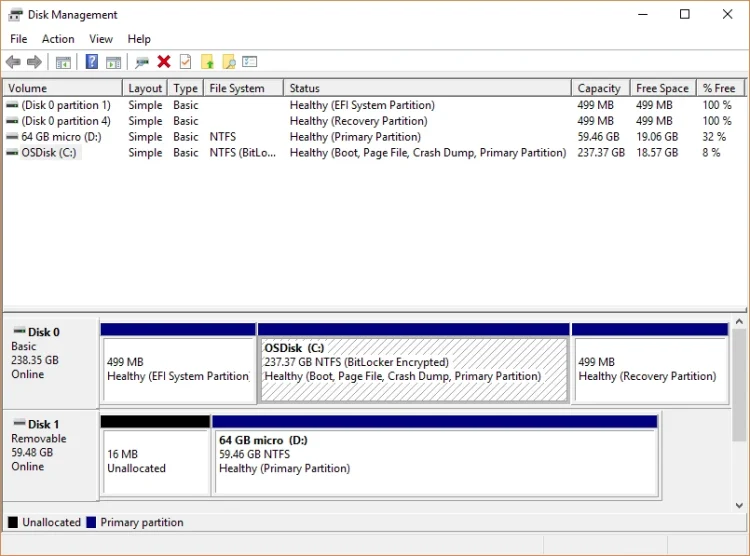
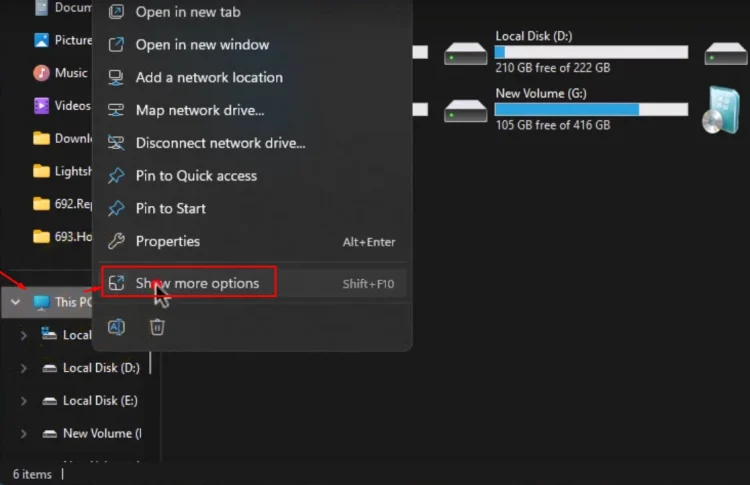
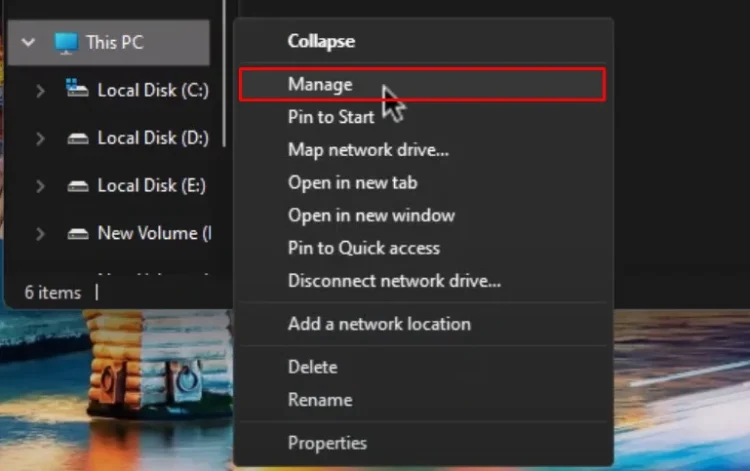
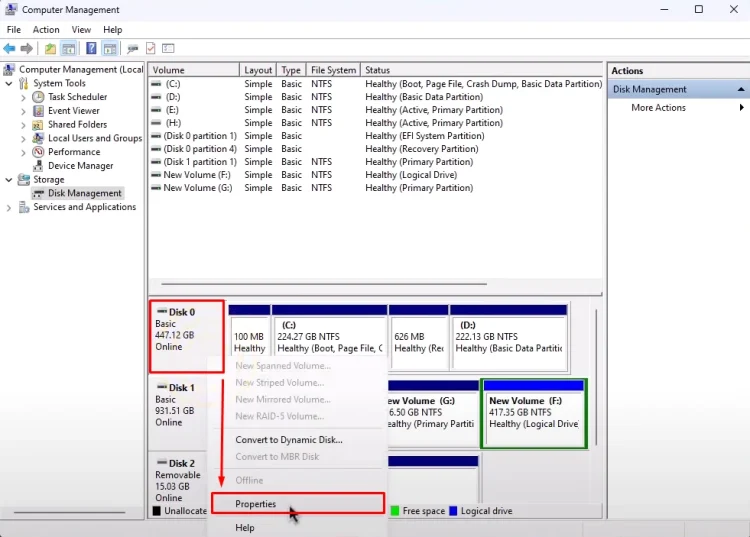
- To determine which scheme your pen drive currently uses, open This PC and select Show more options, then Manage.
- On Disk Management Disk 0 is C drive, and we need to check it for MBR or GPT.
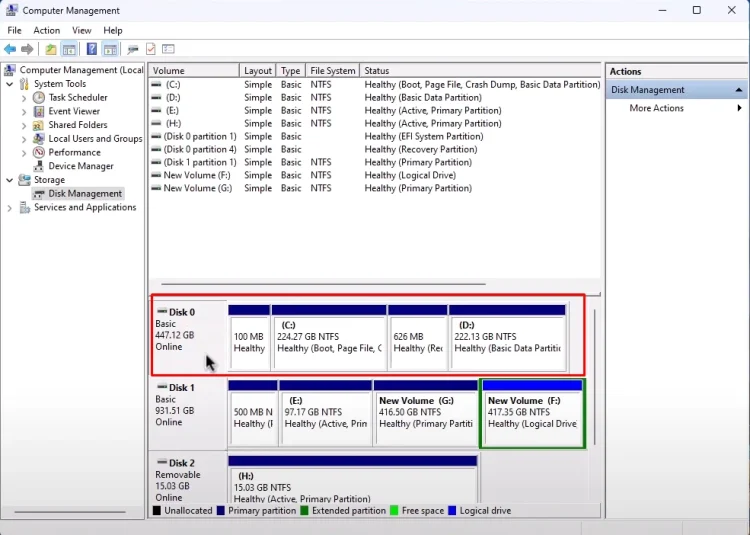
- Right-click on the pen drive and select Properties.
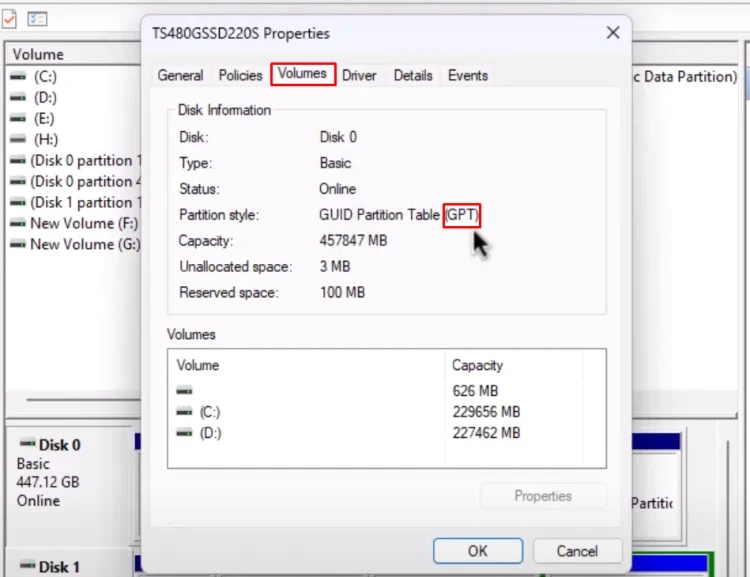
- Under the Volumes tab we will find the partition scheme of your drive, and this is what we have to select on Rufus. Mine is GPT.
- Back to Rufus again, choosing GPT, and continue. Click Start to begin the process.
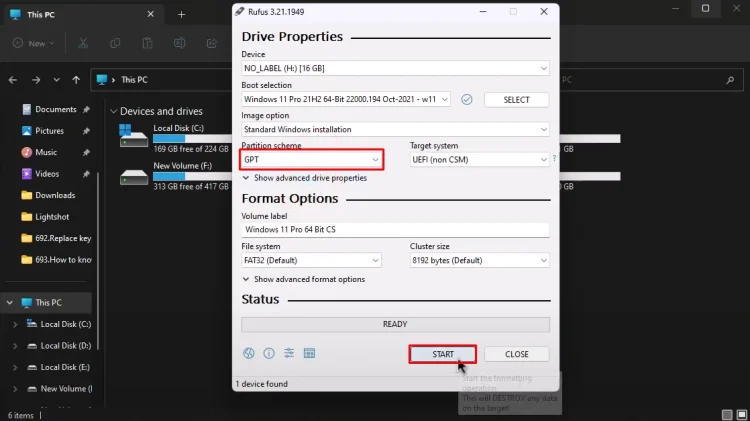
Rufus will format your pen drive and initiate the bootable drive creation.
By following the steps outlined, including checking the partition scheme in Disk Management and configuring Rufus accordingly, you can ensure a smooth and error-free bootable drive creation process.
By implementing these steps, you’ll be equipped to handle any booting issues with ease and confidence, ensuring a seamless experience every time.
