
Many older devices, such as older computers, cameras, and media players, only recognize FAT32. To ensure compatibility, format your USB drive to FAT32. FAT32 is also required for creating bootable USBs for installing operating systems or running diagnostic tools.
Despite its 4GB file size limit, FAT32’s broad compatibility makes it a popular choice. This article provides step-by-step instructions using various methods in Windows.
Prerequisites
Before formatting, ensure you have:
- A Windows PC: Running Windows 7, 8, 10 or 11.
- Administrative Access: To execute formatting commands.
- A USB Drive: Preferably 32 GB or smaller for easier formatting.
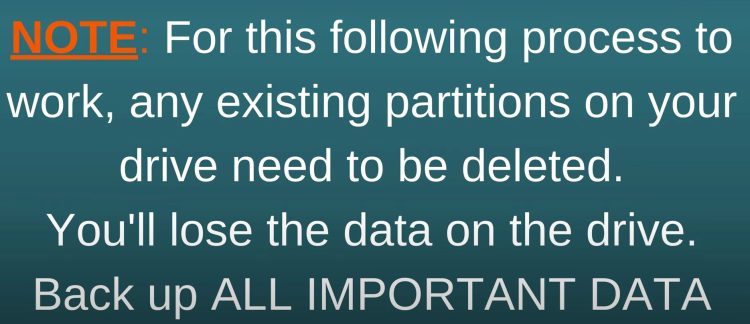
- Backup: Save any important files, as formatting will erase all data.
Important: The first two methods (File Explorer and Disk Manager) only work for drives 32 GB or smaller. For larger drives, use the third or fourth method.
Method 1: Format a 2GB-32GB USB Drive to FAT32 with File Explorer
- Insert the USB Drive: Plug your USB drive into a Windows 10 PC.
- Open File Explorer: It should open automatically. If not, click the folder icon on your taskbar or search for “File Explorer.”
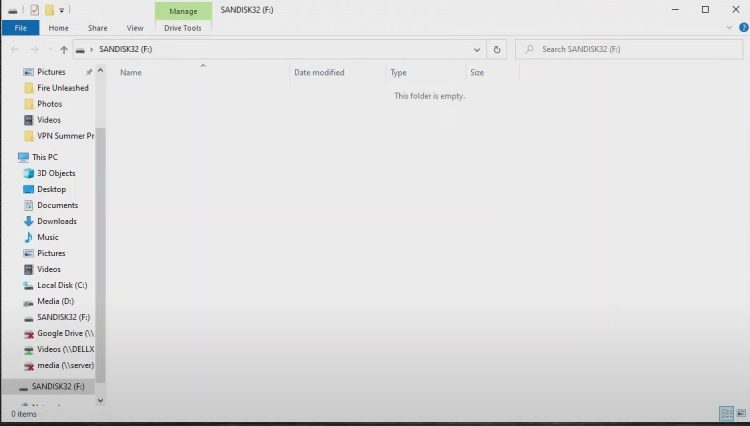
- Locate Your USB Drive: Find it listed in File Explorer, usually labeled with the drive name.
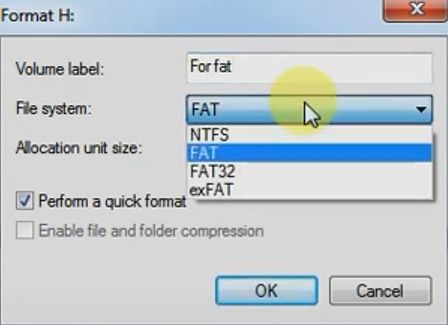
- Format the Drive:
- Right-click the USB drive and select “Format.”

- In the Format window, select “FAT32” from the “File System” drop-down menu.
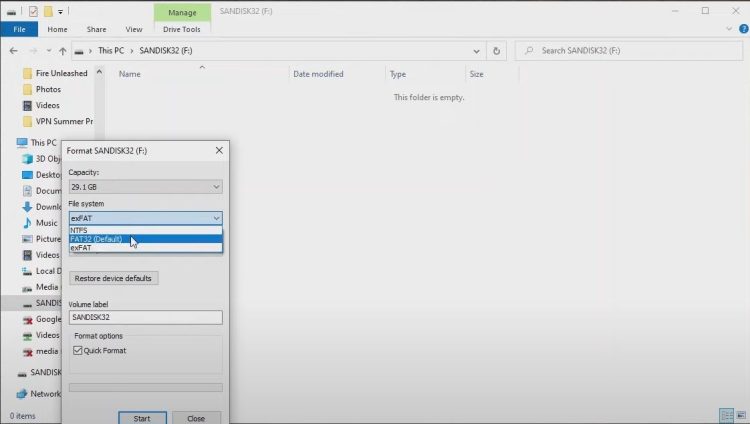
- Optionally rename the drive in the “Volume Label” field.
- Ensure “Quick Format” is checked and click “Start.”
- Right-click the USB drive and select “Format.”
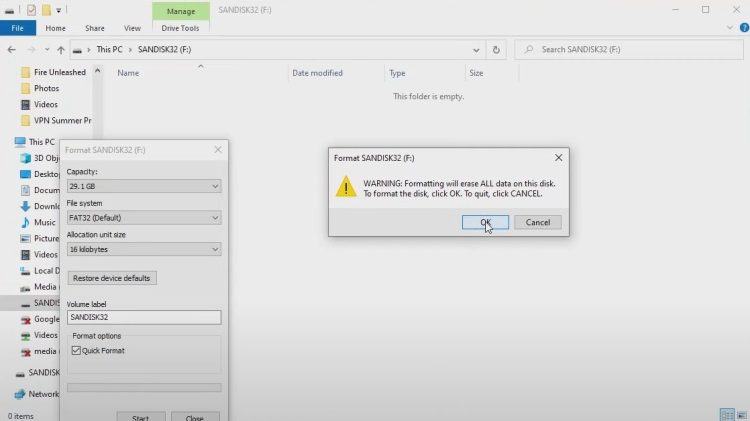
- Confirm and Complete:
- Click “OK” when prompted that all data will be erased.
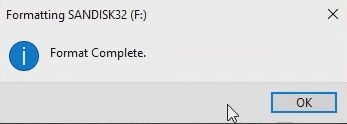
- Wait for the process to finish and click “OK” when done.
- Click “OK” when prompted that all data will be erased.
- Safely Eject the Drive:
- Click the up arrow in the bottom-right corner of your screen.
- Select the USB icon and click “Eject [Drive Name].”
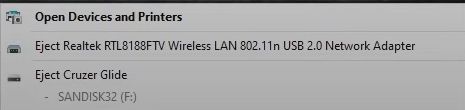
- Wait for the message that it’s safe to remove the drive, then unplug it.
Your USB drive is now formatted to FAT32!
Method 2: Format a 2GB-32GB USB Drive to FAT32 with Disk Management
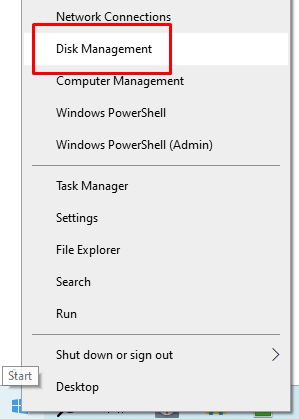
- Open Disk Management:
- Right-click the Windows icon on your taskbar.
- Select “Disk Management” from the menu to view all connected drives.
- View Connected Drives:
- In Disk Management, locate your USB drive. Be careful to select the correct drive to avoid formatting system drives (e.g., C: or D:).
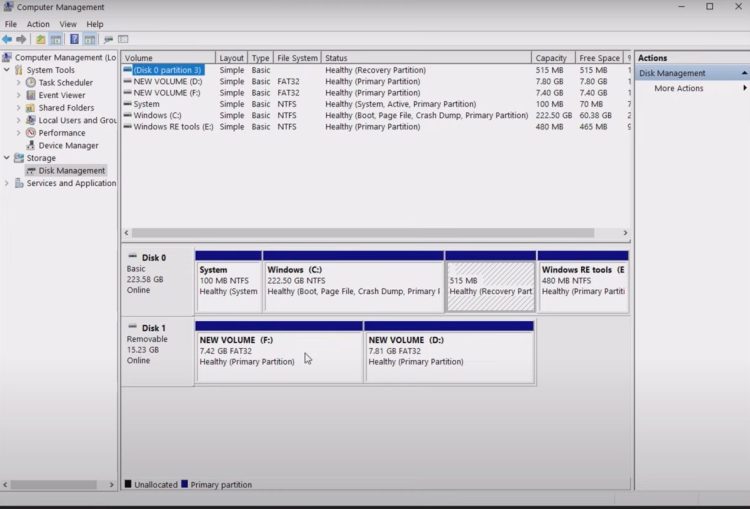
- In Disk Management, locate your USB drive. Be careful to select the correct drive to avoid formatting system drives (e.g., C: or D:).
- Format the Drive:
- Right-click the USB drive and select “Format.”
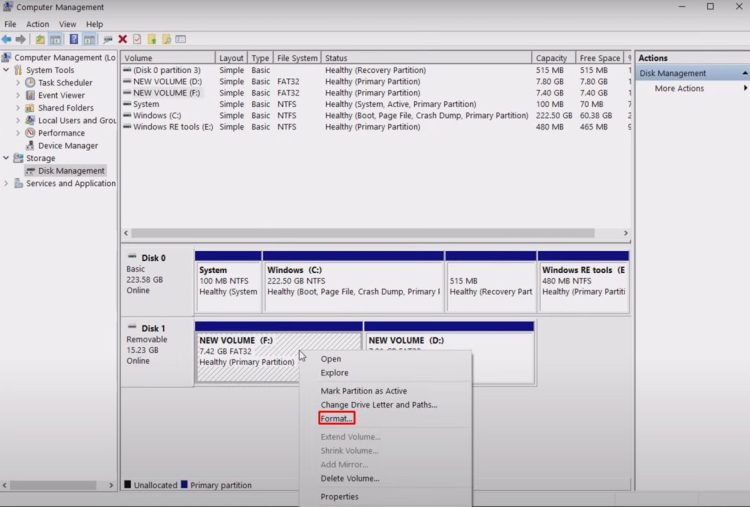
- In the format window, choose “FAT32” for drives 32GB or smaller.
- Click “OK” to start formatting.
- Right-click the USB drive and select “Format.”
- Complete the Process:
- Once formatting is finished, close Disk Management.
- Safely eject the drive by clicking the USB icon in the system tray and selecting “Eject [Drive Name].”
Your USB drive is now formatted to FAT32. For larger drives, use a third-party tool to format to FAT32.
Method 3: How to Format a Large USB Drive (2GB-256GB) to FAT32 Using DiskPart in Command Prompt
- Open Command Prompt as Administrator
- Search for “Command Prompt” in the Windows search bar.

- Right-click on it and select “Run as administrator.”
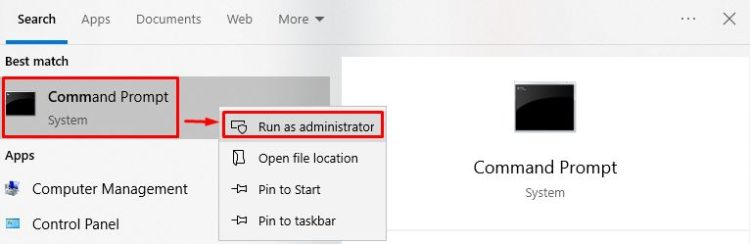
- Search for “Command Prompt” in the Windows search bar.
- Launch DiskPart Utility
- Type
diskpartinto the Command Prompt window and press Enter. This launches the DiskPart utility.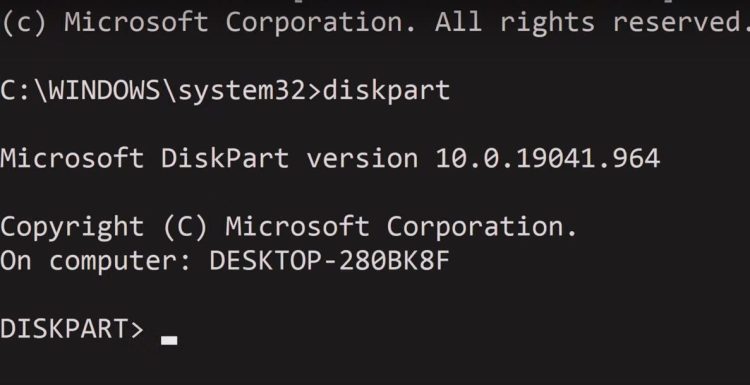
- Type
- List Available Drives
- Type
list diskand press Enter. This will display all the available hard drives on your machine.
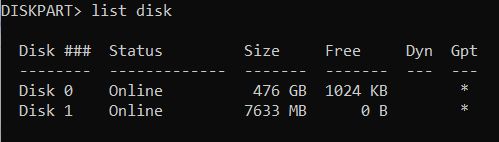
- Type
- Select Your External Hard Drive
- Note the number assigned to your external hard drive.
- Type
select disk n, replacingnwith your drive number, and press Enter to confirm.
- List Volumes
- Type
list volumeand press Enter. This will display all the volumes on the selected disk.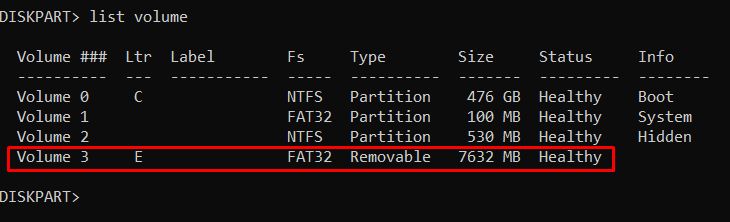
- Type
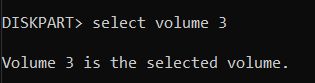
- Select the USB Drive Volume
- Note the volume number of your USB flash drive.
- Type
select volume n, replacingnwith the volume number of your USB flash drive, and press Enter.
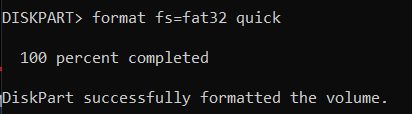
- Format the USB Drive
- Type the following command to format your USB drive:
format fs=fat32 quick
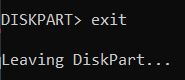
- Type
exitand press Enter to exit the DiskPart utility.
- Type the following command to format your USB drive:
Method 4: How to Format a Large USB Drive (2GB-256GB) to FAT32 Using Rufus
To format a USB drive larger than 32GB to FAT32, use the free utility Rufus:
- Download Rufus:
- Visit the Rufus website.
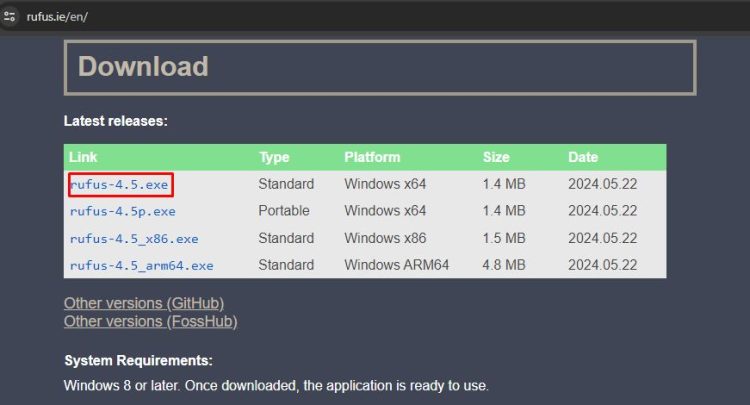
- Download the latest version.
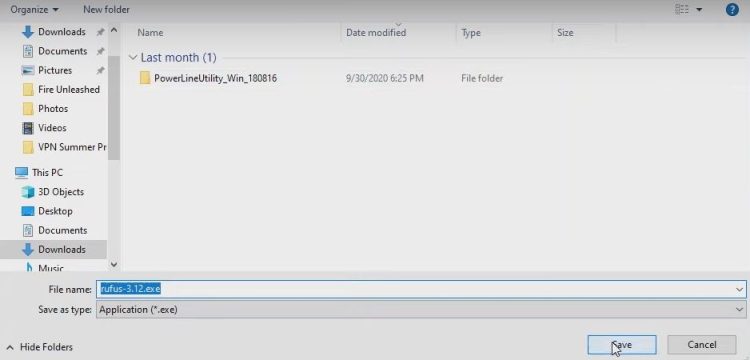
- Visit the Rufus website.
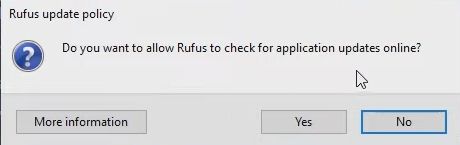
- Install Rufus:
- Open the downloaded file.
- Allow the app to make changes and check for updates if prompted.
- Select Your USB Drive:
- In Rufus, choose your USB drive from the dropdown menu.

- In Rufus, choose your USB drive from the dropdown menu.
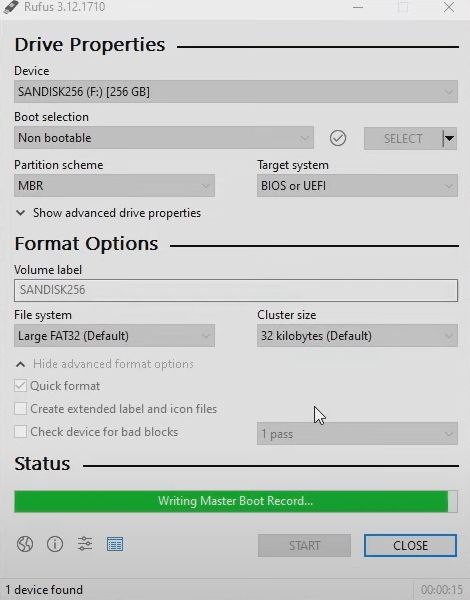
- Set Up Formatting Options:
- For “Boot selection,” select “Non bootable.”
- Set “File system” to “Large FAT32.”
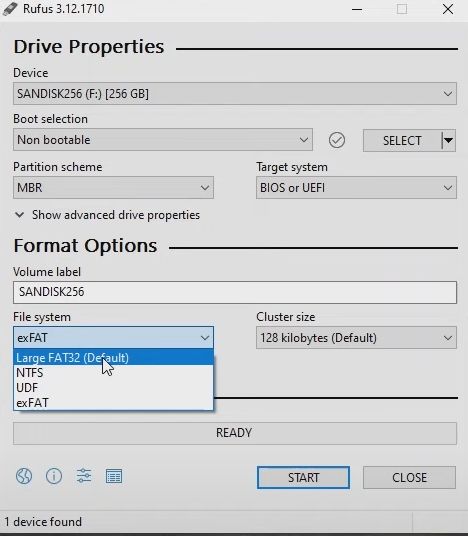
- Optionally, change the “Volume Label.”
- Uncheck “Create extended label and icon files.”

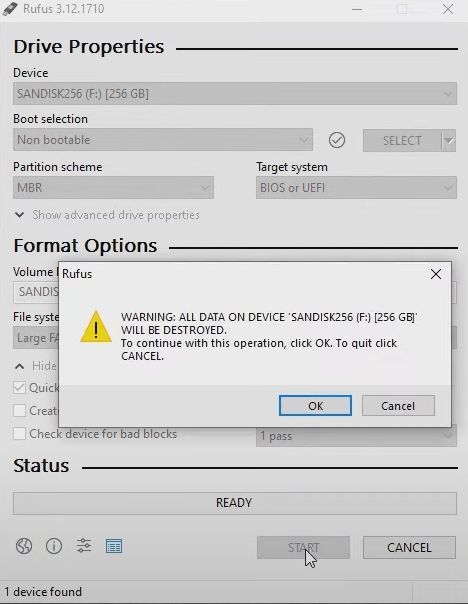
- Start Formatting:
- Click “Start.”
- Confirm that all data will be erased and click “OK.”
- Complete and Eject:
- Wait for the formatting to finish.
- Close Rufus and safely eject the USB drive by clicking the USB icon in the system tray and selecting “Eject [Drive Name].”
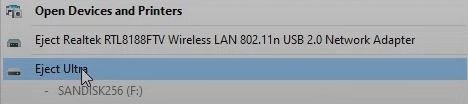
- Wait for the formatting to finish.
Your USB drive is now formatted to FAT32 and ready for use!
Understanding FAT32
FAT32 is an older file system that has been in use for many years. Despite its age, it remains widely compatible with a variety of devices and operating systems. Here’s a summary of the advantages and disadvantages of FAT32:
- Broad Compatibility. FAT32 is known for its nearly universal compatibility. It works well across different platforms, including PCs, Macs, Linux systems, and even smartphones. This makes it an excellent choice if you need to share files between different devices frequently.
- File and Partition Size Restrictions. One of the major limitations of FAT32 is its inability to handle files larger than 4GB and partitions over 32GB. Additionally, it does not support drives larger than 16TB. These constraints can be problematic for users dealing with large files, such as video editors.
- Performance Considerations. Compared to NTFS and exFAT, FAT32 is somewhat slower. While the performance difference might not be immediately noticeable, it can accumulate over time. If you don’t need broad compatibility, you might opt for the more efficient NTFS or exFAT file systems.
Despite these drawbacks, FAT32 is still a popular choice for bootable USB drives due to its extensive compatibility with various devices and operating systems.
FAQ
Is it possible to format 64GB USB to FAT32?
Yes, it is possible to format a 64GB USB to FAT32. While Windows’ built-in formatting tools typically do not support formatting drives larger than 32GB to FAT32, you can use third-party tools like Rufus, GUIFormat, or command-line tools to achieve this.
Why is my USB not formatting to FAT32?
Possible reasons your USB is not formatting to FAT32 include:
- The drive is larger than 32GB and you are using a built-in Windows tool that does not support FAT32 for large drives.
- The drive is write-protected.
- The drive has errors or bad sectors. Use a third-party tool or check for errors on the drive.
Is exFAT the same as FAT32?
No, exFAT is different from FAT32. exFAT is designed for larger drives and files, supporting files larger than 4GB, which FAT32 does not.
Is NTFS better than FAT32?
NTFS is generally better for larger drives and modern systems, offering better security, larger file size support, and more features. FAT32 is more compatible with older systems and devices.
What are the disadvantages of FAT32?
- Maximum file size of 4GB.
- Limited security features.
- Susceptible to fragmentation and data corruption.
What if a file is too big for FAT32?
If a file is larger than 4GB, you need to split the file or use a different file system like exFAT or NTFS.
What OS uses FAT32?
FAT32 is used by many operating systems, including Windows, macOS, Linux, and various embedded systems.
How do I know if my USB is FAT32?
Right-click the USB drive in Windows Explorer, select Properties, and check the File System.
Why won’t my computer read FAT32 USB?
Possible reasons include:
- Corrupted file system.
- Incompatible USB port or driver issues.
- USB drive malfunction.
Can any drive be formatted to FAT32?
Most drives can be formatted to FAT32, but drives with large capacities or specific configurations might need special tools.
What format is the same as FAT32?
There is no exact equivalent, but exFAT is a modern alternative with fewer limitations.
Is FAT32 format bootable?
Yes, FAT32 can be used for bootable drives, especially for BIOS and UEFI compatibility.
Can you change to FAT32 without formatting?
No, changing to FAT32 requires formatting the drive, which erases all data.
How to format USB to FAT32 in Windows 10?
Use Disk Management or Command Prompt:
- Open Disk Management, right-click the USB drive, select “Format,” and choose FAT32.
- Alternatively, use Command Prompt:
format /FS:FAT32 X:(replace X: with your drive letter).
Conclusion
Formatting a USB drive to FAT32 on Windows is straightforward using various methods. Whether you choose File Explorer, Disk Management, Command Prompt, or third-party software, each approach has its benefits. Follow these steps to prepare your USB drive for any task, especially creating bootable media.
We hope this guide helps you successfully format your USB drive to FAT32. If you have any questions or need further assistance, feel free to reach out in the comments below.