Table of Contents
ToggleIntroduction and Purpose
With the new school year starting, instead of spending money, Chrome OS could give that old computer a second or even third life. You’ll be able to use it for work or even for your kids — not just for work but for some fun as well. You can even install it on your desktop if you want.
Installing the Chromebook Recovery Utility
Now, here we are on my desktop so we can create the USB pen drive installation for Chrome OS. I have Chrome open here with Google, and although it says google.com. Let’s start by going to the Chrome Web Store.
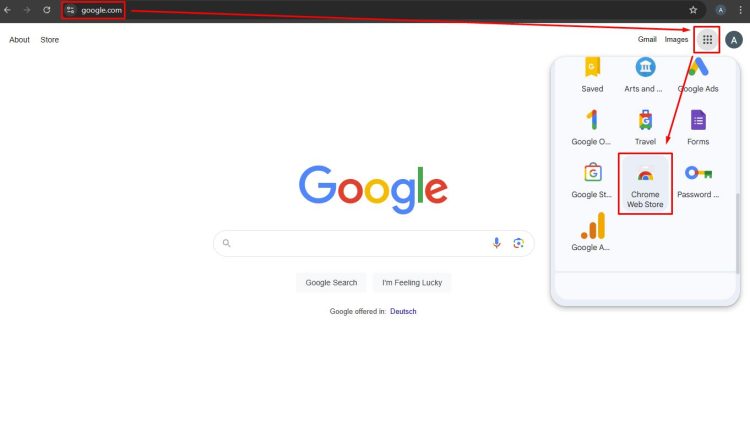
Search for the ‘Chromebook Recovery Utility’.
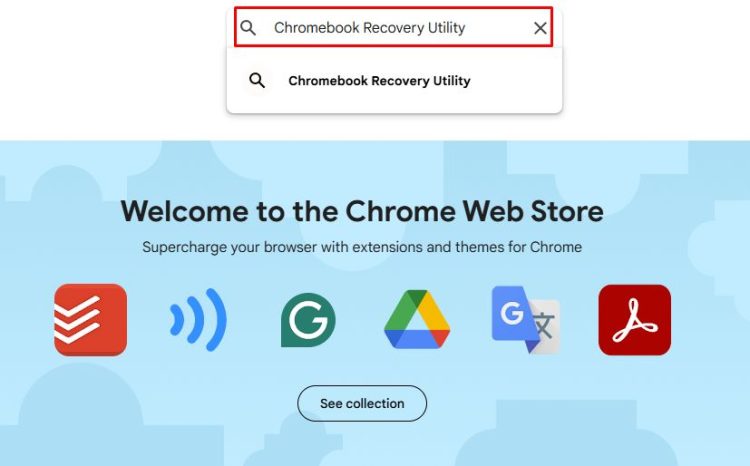
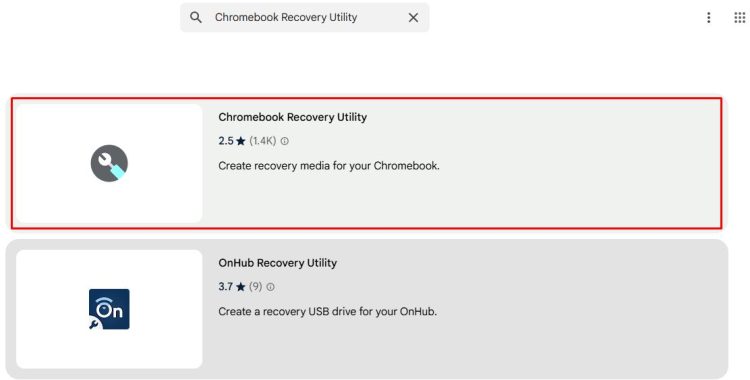
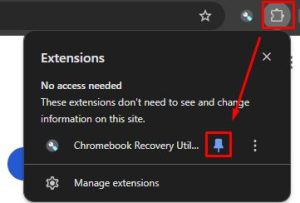
Select it, and once we do, we’ll see the ‘Add to Chrome’ button. Let’s install it, add the extension, and once it’s added, we can close this window. You can also pin the extension for easy access.
Creating the Chrome OS USB Installer
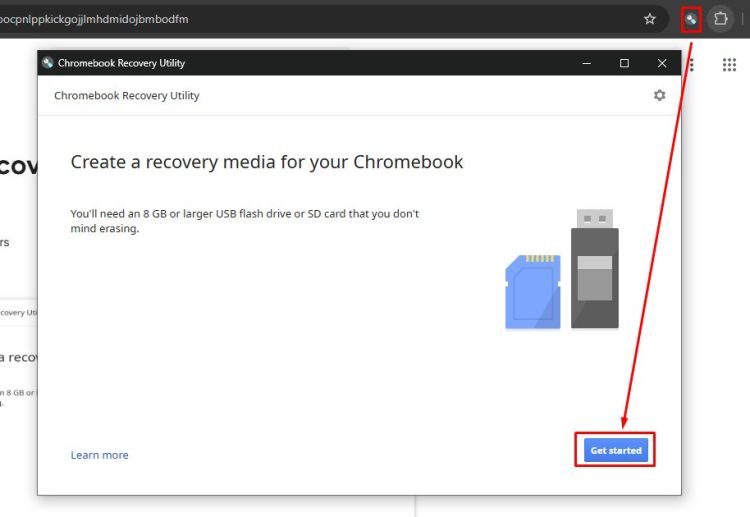
Now, when you want to use it, just click on it to start. To get started, select ‘Get Started.’
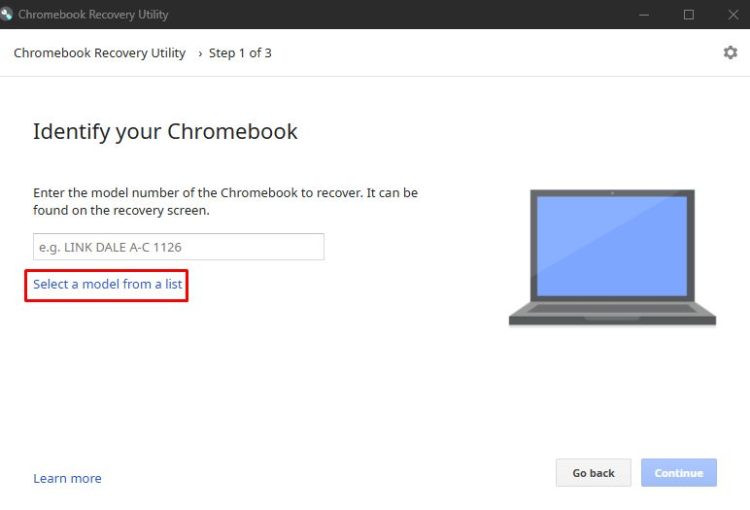
Since we’re not using an actual Chromebook, we’ll use any computer we want. Use ‘Select a model from a list’.
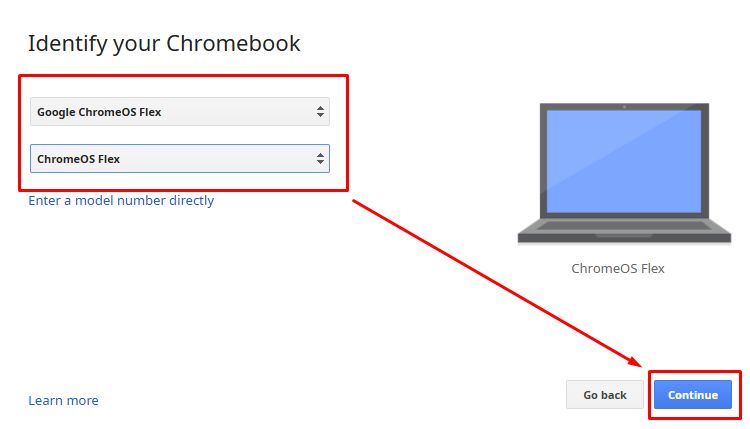
Then search for ‘Google Chrome OS Flex.’ Once we select Chrome OS Flex, click ‘Continue.’
Next, choose your USB drive — an 8 GB drive is sufficient.
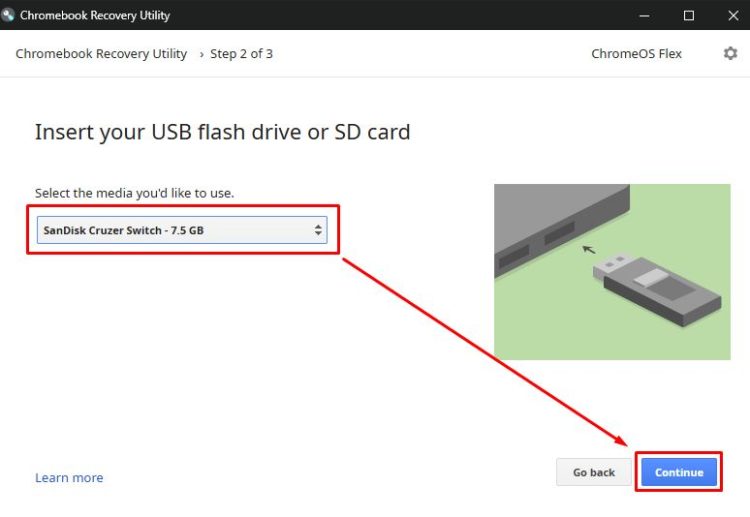
Important Warning: Before proceeding with the installation, please note that all data and partitions on your recovery media will be deleted. Ensure you back up any important files from the USB drive or storage device you are using to create the installation media, as this process cannot be undone. Proceed with caution!
Click ‘Continue’ and then ‘Create Now.’
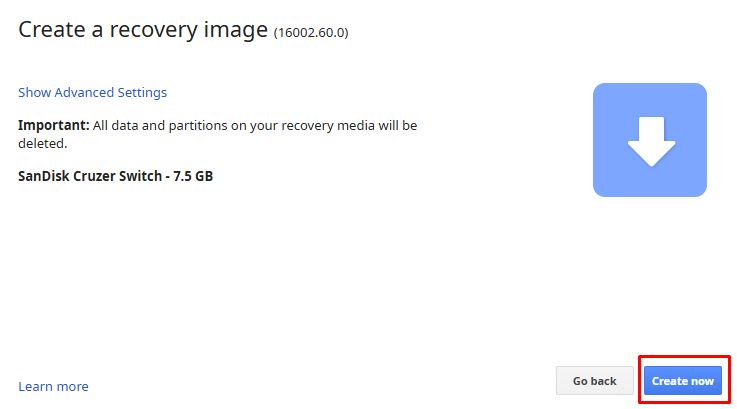
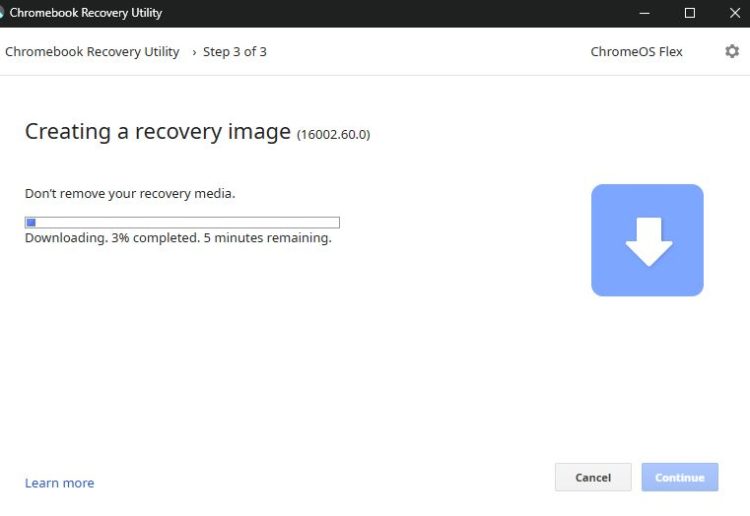
The process will take a few minutes, around 5 to 10 minutes. During the installation process, a pop-up window will appear and you will need to confirm writing to disk.
Okay, the process is finished! Click ‘Done’.
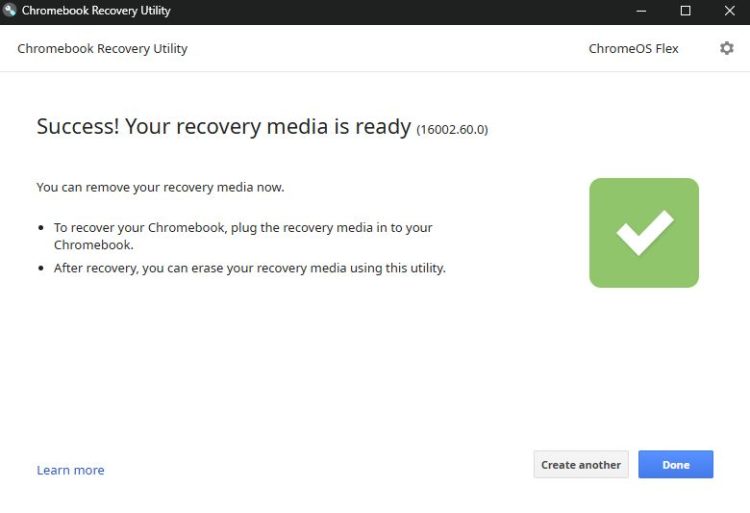
Now, we have our USB drive, labeled ‘EFI System,’ ready to be removed and inserted into the computer where we want to install Chrome OS.

If you’re installing it on the same computer, you can leave the USB drive plugged in and just restart the machine. But in my case, I’ll remove the USB drive, so it disappears, and click ‘Done.’
That’s it for this computer! Now, I’ll move on to another computer to install Chrome OS.
Setting Up the BIOS to Boot from USB
I just plugged the USB thumb drive into this new computer. Well, it’s actually an older computer with 4 GB of RAM. I turned it on and booted into the BIOS. In my case, I accessed the BIOS by pressing the Delete key, but on your system, it might be F12, F2, or another key depending on the motherboard brand.
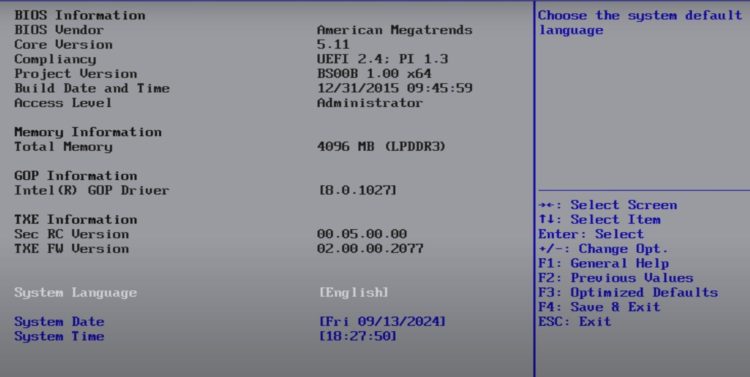
Now that we’re in the BIOS, which you can see on the screen, we want to go to the Boot Override menu. Yours should look similar to mine. From there, we need to select either UEFI USB or USB, depending on what’s listed in your BIOS. You’ll notice that I already have ChromeOS Flex listed on my hard drive because I’ve installed it before. In your case, it might show Windows or Linux, depending on what’s already on your computer.
To boot from the USB drive, I’ll select it here. If you see different names for USB drives, don’t worry—that’s just because there are different brands. If one selection doesn’t work, try the other one, and it should work fine.
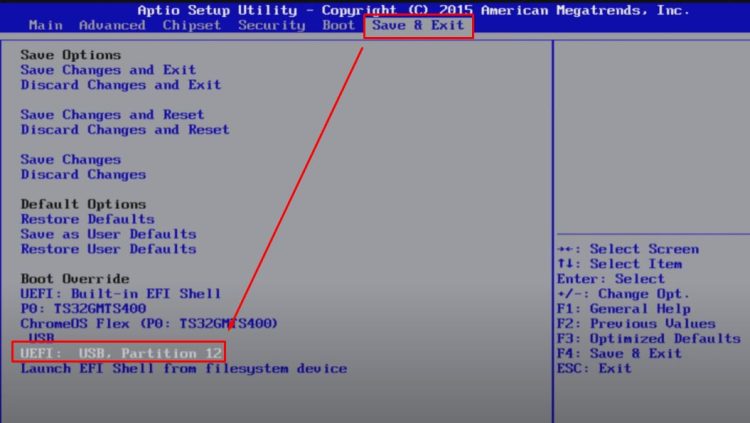
I know this particular option is the right one, so I’ll select it, and in a few seconds, we’ll see the ChromeOS start menu.
Booting Chrome OS Flex and Installation Process
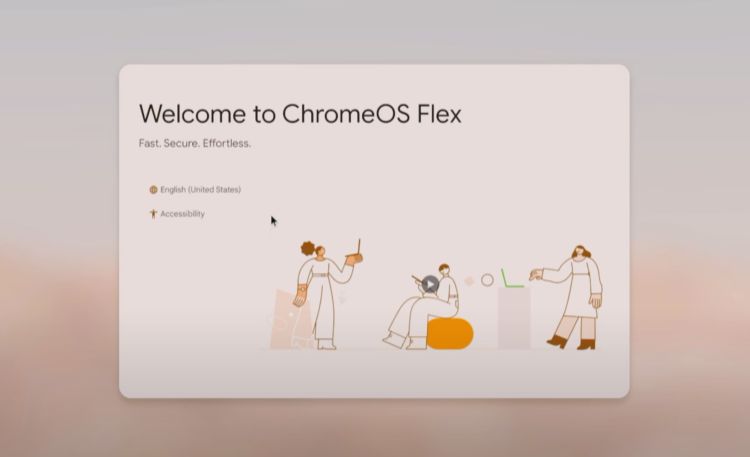
Now, we can change the language here, but I’ll leave it as English. Let’s go ahead and get started.
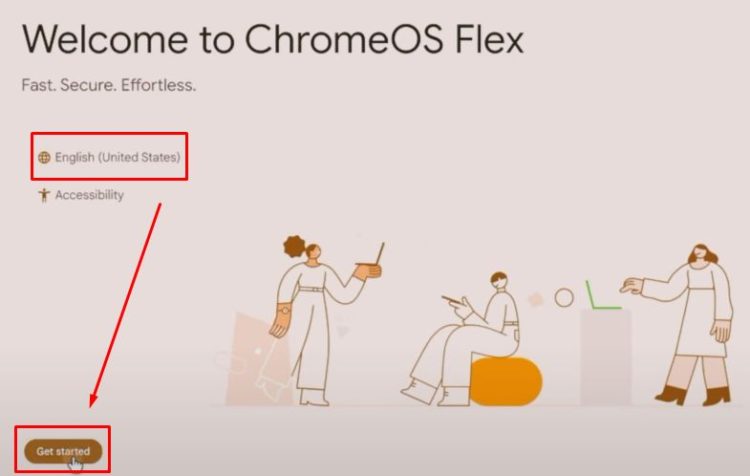
If you want to try Chrome OS without installing it on your hard drive, you can select the option to run it directly from the USB. Just keep in mind that if your USB drive is slow, it won’t be the best experience.
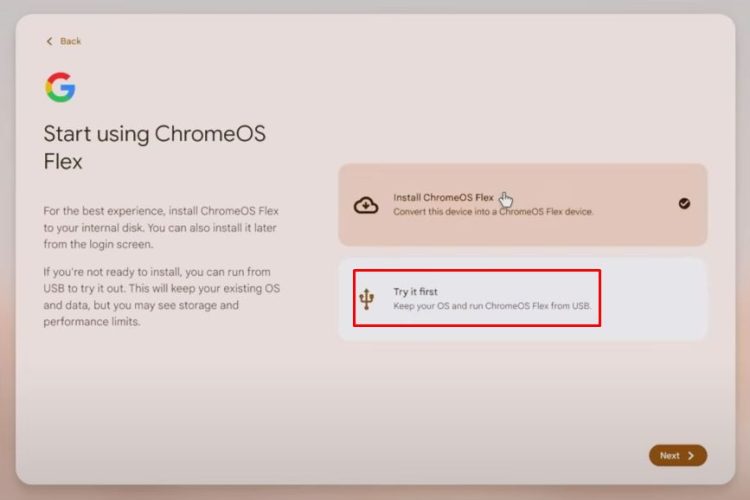
Running Chrome OS directly on the SSD will be much smoother.
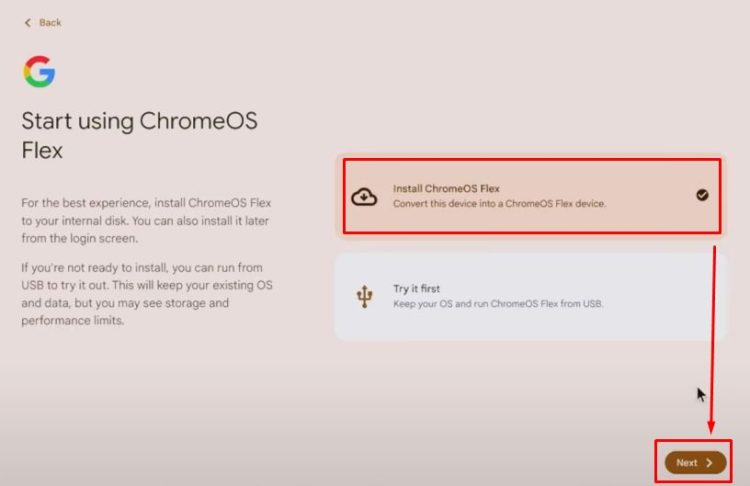
I’ll press ‘Next’, and here it gives a warning that it will delete everything on the hard drive or SSD. That’s fine for my setup, so let’s press ‘Install’, and that’s it!
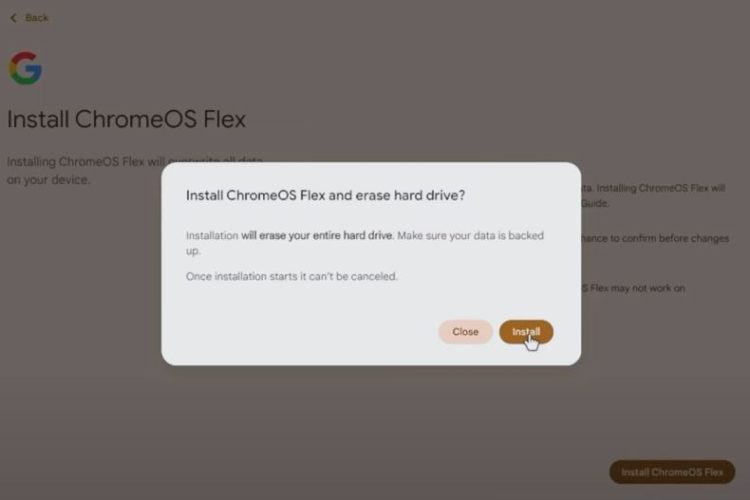
The installation process should take less than the estimated 20 minutes; for me, it was around 5 minutes. Once the installation is complete, the system will shut down in about 40 seconds. At that point, we just need to remove the USB drive, then restart the device to boot from the internal SSD, which will complete the installation.
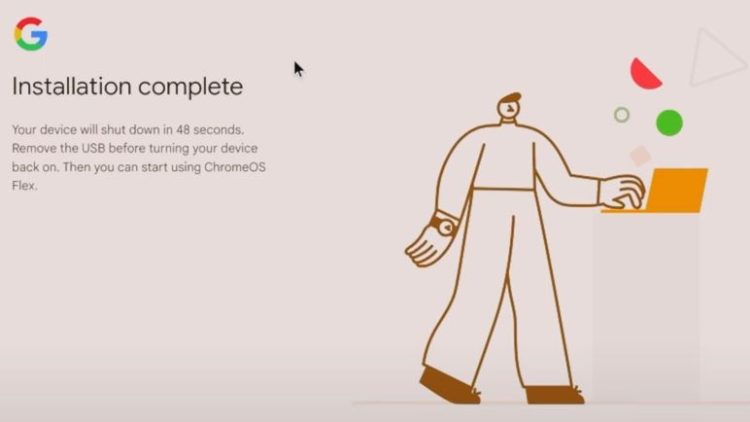
If you want to shut down sooner, you can go to the menu and select Shut Down. So, I’ve removed the USB drive, started up the computer, and here we are. It might look like the initial screen, but we’re actually on the next step.
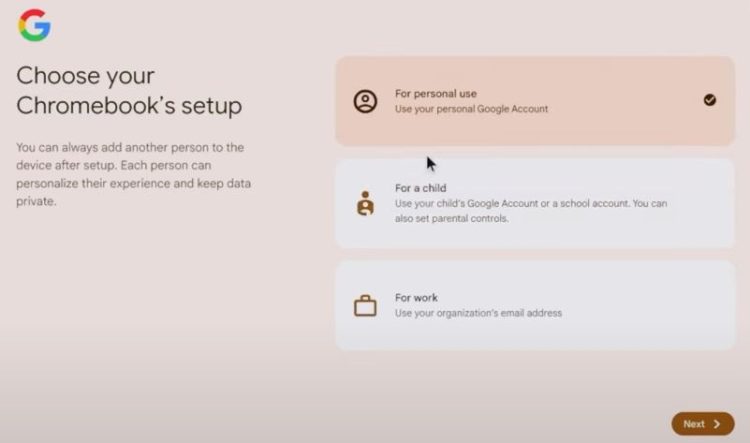
At this stage, we need to select the type of setup: Personal use, Child, or Work. Choosing Child will enable parental controls, but I’ll select Personal use and press Next.
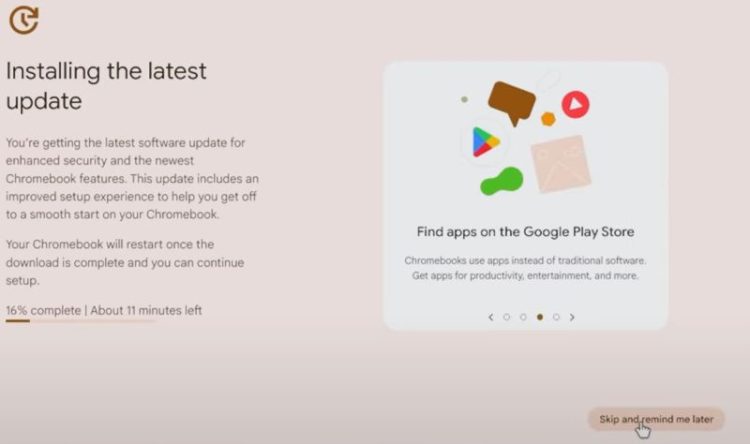
It will check for updates here, and the latest version available is 128. There’s an option to skip this update, but I’ll leave it for now to stay up-to-date. However, just for demonstration, let’s click Skip and remind me later.
Next, we need to enter our credentials, which will be a Gmail account. After entering the email and password, there’s an option to review sync settings, but I’ll leave them as-is. I’ll also let Google collect hardware data, and that’s it!
Okay, let’s go ahead and accept and continue. Now we have the option to use our Google account password to log in, but I’m going to set a new, simpler password specifically for this device. I’ll press ‘Next’, and now the password is set. From now on, we’ll use this new password to log in on this computer, instead of our Google account password.
Configuring Chrome OS Settings
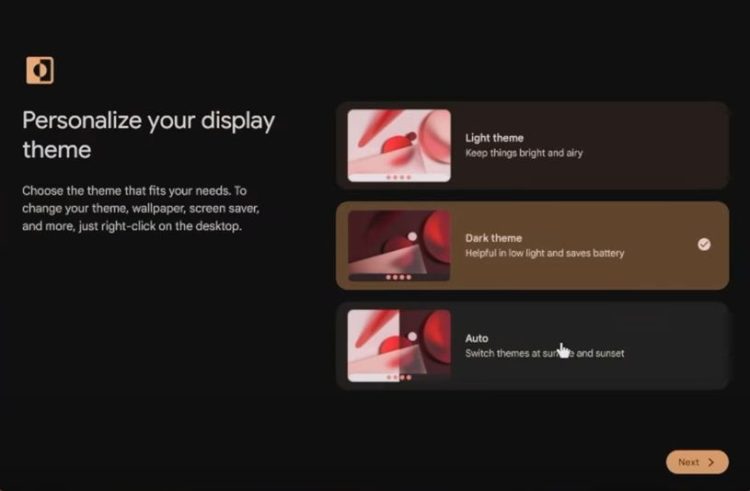
Here, we can adjust the display size and resolution settings. I’ll make those changes in a moment for better visibility. We also have the option to select a theme: light, dark, or auto. I prefer dark mode, so I’ll select that and press ‘Next’ to get started. And that’s it for the initial configuration.
If your system displays in a different language, you can change it by going to System Preferences > Languages. Next, I want to go to Device > Display. I’m currently using a 4K resolution, but let’s set it to around 160% scaling so it’s easier to see. Let me check the recording screen—yes, that looks much better.
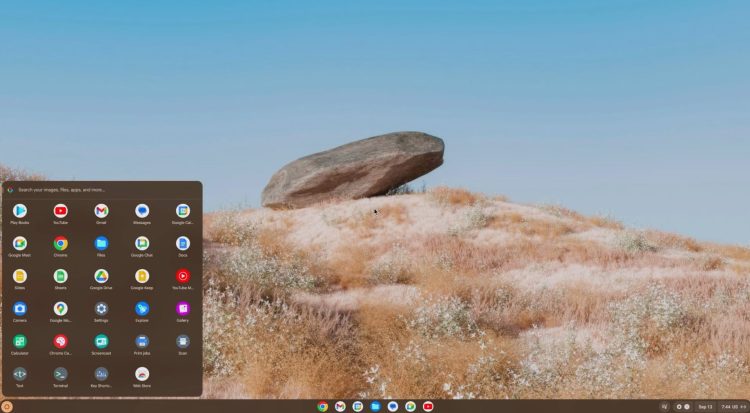
For those of you new to Chrome OS, I suggest exploring the welcome window that appears at first boot. If you close it like I did, you can reopen it by going to the App Drawer, selecting Explore, and browsing the available apps, games, and options there.
Accessing and Using Apps on Chrome OS
Now, as you can see, we don’t have the Google Play Store on this installation, which is normal. Let’s go back to Settings. Here in the App Drawer, you’ll find all your installed apps, along with quick options like Wi-Fi connectivity. Right now, I’m connected via Ethernet, but I also have Wi-Fi enabled as you can see here.
Updating and Maintaining Chrome OS
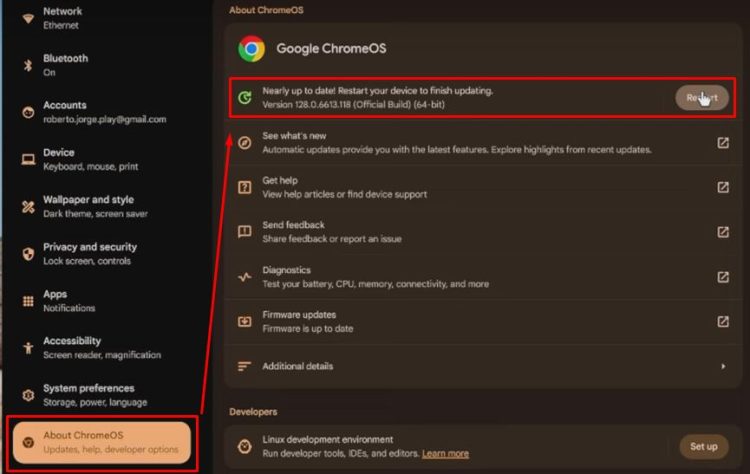
Next, I’ll show you where to check the Chrome OS version and perform updates. Go to ‘About Chrome OS’, where it should say Version 128. Here, you have two options: Check for updates or Restart if an update has already been downloaded, as it has here. This is where you’ll find out if you have the latest version. Since we built this using Chrome OS Flex on our Windows computer, this is an official version.
In the ‘Diagnostics’ section, you can check out system information.
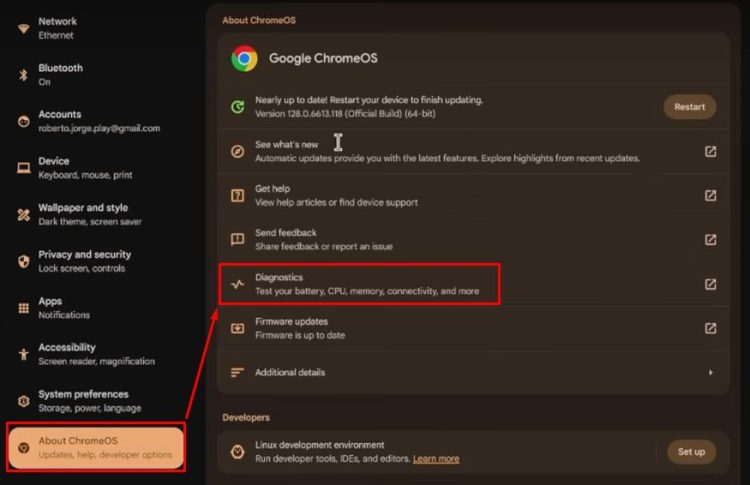
You’ll see that I’m running this on a device with an Intel N3150 processor, which is quite old, and it has 4 GB of RAM. Chrome OS Flex is designed to run on a wide range of hardware, so even this older setup is working smoothly.
You can also run various tests on your CPU and memory, which is a nice feature. Let’s close this for now. In System Preferences, you’ll find all the main settings, including accessibility options, app management, and more. While the Google Play Store isn’t available, we do have access to the Chrome Web Store, where we can install add-ons and extensions for Chrome, which is pretty useful. For customization, you can set privacy preferences, wallpapers, and styles here as well.
Moving to device settings, you’ll find options for managing networks, Bluetooth, and other configurations. Don’t worry about any emails coming to this account, as I use it solely for testing purposes.
Final Tips for Using Chrome OS on Older Hardware
If you’re setting this up for work or for your kids, you can easily access Google Workspace apps. For instance, opening Google Sheets will use the Google account you’re logged in with, and you’ll have access to your Google Drive files. This is useful if you need a budgeting template or any other resource, as your account syncs seamlessly.
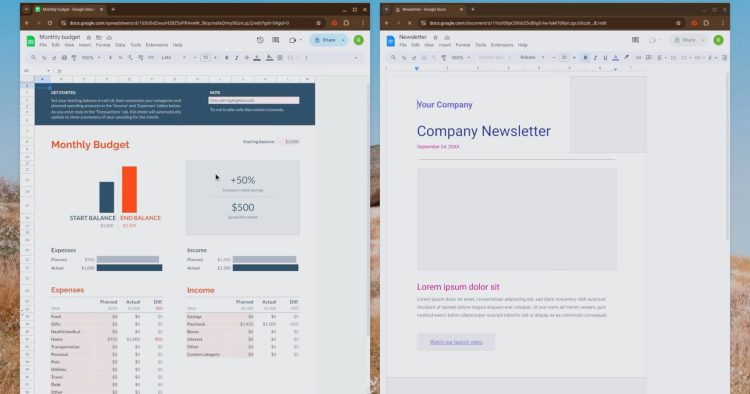
When I open both Sheets and Docs in Chrome OS, I’m able to multitask effortlessly—even on this older machine with just 4 GB of RAM. If this were Windows, running such applications simultaneously would likely be slow and challenging, especially given Windows 11’s heavier demands on older hardware. Chrome OS is clearly optimized to make multitasking on older devices more efficient.
Conclusion: Giving New Life to Old Devices
That wraps up this guide! I hope it’s been helpful. With these steps, you can now enjoy the official version of Chrome OS on almost any computer, especially older ones you may have lying around. It’s a simple way to give new life to your hardware and help reduce waste.
Repurposing old computers with Chrome OS is a great way to extend their usability. It’s sustainable, functional, and perfect for devices that originally ran Windows but now struggle with modern OS requirements.

